Ghost
Step-by-step guide to installing the AI Agent on your Ghost website
💡 Connecting Your Chatbot with Ghost
Enhance your Ghost website with smart AI Agent! This guide covers every aspect of adding a powerful AI chatbot to your Ghost CMS that can answer visitor questions, provide 24/7 assistance, and dramatically improve user engagement across your entire website.
Adding an AI Agent to Ghost CMS
Ghost's "Code Injection" feature makes it easy to add your YourGPT AI Agent to your website. This seamless integration works similarly to adding Google Analytics or other JavaScript code to your site.
You can deploy the AI Agent globally across your entire Ghost site or selectively on specific posts and pages. For maximum impact and visitor assistance, we recommend the global installation method outlined below.
Sign in to Ghost Admin
Open your web browser and navigate to your Ghost admin URL (typically yourdomain.com/ghost).
Enter your email address and password to access your Ghost admin dashboard.
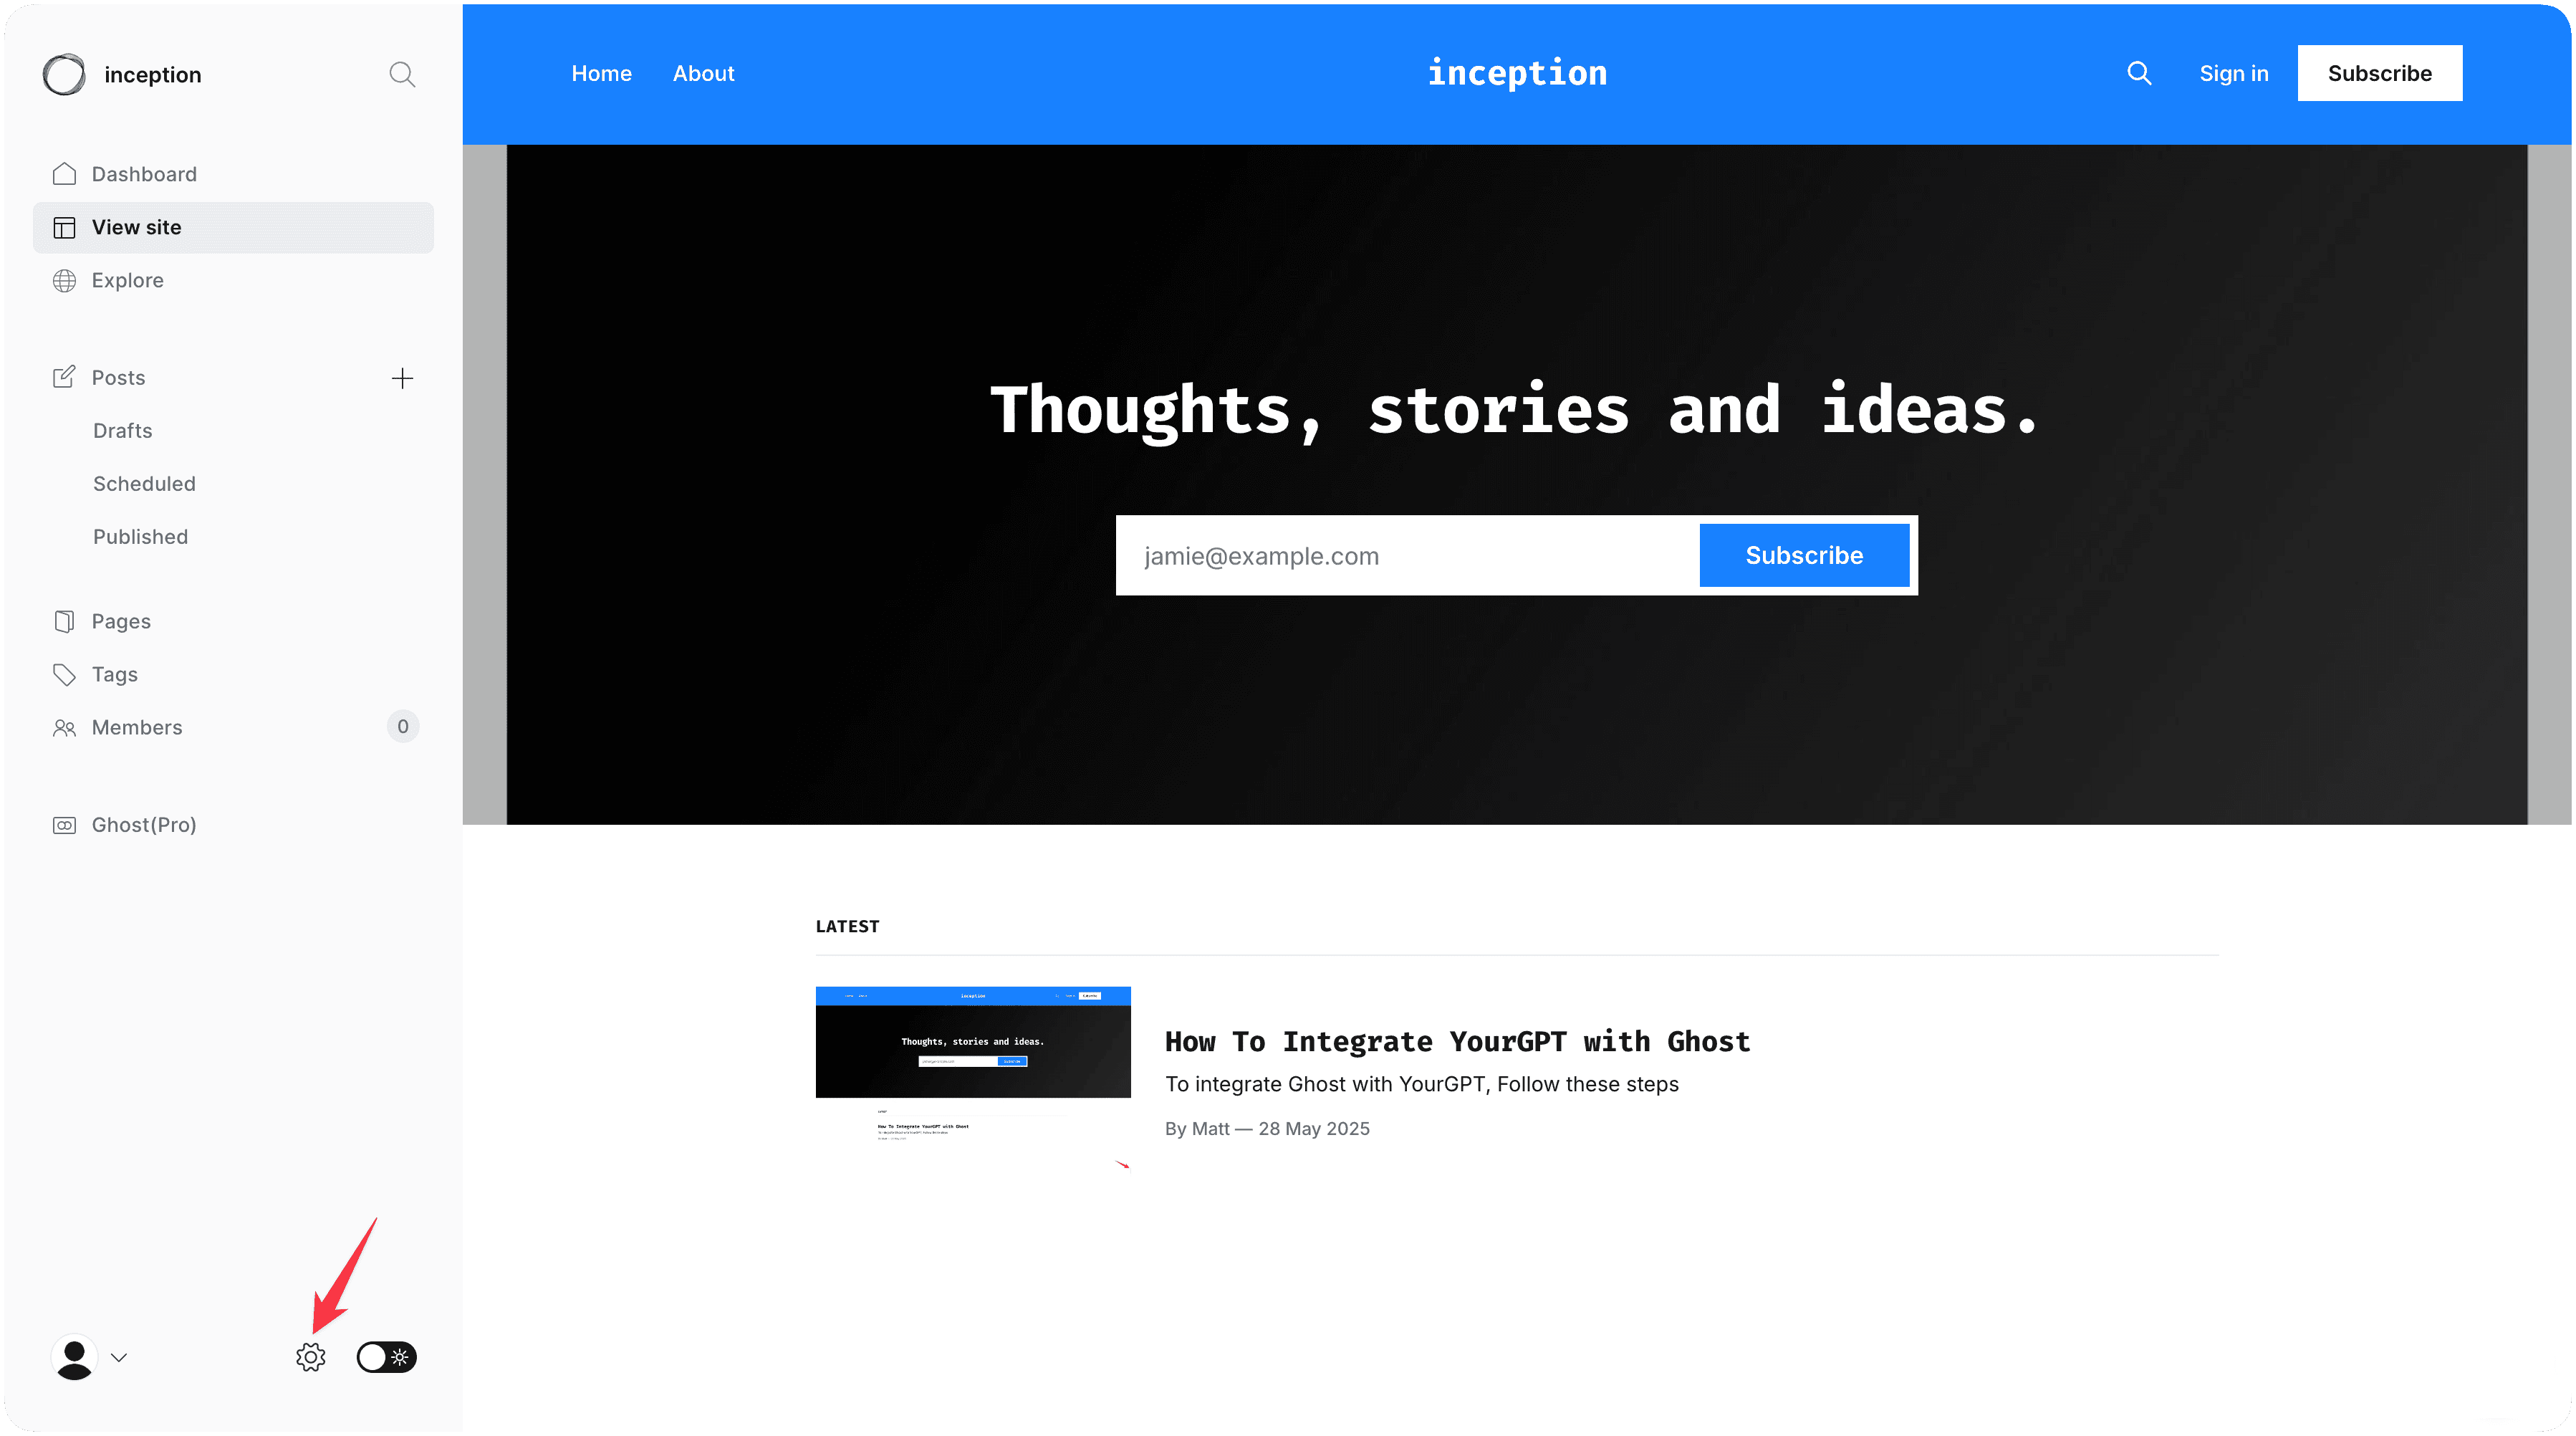
Once logged in, you'll see your Ghost admin interface with the sidebar navigation.
Access Settings & Code Injection
In the Ghost admin sidebar, click on Settings.
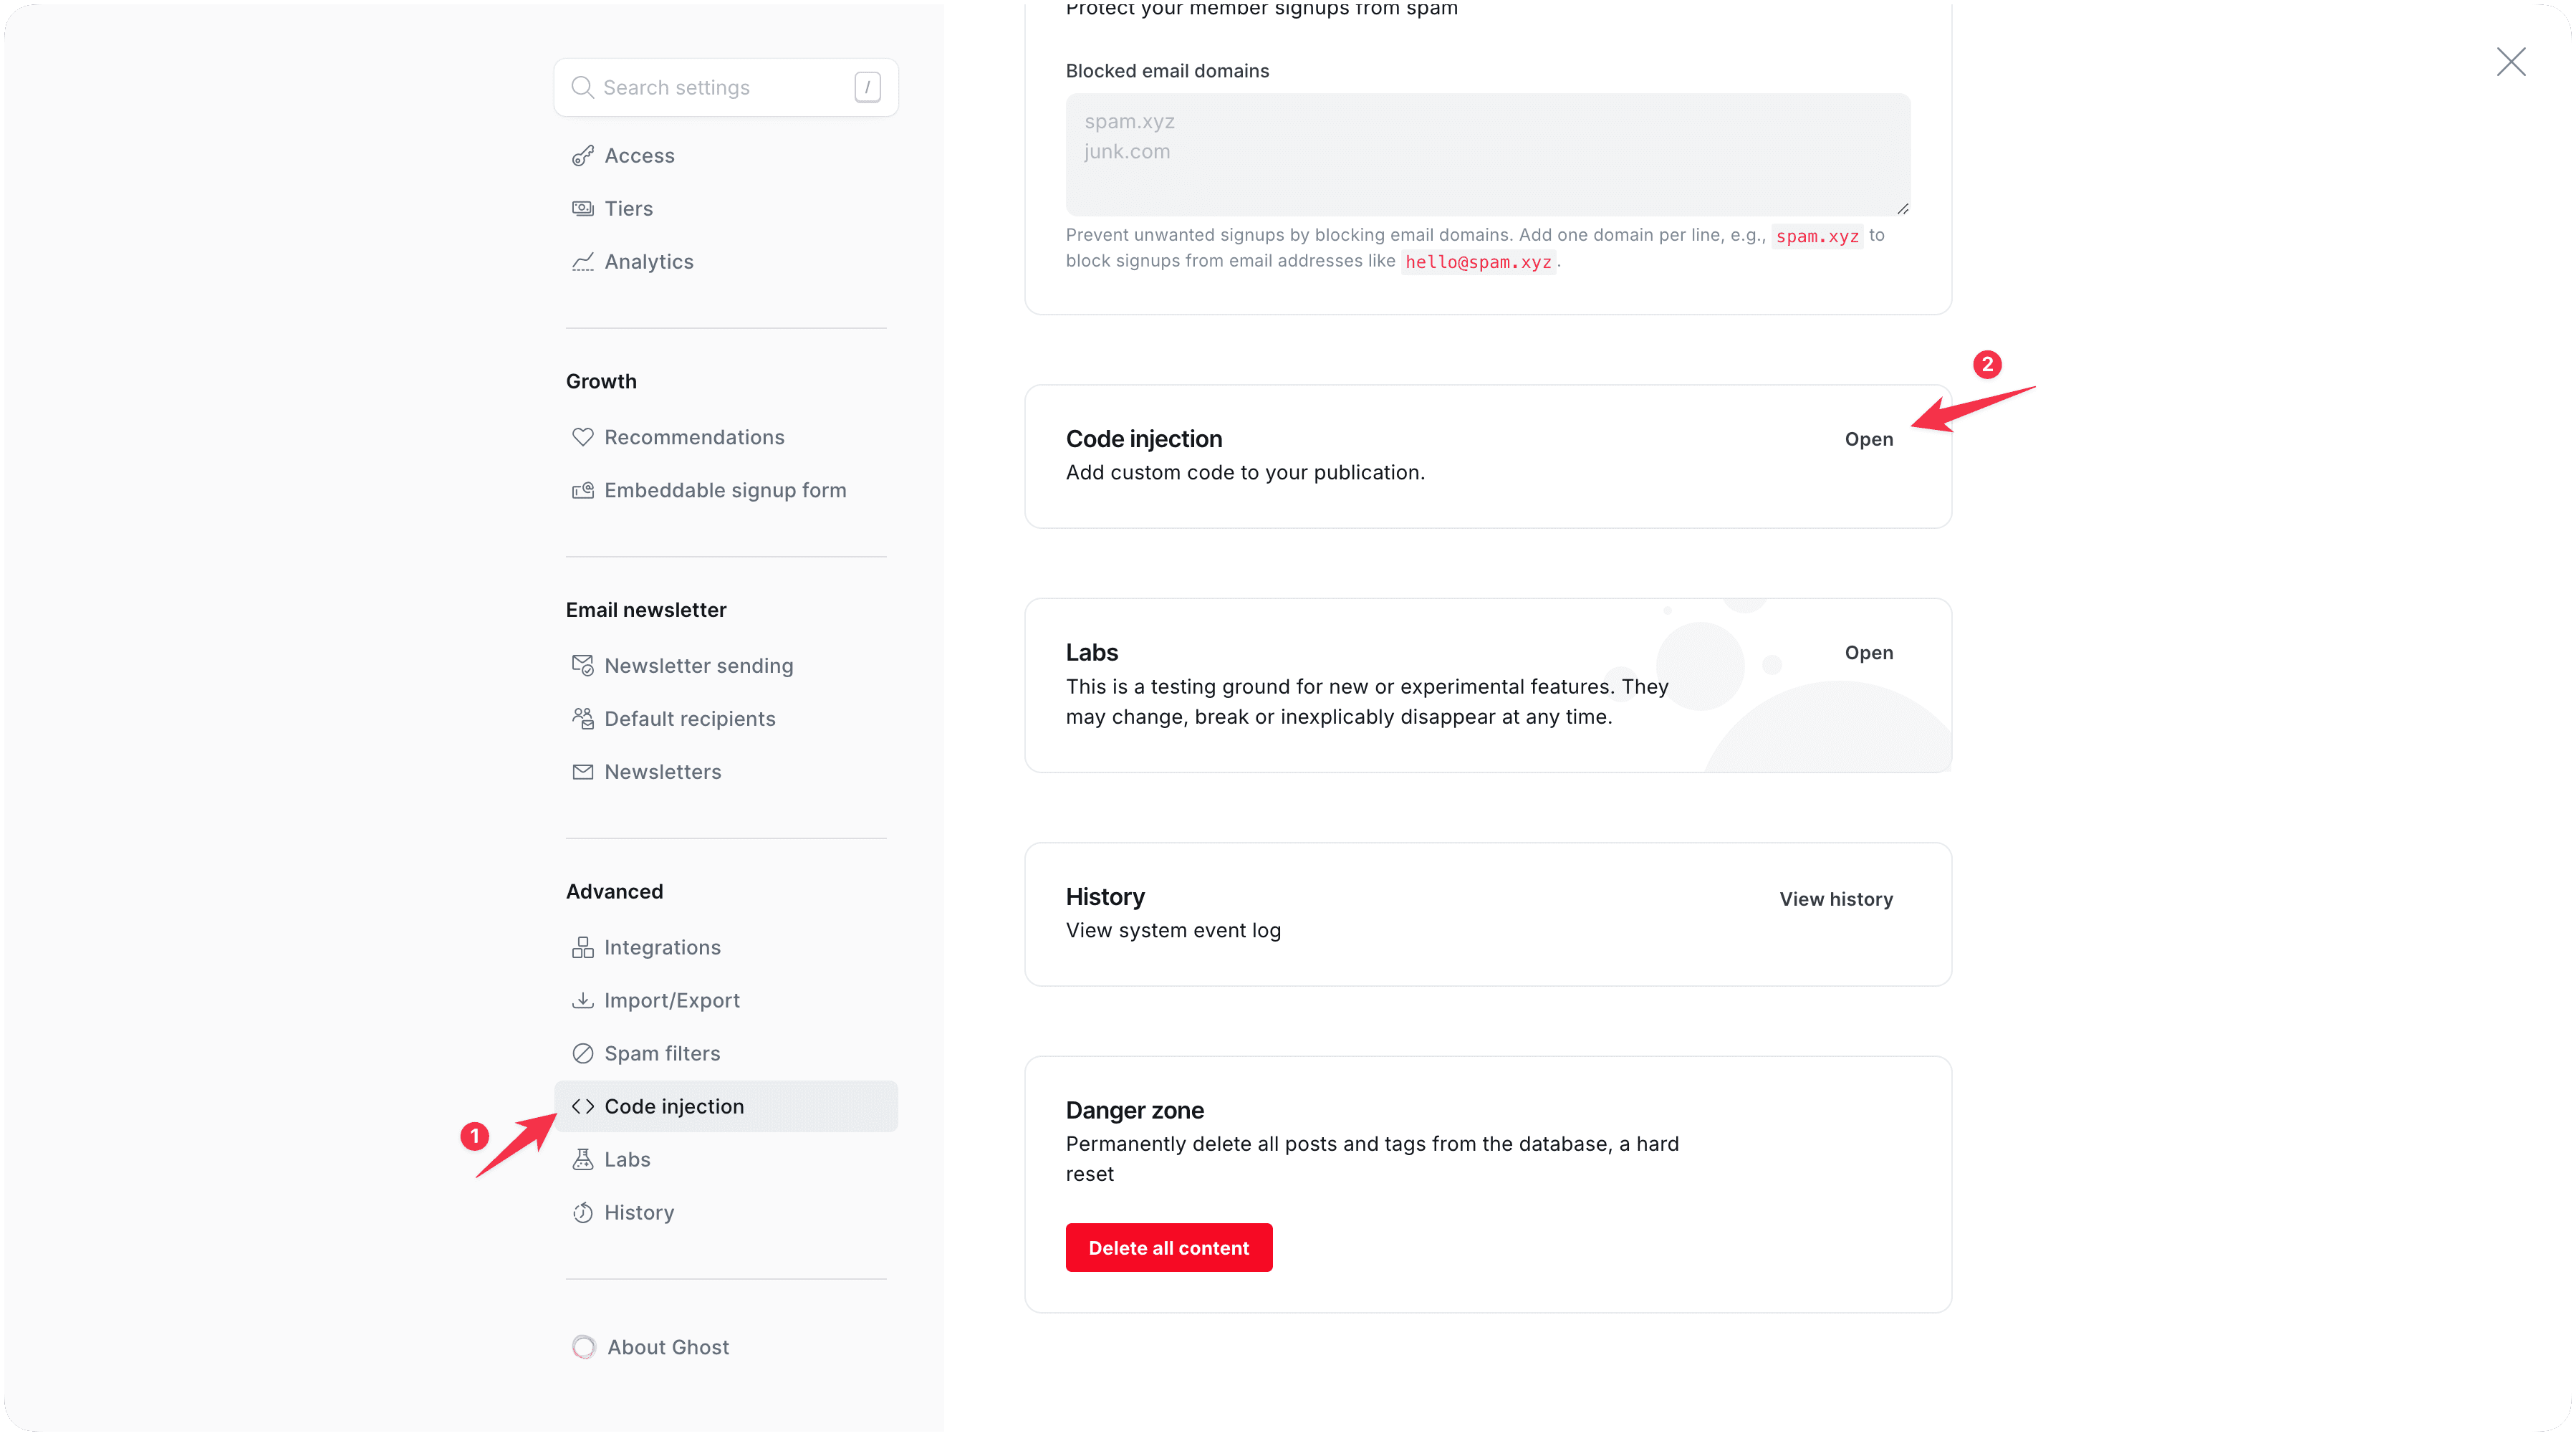
Scroll down through the settings menu and locate Code Injection.
Click on "Code Injection" to open the global code injection interface.
This section allows you to add custom code that will run on your entire Ghost site.
Locate Code Injection Area
In the Code Injection page, you'll see two main sections:
- Site Header: Code added here is injected into the
<head>section of every page - Site Footer: Code added here is injected before the closing
</body>tag
For optimal performance, we'll use the Site footer section.
Get Your YourGPT AI Agent Script
Log in to your YourGPT Dashboard.
Navigate to the Integration section in your dashboard.
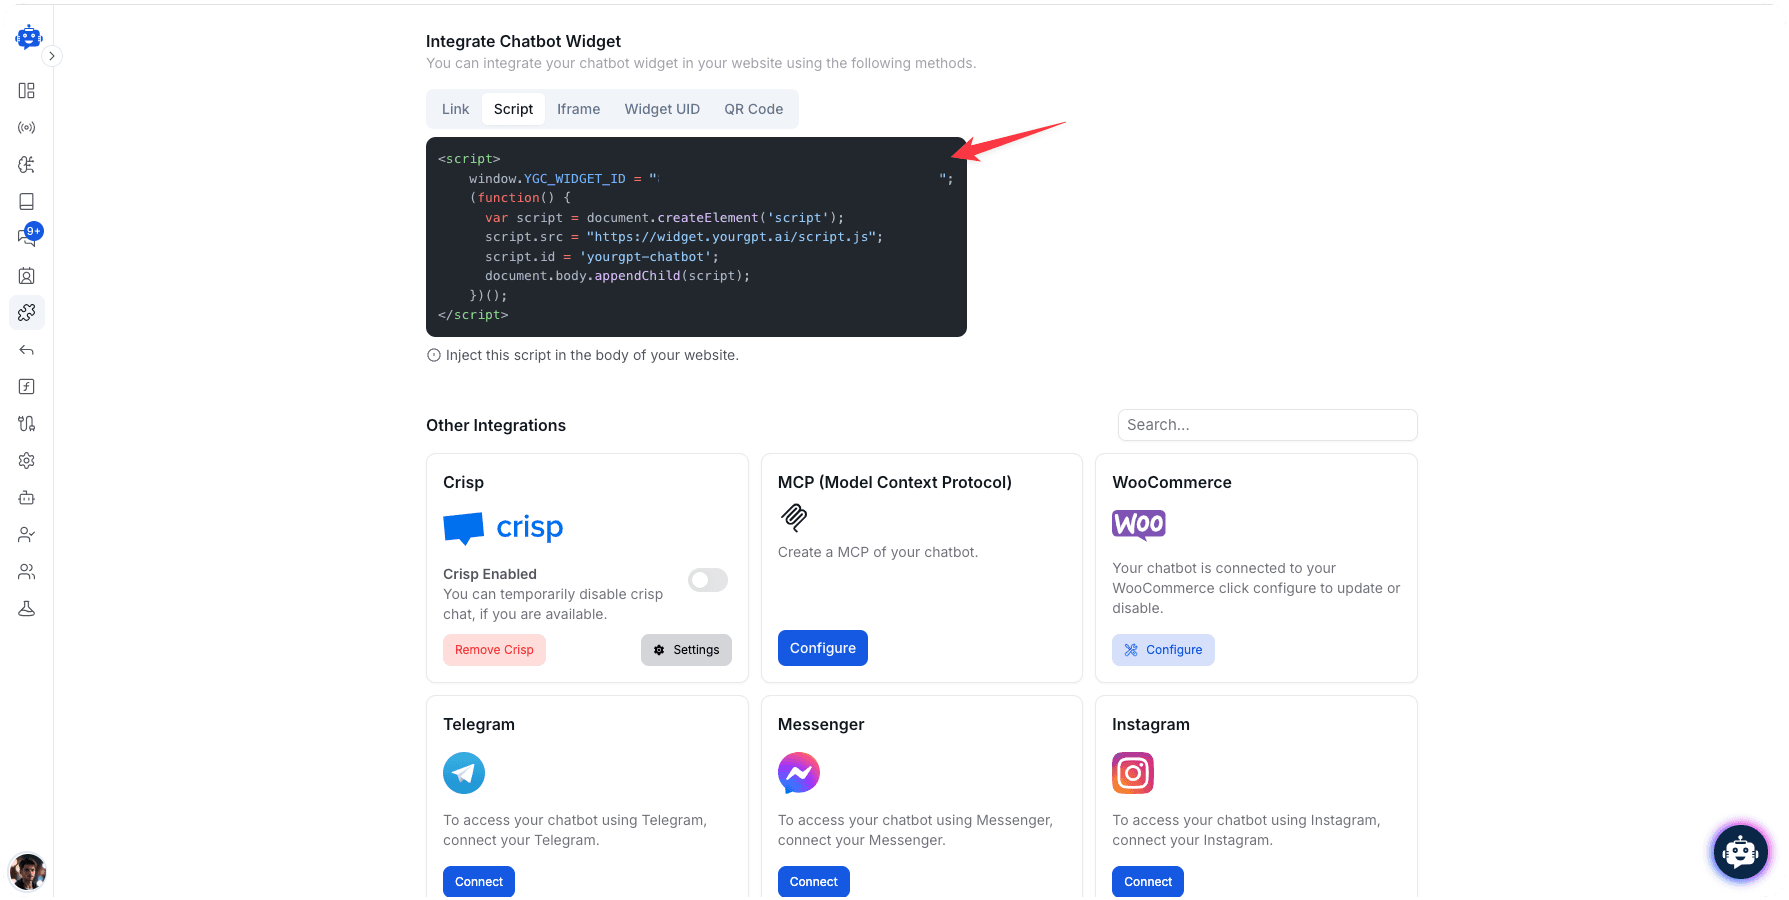
Find your AI Agent's widget script (it will look similar to the example below).
Click the Copy button to copy the entire script to your clipboard.
Add Script to Ghost
Return to your Ghost admin Code Injection page.
Paste the copied YourGPT AI Agent script into the Site Footer field.
Make sure the entire script is properly pasted without any modifications.
The script will automatically configure your AI Agent with your custom settings.
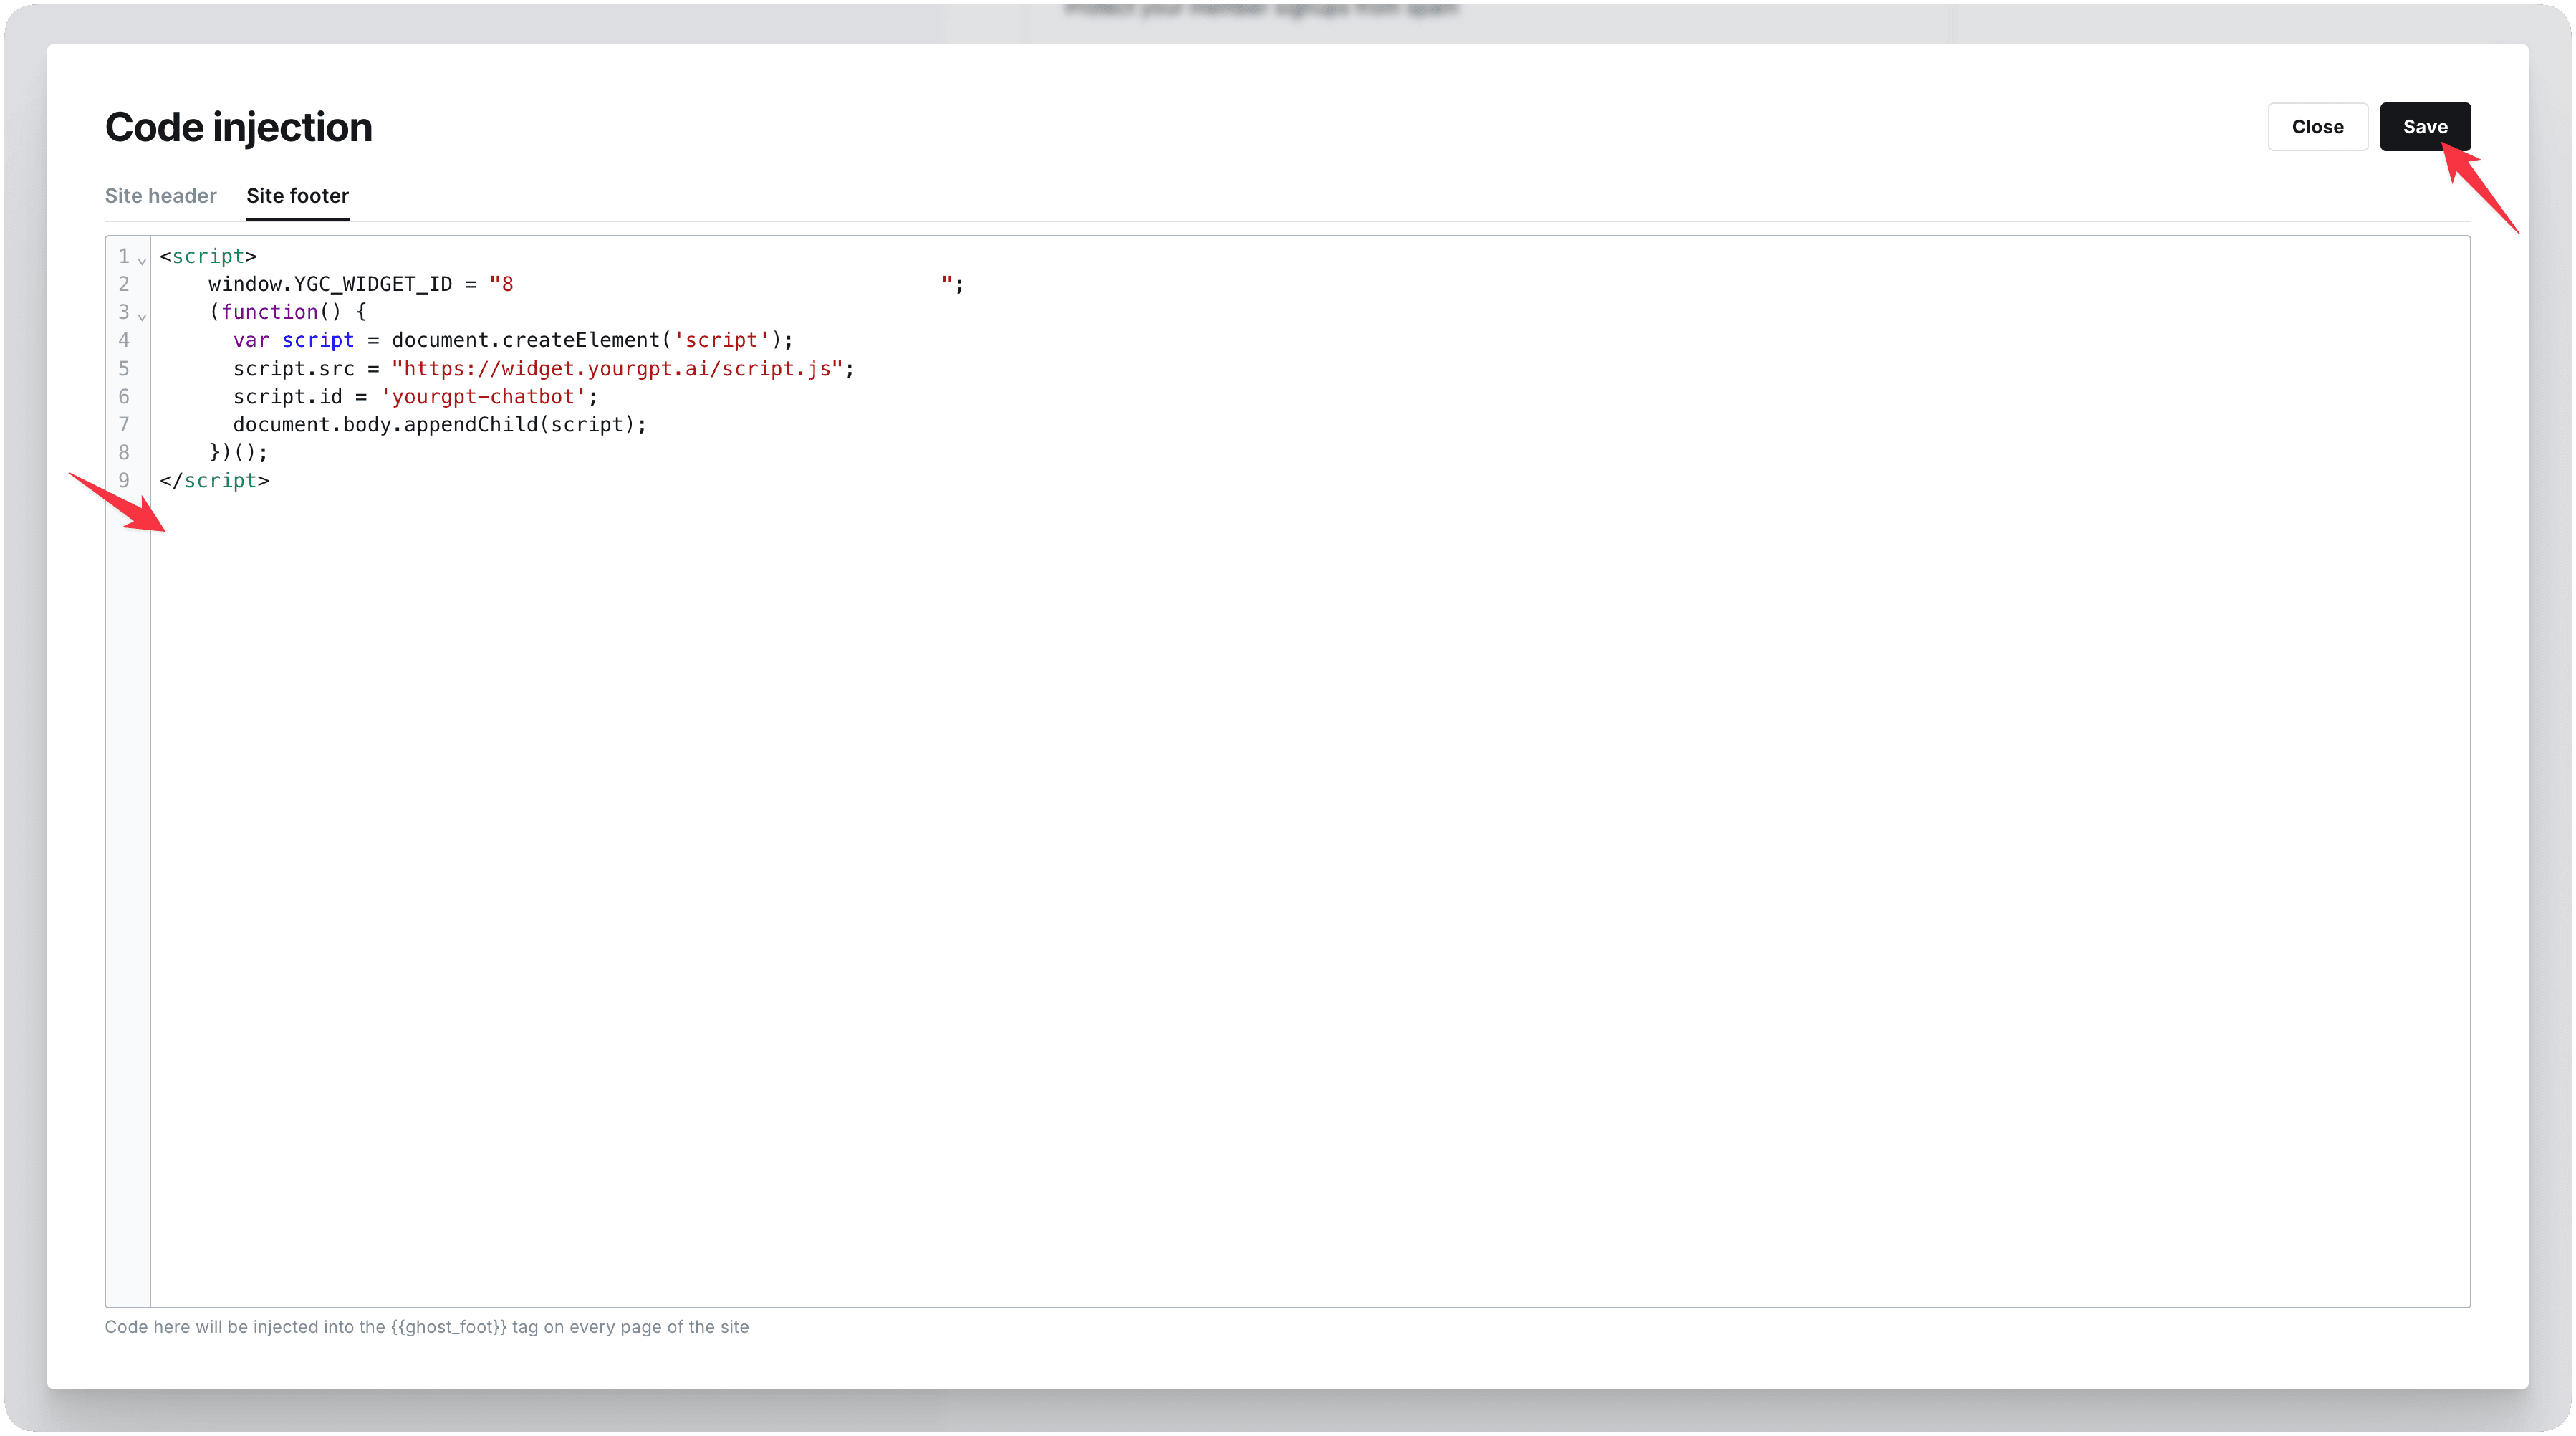
Save Changes & Verify
Click the Save button at the bottom of the Code Injection page.
Visit your Ghost website in a new browser tab to verify the installation.
You should see the YourGPT AI Agent chat widget appear on your site (typically in the bottom-right corner).
Click on the widget to test that it opens correctly and responds to queries.
Pro Tip
Test your AI Agent on multiple devices (desktop, tablet, mobile) to ensure responsive behavior across all screen sizes.
Troubleshooting
The AI Agent not appearing or performance issues? Try these troubleshooting steps:
AI Agent Not Appearing
- Clear your browser cache and reload the page
- Verify the script was saved in Code Injection
- Check for JavaScript errors in your browser console
- Ensure no ad-blockers are preventing the widget from loading
Script Conflicts
- Try moving the script to the Site Header instead
- Check if your Ghost theme has JavaScript that might conflict
- Disable other chat widgets or popups that might interfere
Performance Issues
- Optimize your AI Agent's knowledge base size
- Consider using the footer installation method
- Check your Ghost site's overall performance and hosting
Congratulations!
Your YourGPT AI Agent is now successfully integrated with your Ghost website, providing intelligent assistance to your visitors 24/7 and enhancing their overall experience.