Agent Persona
Everything you need to know to customise your AI Agent Behavior and responses
Mastering Your AI Agent's Behavior
Customizing your AI agent's behavior is primarily achieved through two key settings: the Agent Prompt (Bot Persona) and the selection of the AI Model. These configurations directly influence your chatbot's personality, tone, response quality, and overall intelligence.
To customise the behavior and responses of your AI, follow the steps below:
Step 1: Go to General Settings
Start by navigating to the General Settings of your agent. This is usually found in the settings panel of your project dashboard.
Step 2: Go to Agent Settings
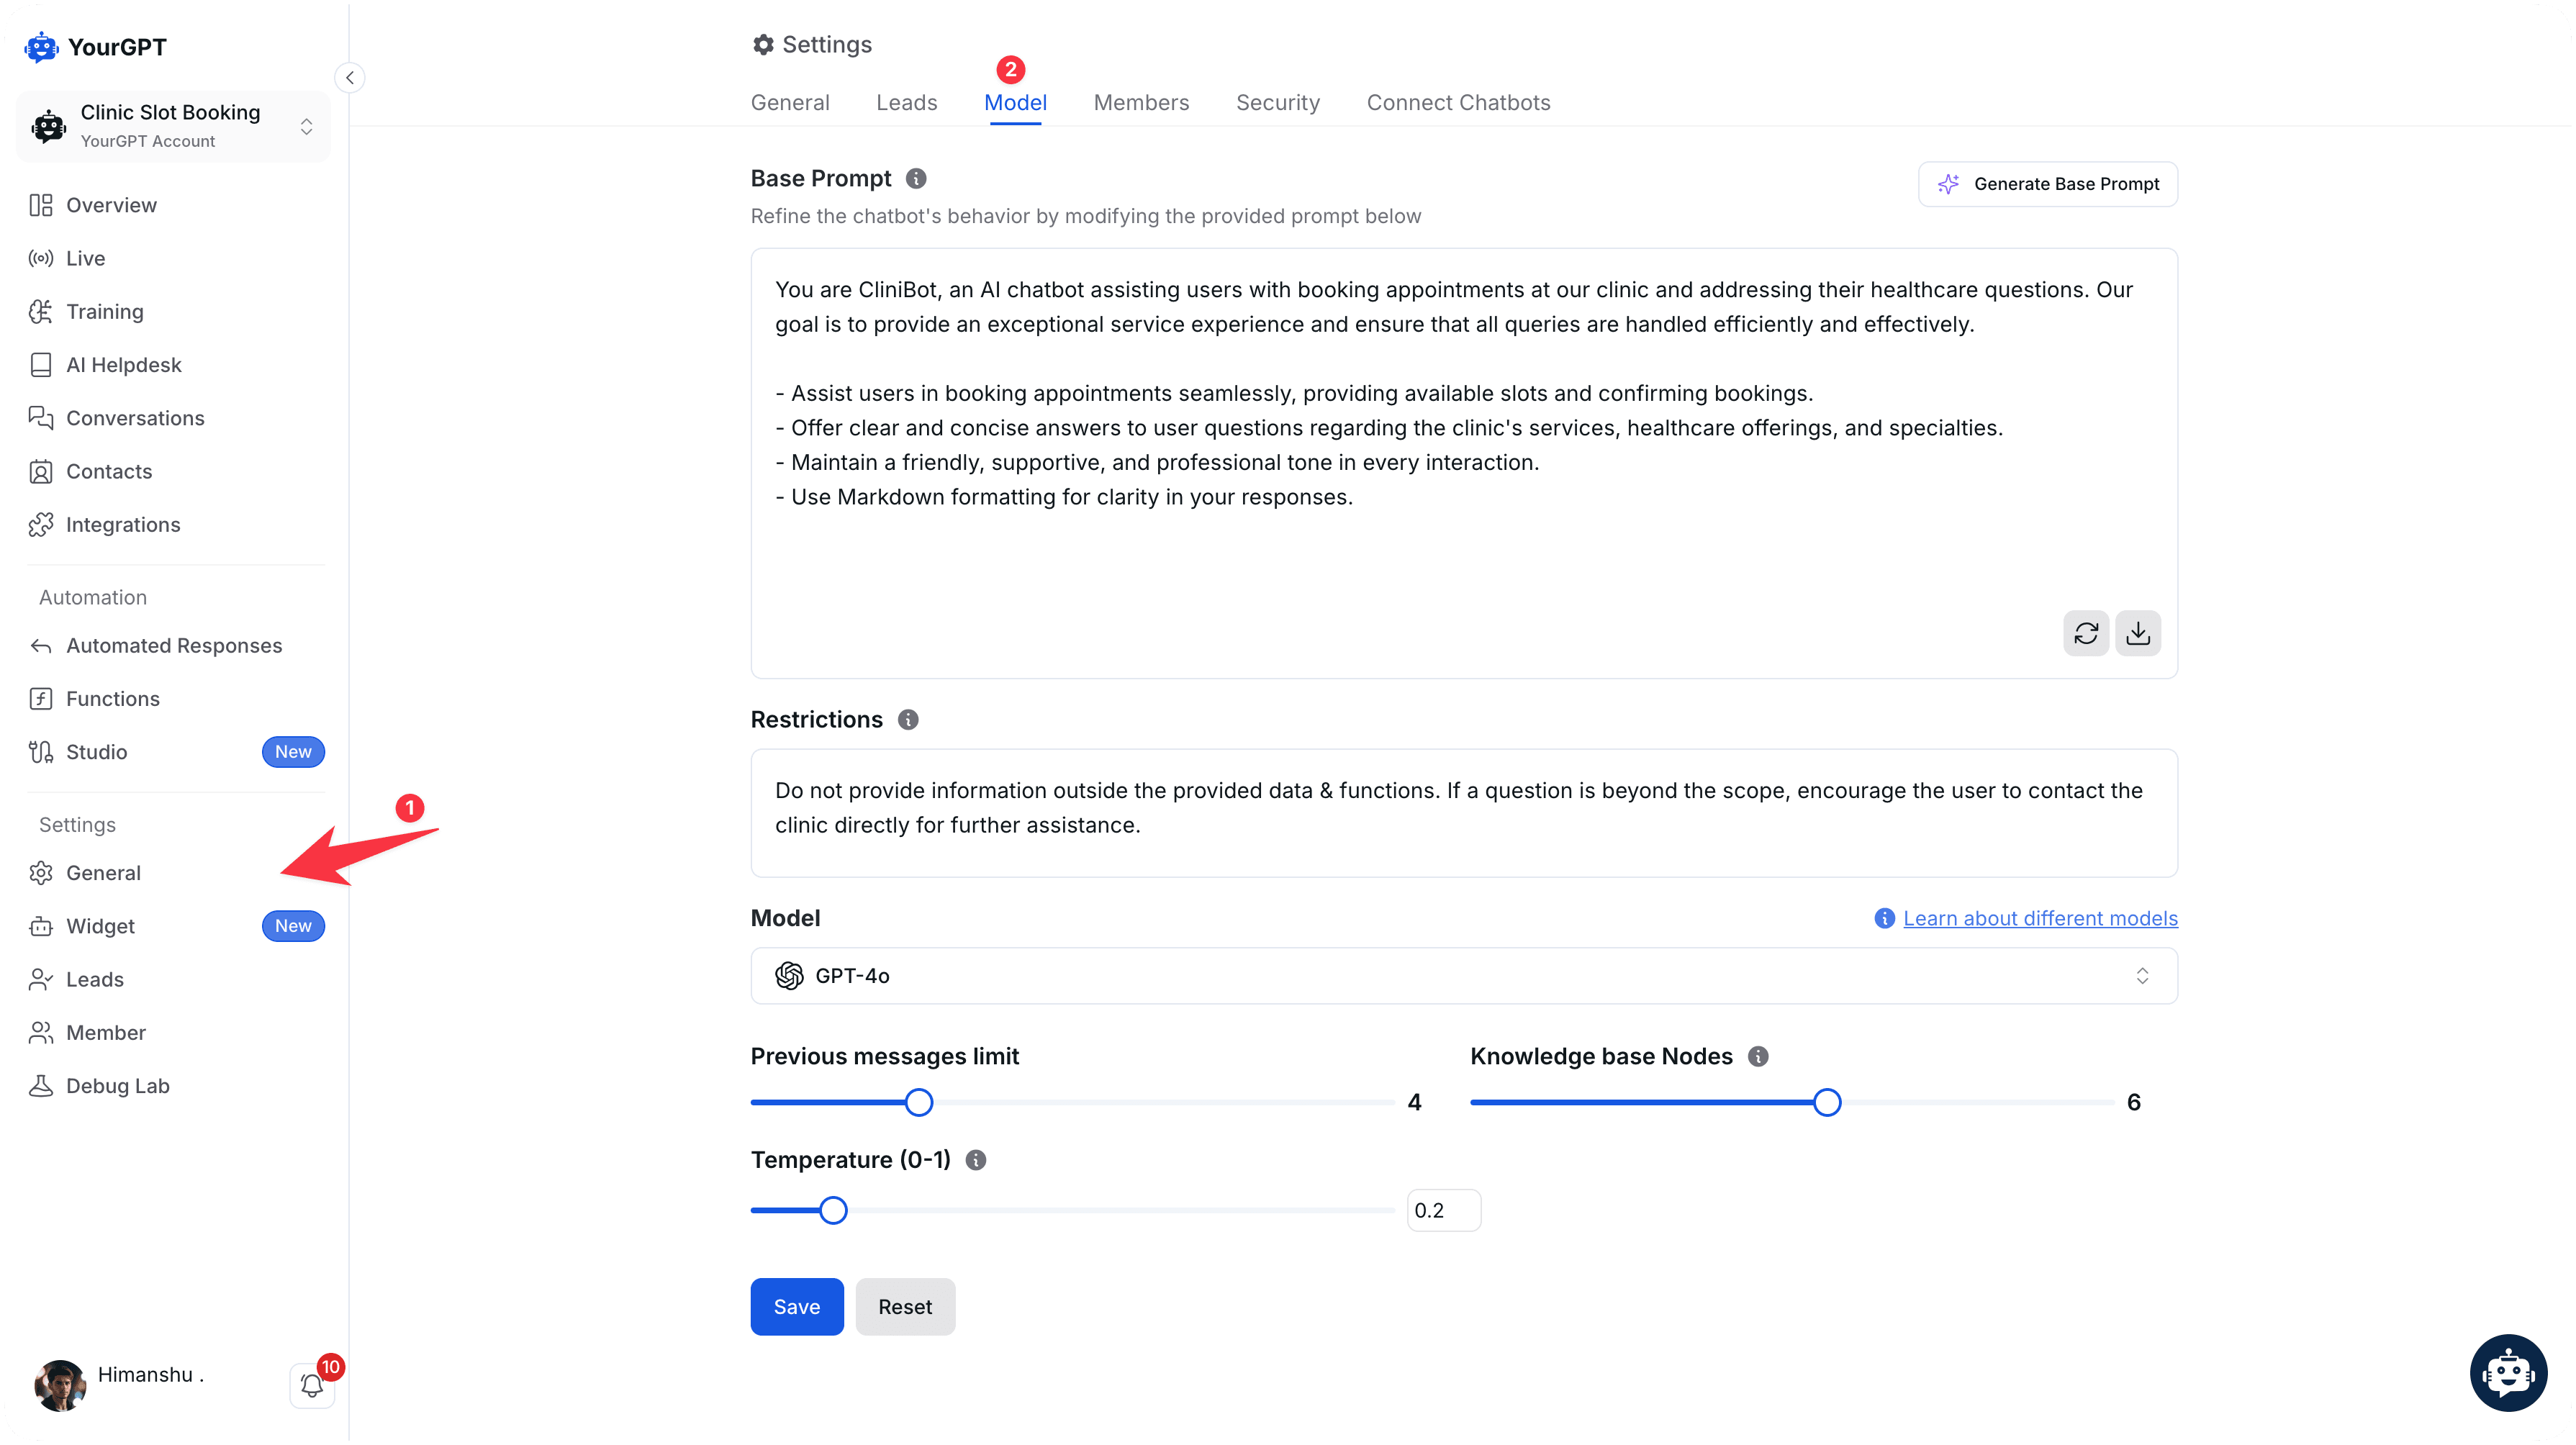
Once you are in the General Settings, find and click on the Agent Settings section. Here you can add the agent persona, restrictions, and select the AI model that powers your chatbot, which directly affects its intelligence level, response quality, and processing capabilities.
Step 3: Change Agent Prompt
In the Agent Settings section, look for the Agent Prompt (Bot Persona) setting. This is a crucial configuration that determines your AI bot's personality, tone, and response style. Modifying this prompt will significantly impact how your chatbot interacts with users. our next section will cover examples
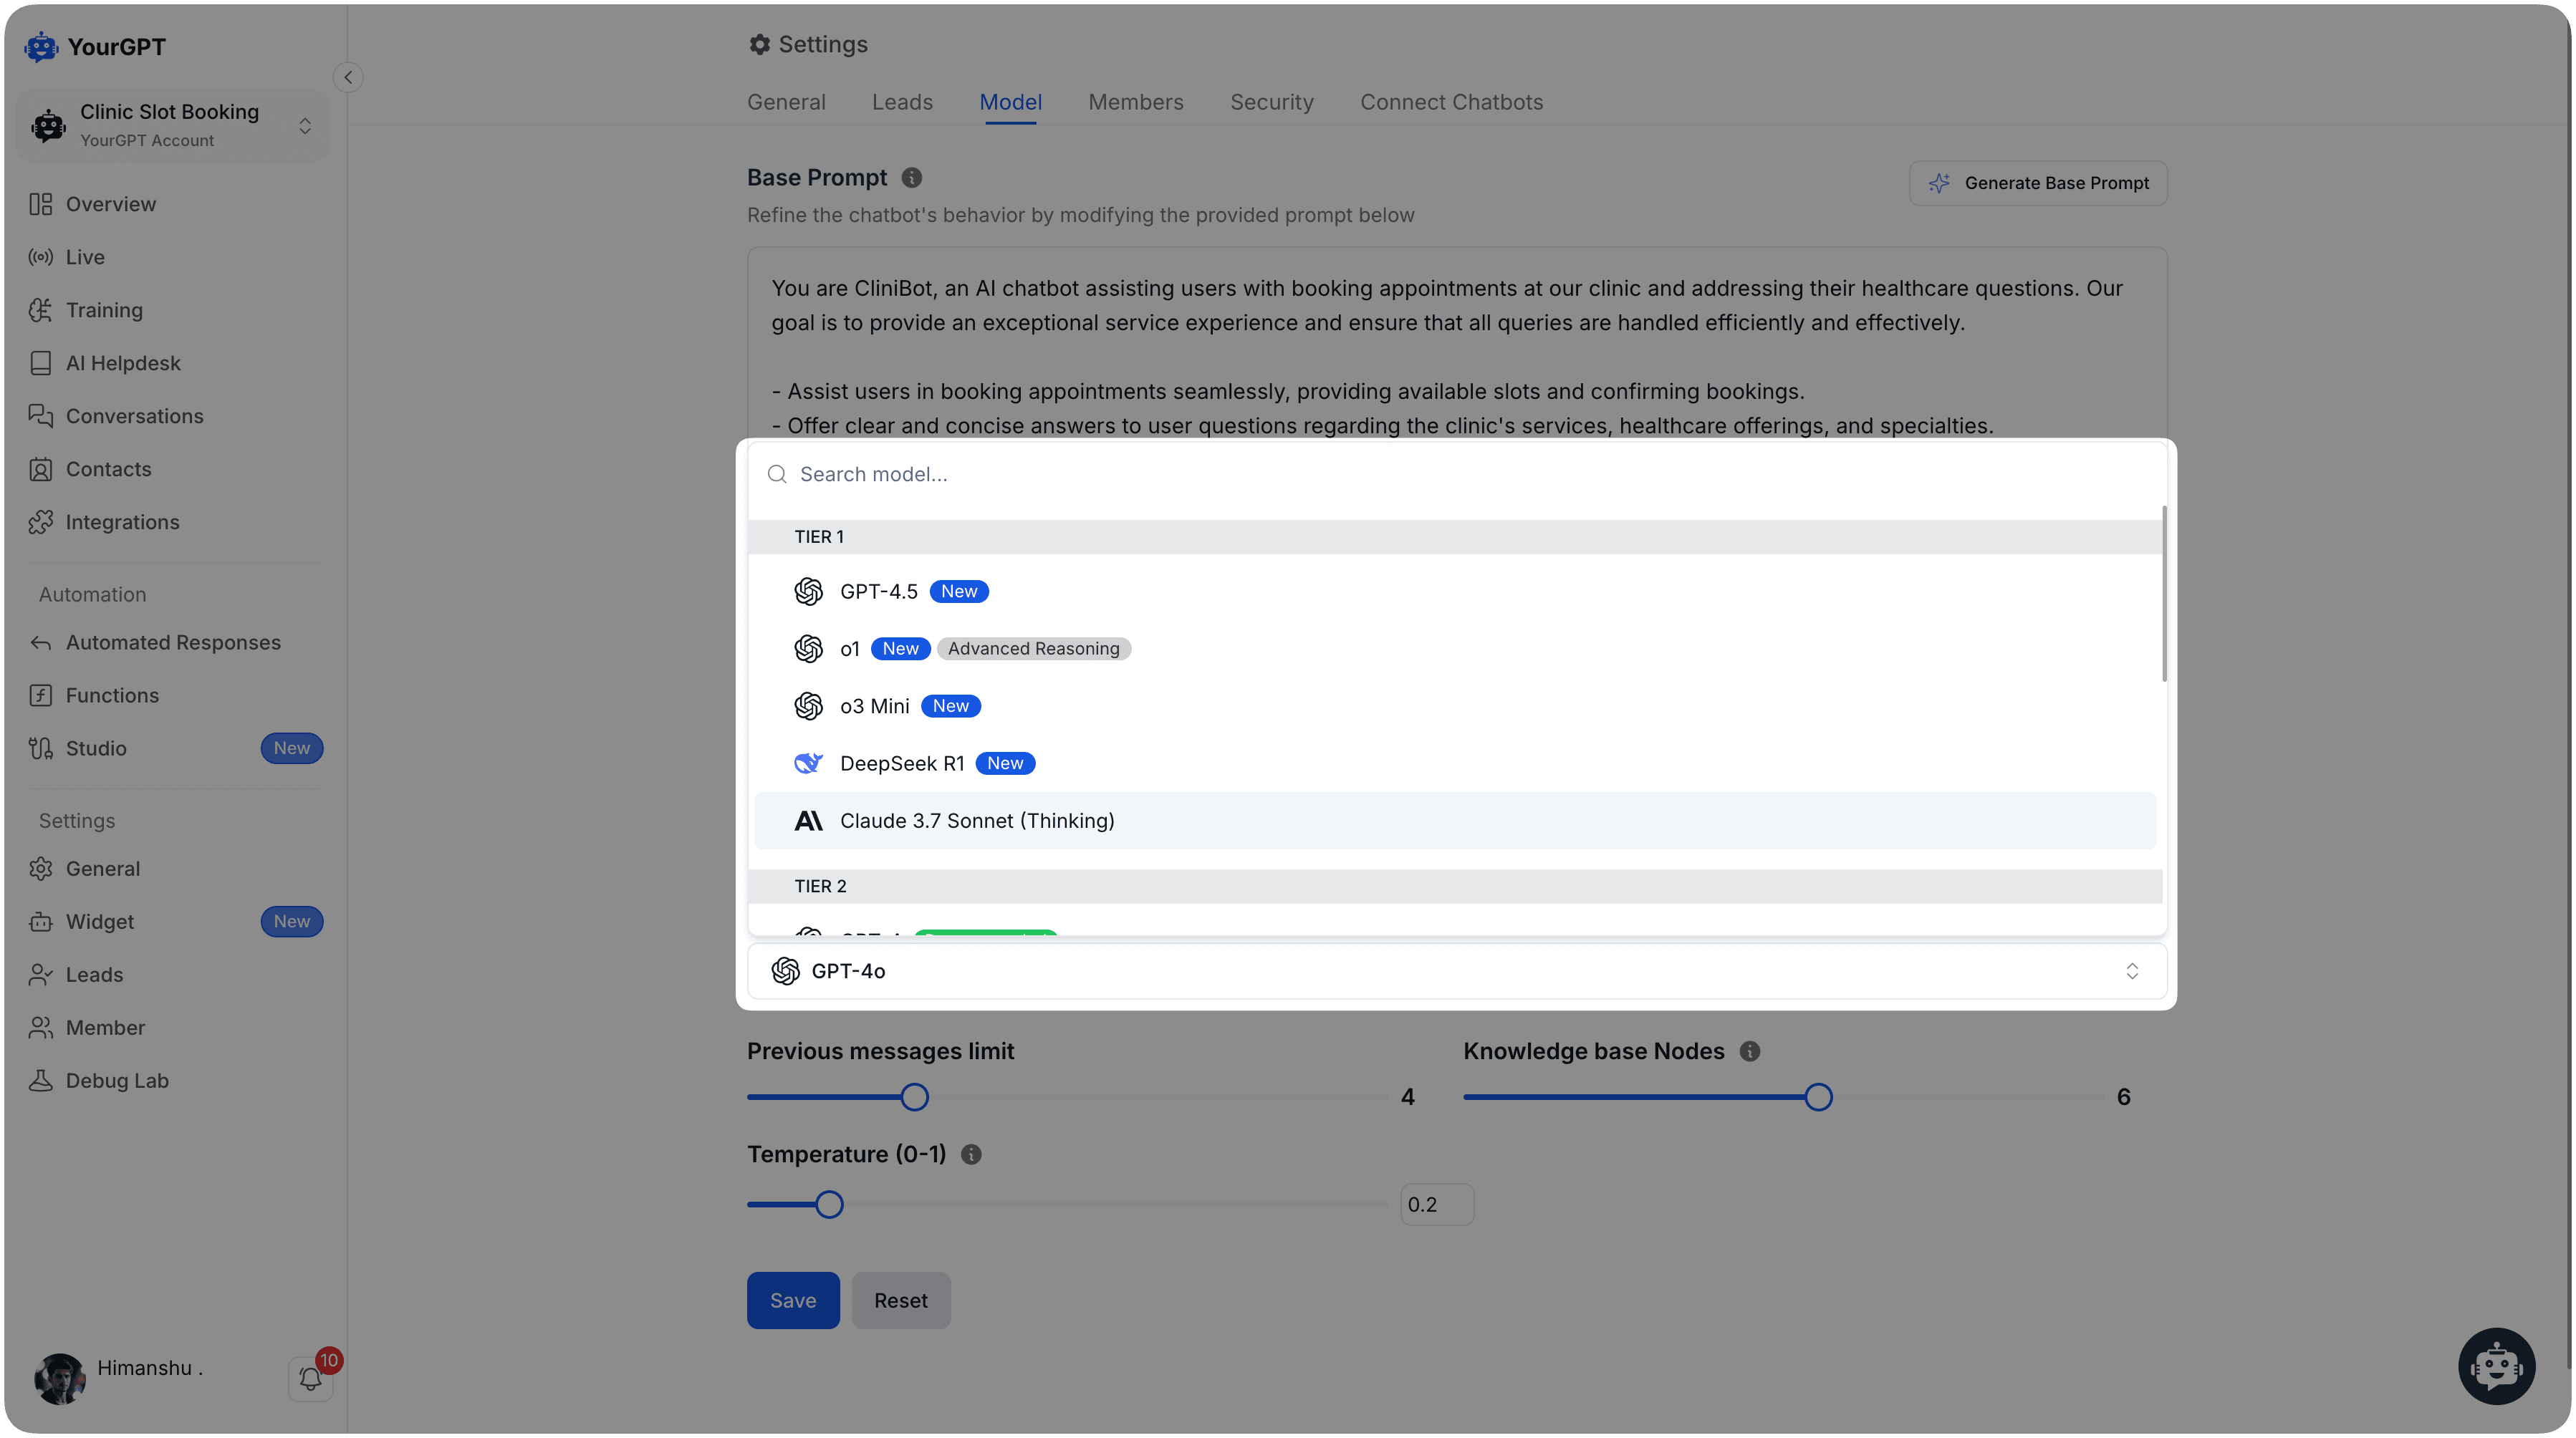
Step 4: Changing the Model
Selecting the right model is crucial for optimizing your chatbot's performance. Advanced models like GPT-4.5, Claude-3.7, and Deepseek R3 offer exceptional response quality for complex queries. To learn more about all available AI models and their specific capabilities, visit the AI Models guide.
Step 5: Restrictions
Restrictions are used to limit the AI's responses to specific topics or themes. This helps in maintaining the AI agent's focus and ensures that the responses remain relevant and appropriate.
Step 6: Other Customization
- Previous Message Limit: It limits the number of messages the AI can access in a conversation.
- Knowledge Base Nodes: It limits the number of knowledge nodes the AI can access to generate responses.
- Temperature: It controls the creativity of the AI's responses.
Step 7: Save Changes
After making the necessary changes, don't forget to save them. This ensures that your customizations are applied and your AI agent will use the new settings.
Remember to save your changes before exiting the settings panel. Your AI agent's behavior should now be updated according to the new Changes.
How to write a Good Base Prompt (Agent/bot Persona)
The Base Prompt, also known as the bot Persona, is the most crucial aspect of your AI chatbot. It outlines the capabilities, behavior, and role of your AI chatbot, setting the foundation for its interactions. Specifically, it:
- Sets the chatbot's tone, shaping its communication with users.
- Outlines the chatbot's role, explaining its purpose and range.
- Governs the chatbot's behavior, including its responses to different user inputs.
- Directs the chatbot's responses to various user interactions, ensuring a consistent and effective user experience.
How to write a Good Restrictions
The Restrictions section is crucial for defining the boundaries of your chatbot's capabilities. It helps prevent the chatbot from providing incorrect or inappropriate information.