Triggers
Learn how to use triggers to customize your chatbot's behavior.
Quick Start
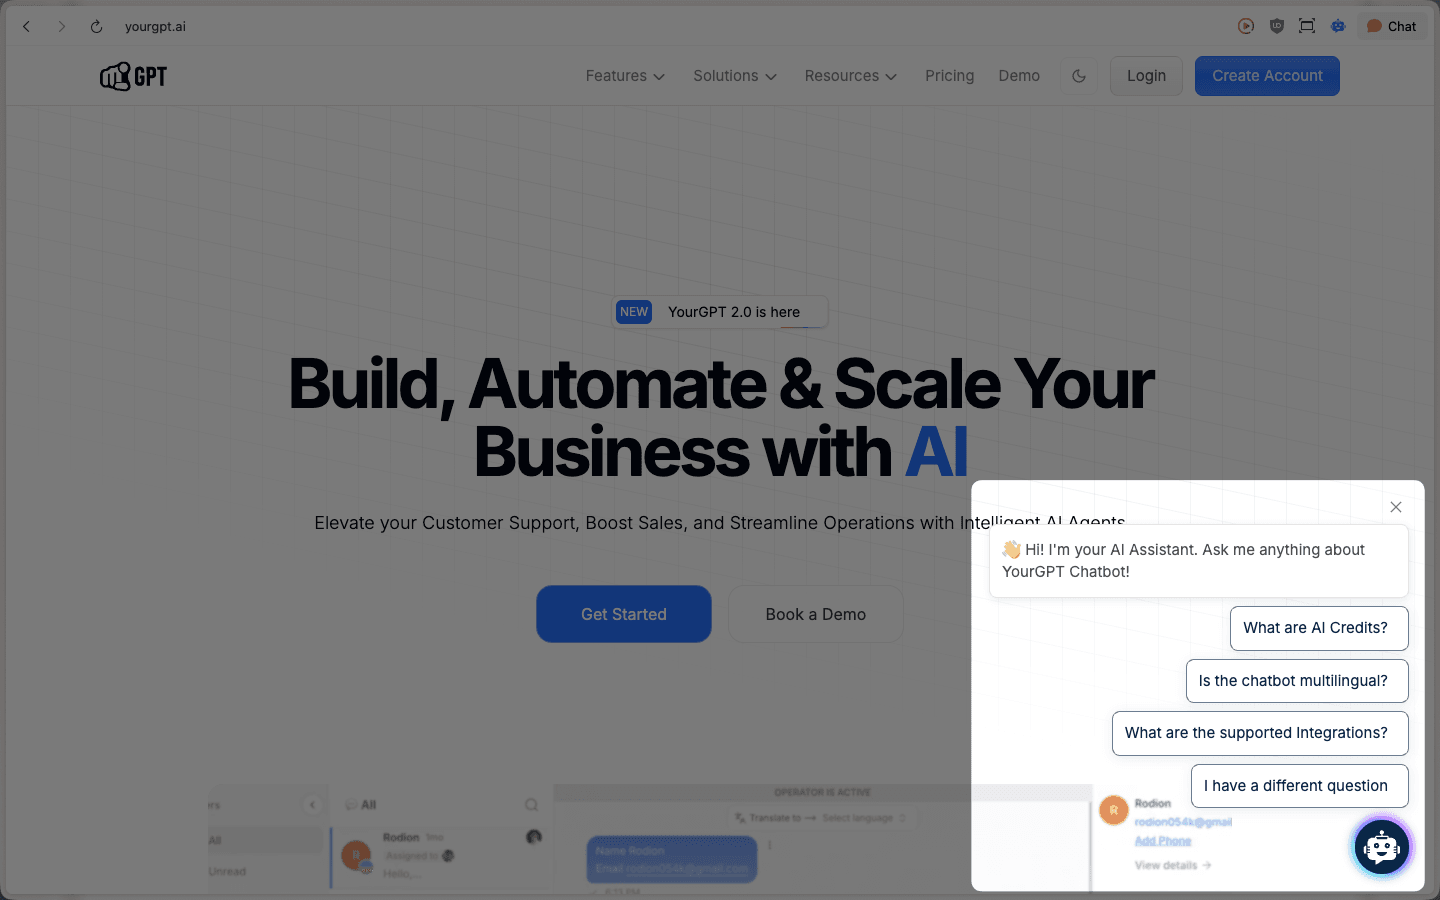
Triggers let your chatbot take actions automatically based on visitor behavior—like opening the widget, sending a message, or showing contextual “Ask AI” questions on specific pages.
Set up Triggers
In your YourGPT dashboard, go to Widget.

In widget settings, scroll to Triggers and open it.
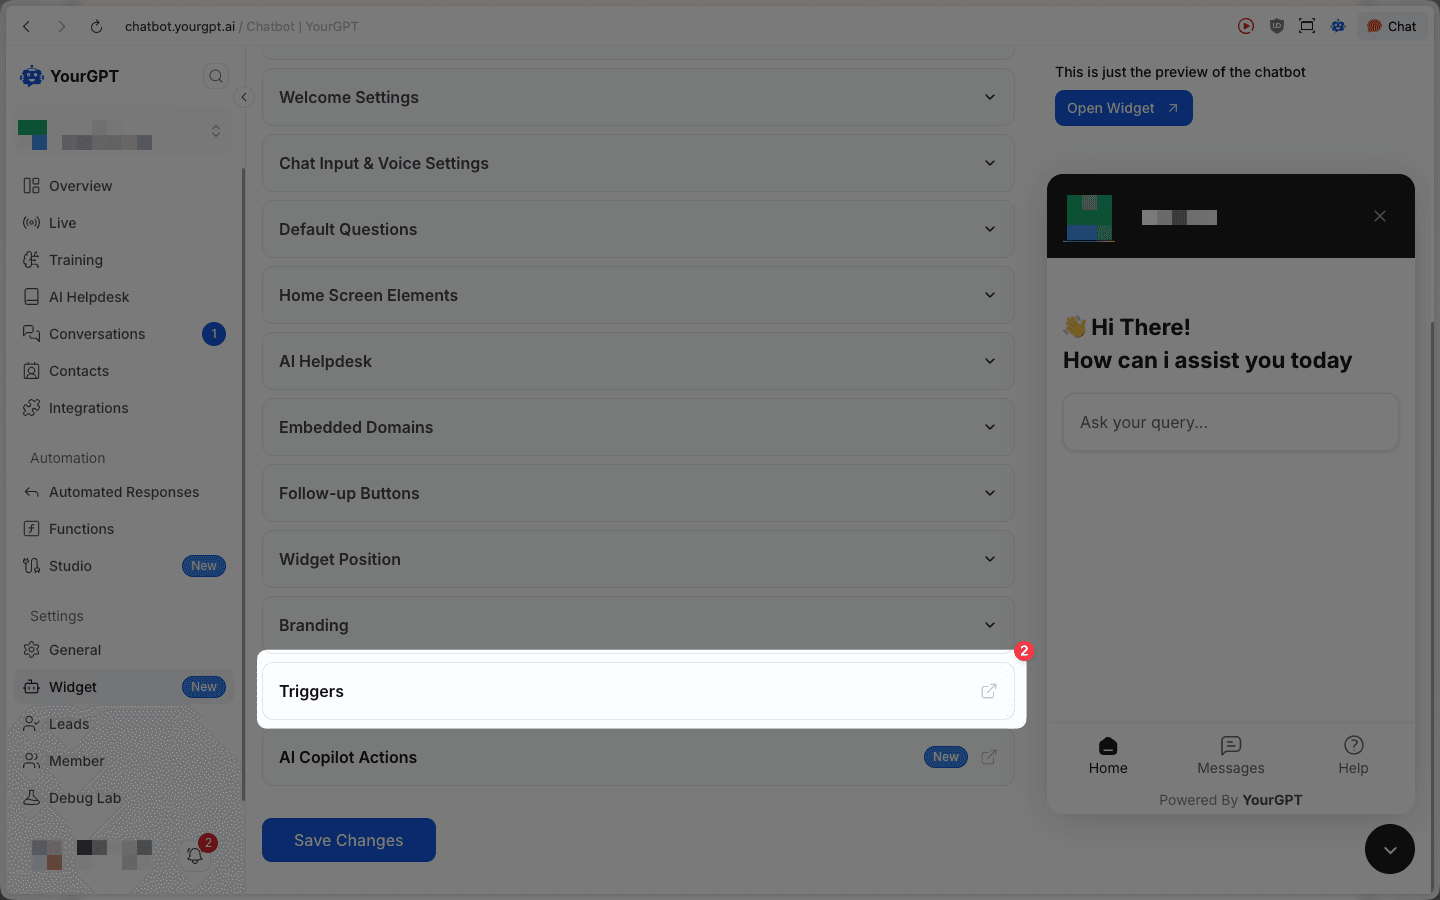
You’ll land on the Triggers page. From here, you can configure Event Triggers and Ask AI Triggers.
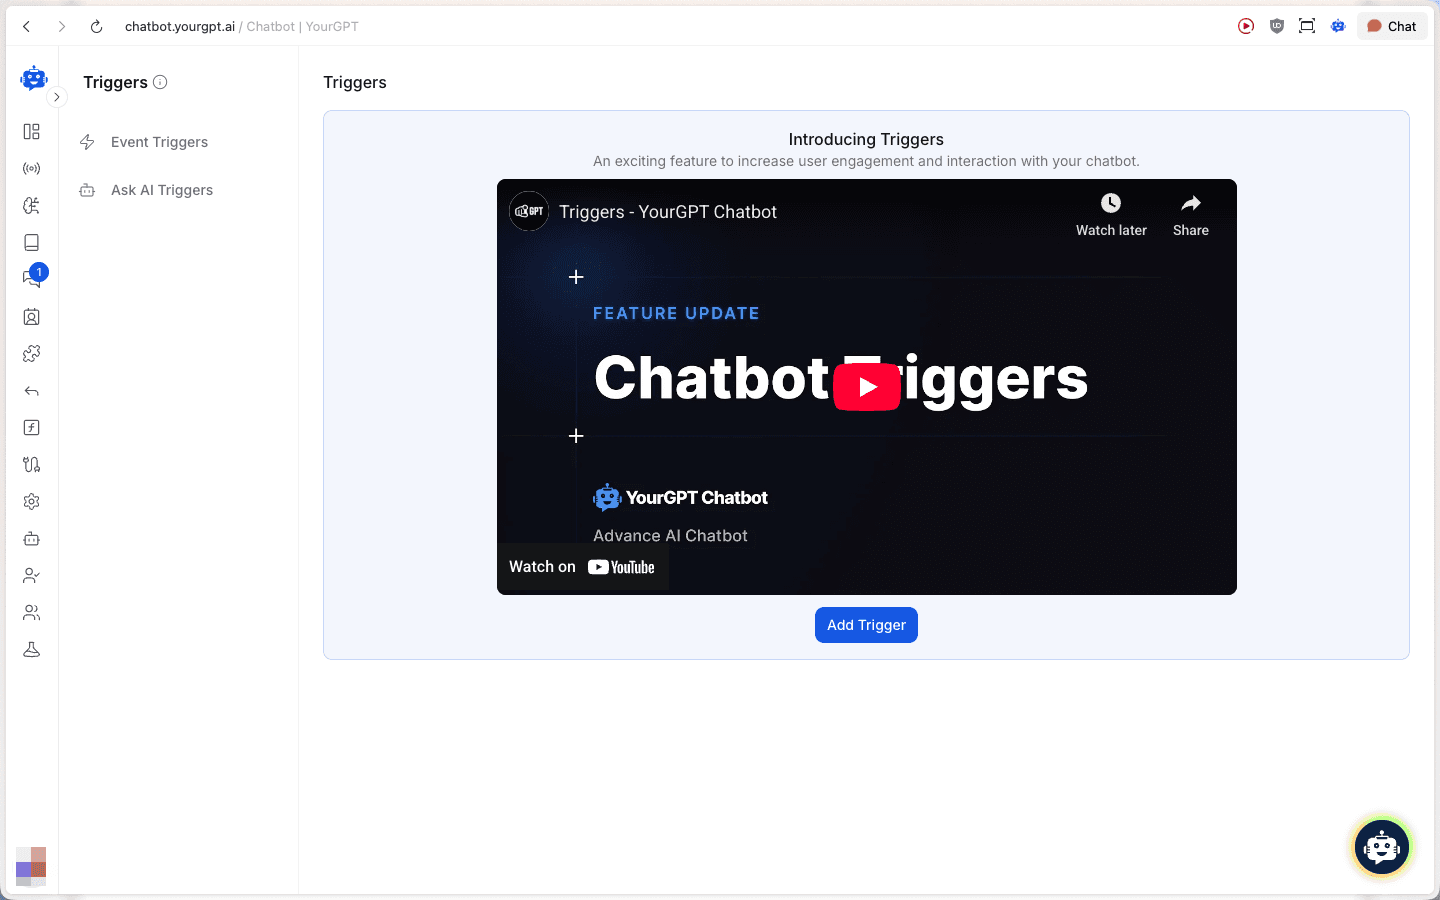
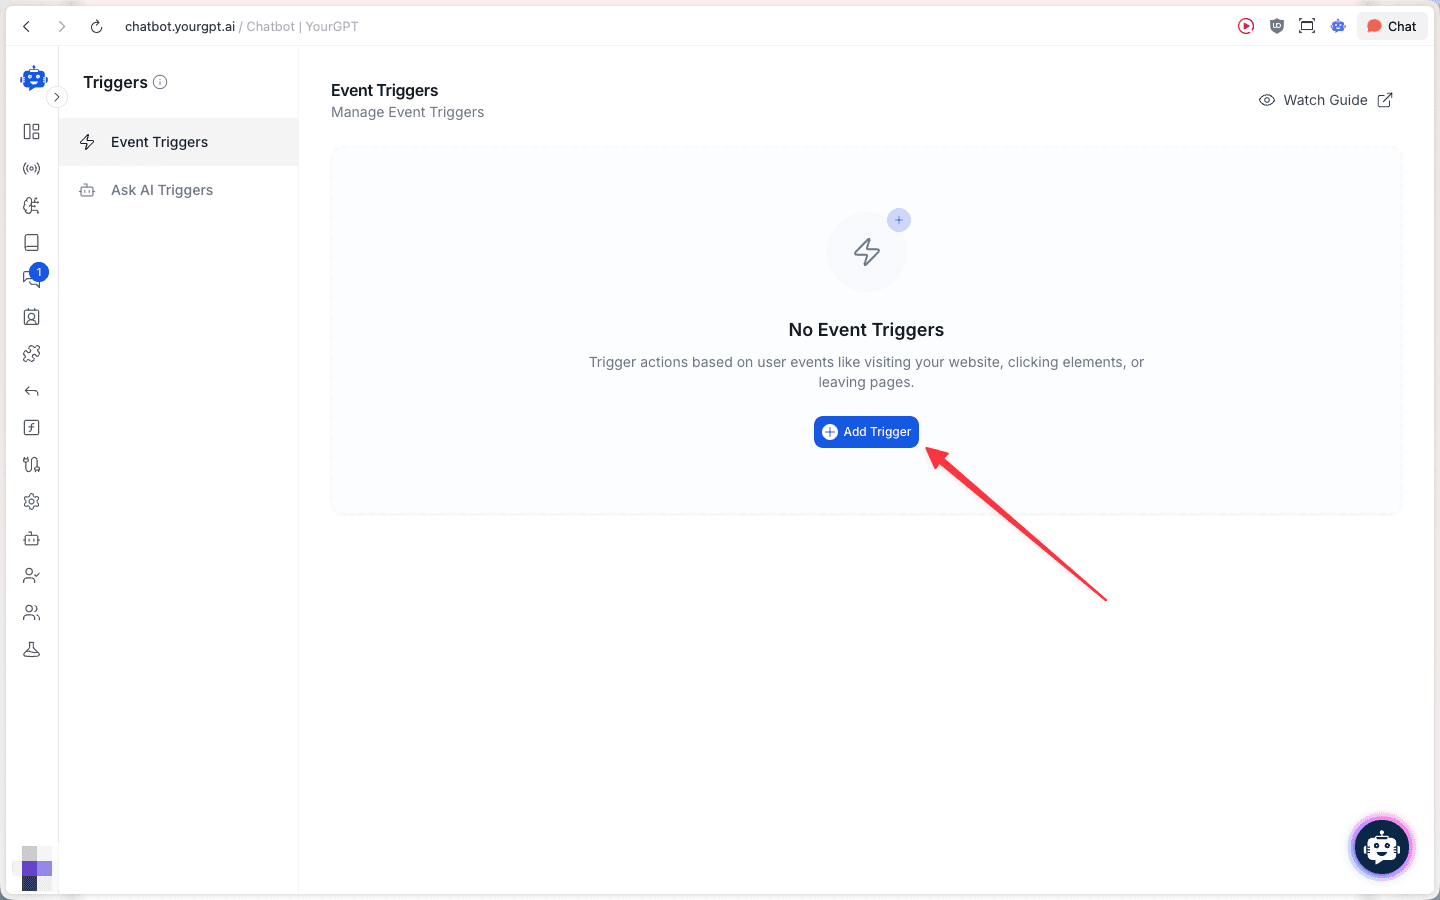
Event Triggers
Event Triggers run actions when a visitor event happens (for example, visiting a page, clicking an element, or leaving a page).
1) Create a new trigger
Go to Event Triggers and click Add Trigger.
Give your trigger a name.
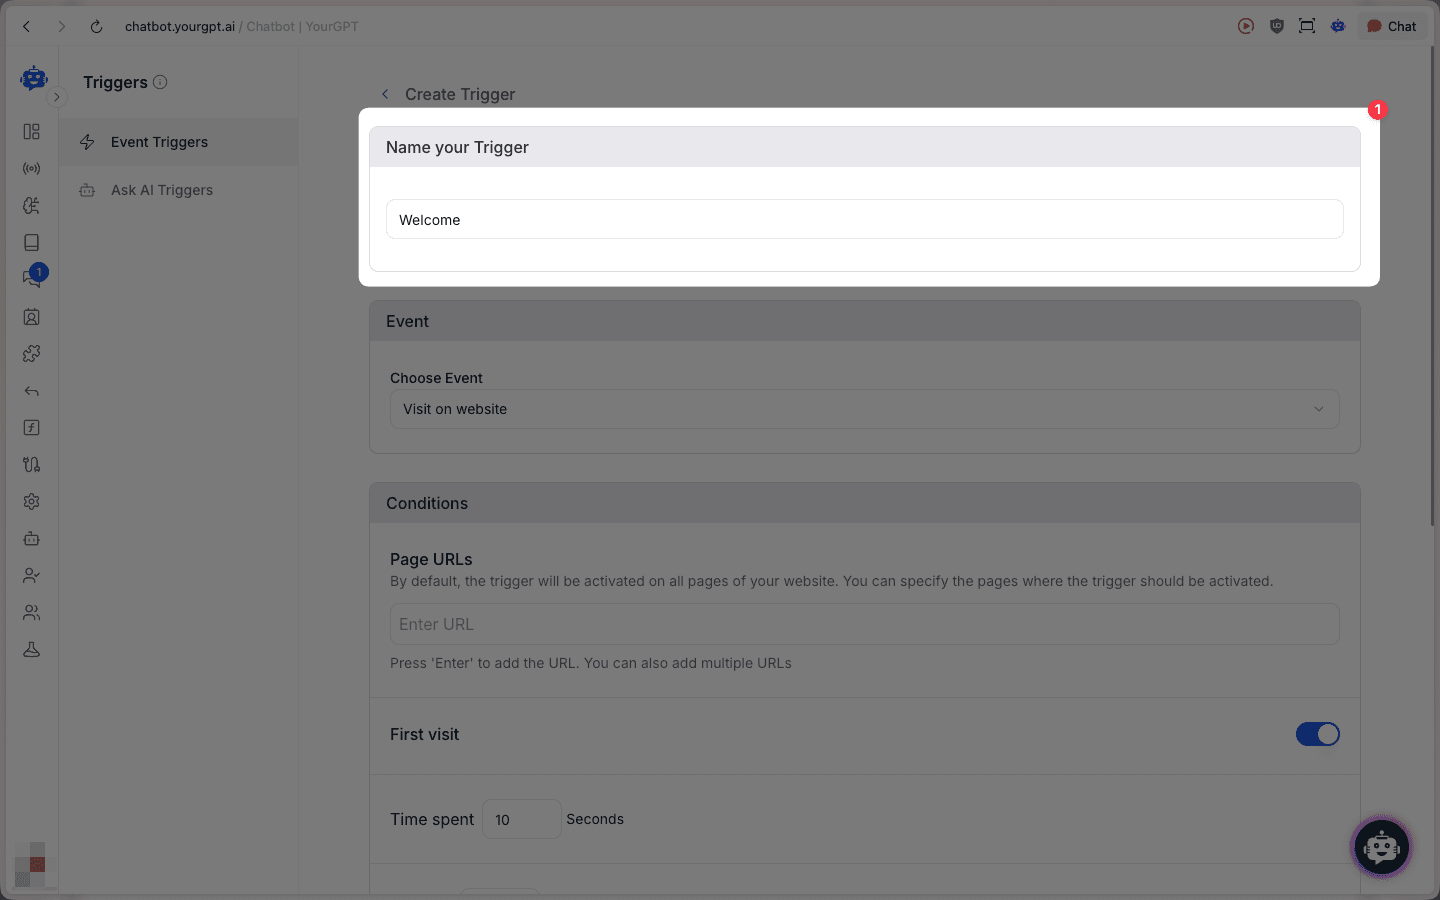
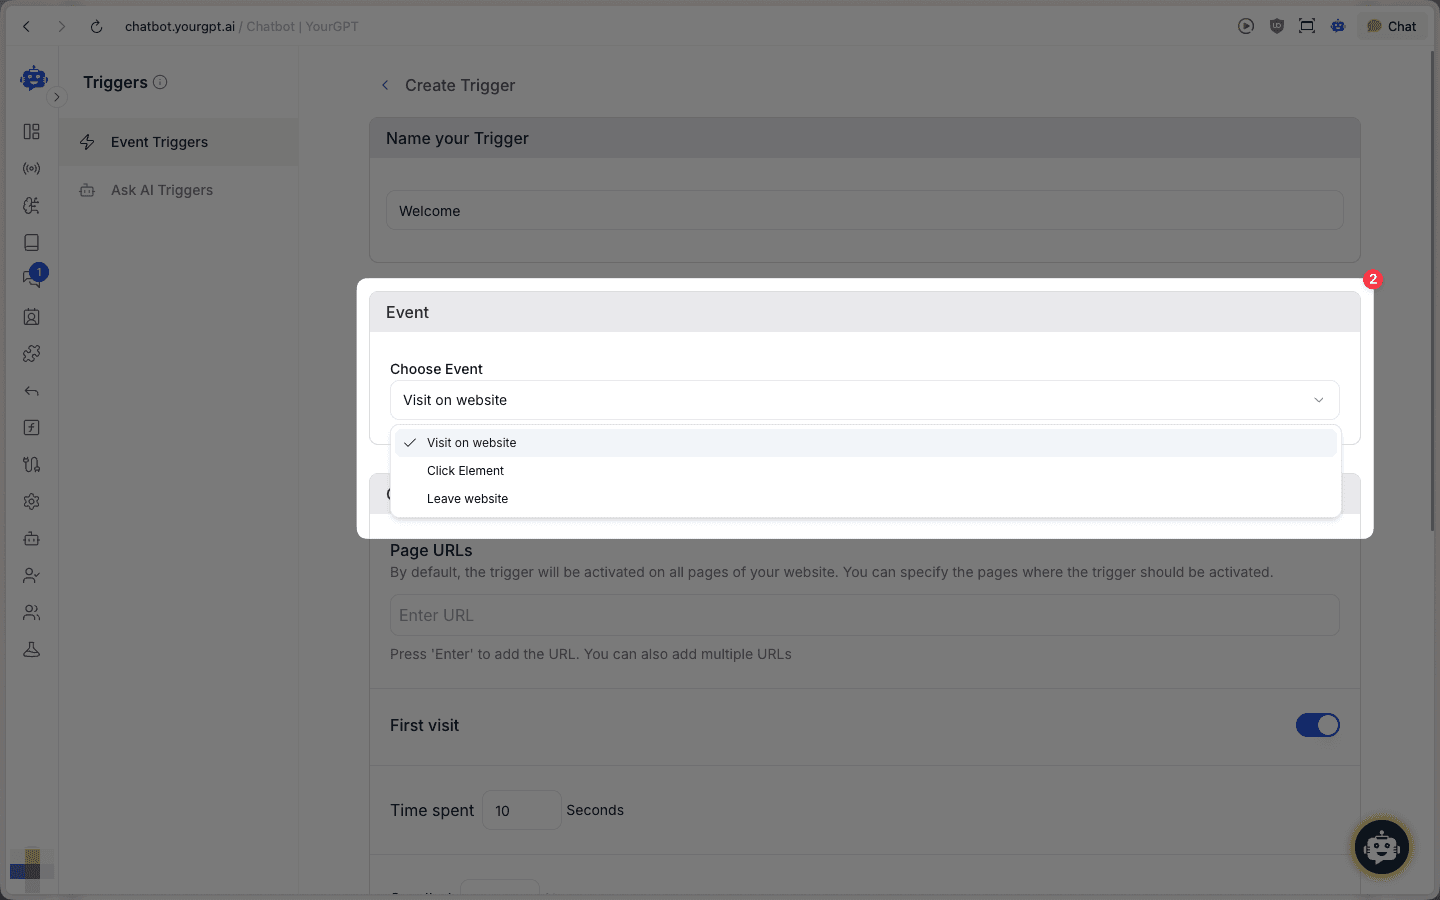
Choose an Event for when the trigger should run:
- Visit on website
- Click Element
- Leave website
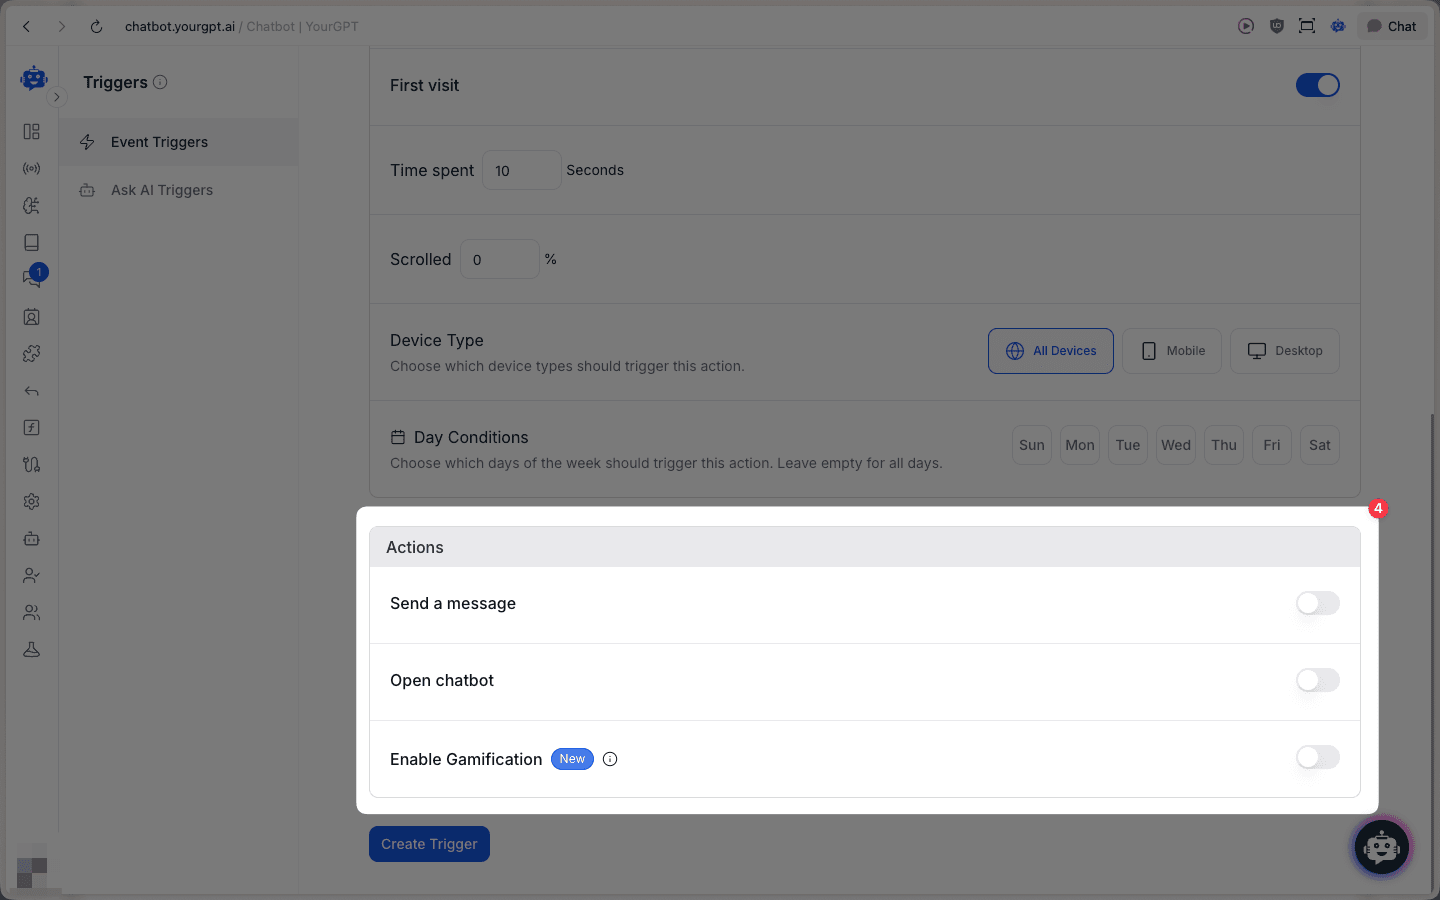
Set Conditions to control where and when it should fire:
- Page URLs (optional)
- First visit toggle
- Time spent (seconds)
- Scrolled (%)
- Device Type (All / Mobile / Desktop)
- Day Conditions (days of week)
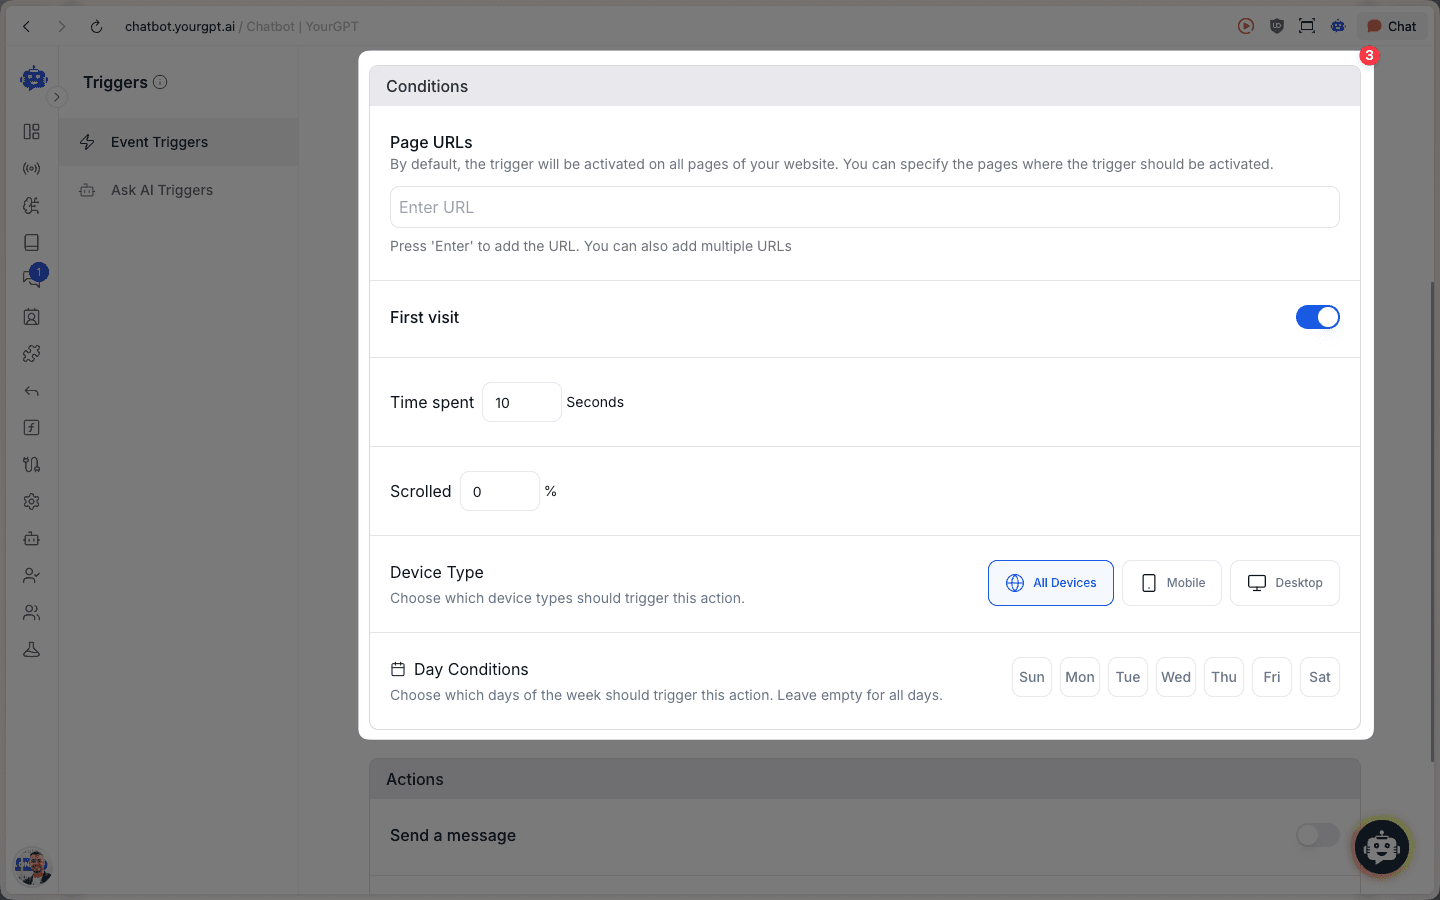
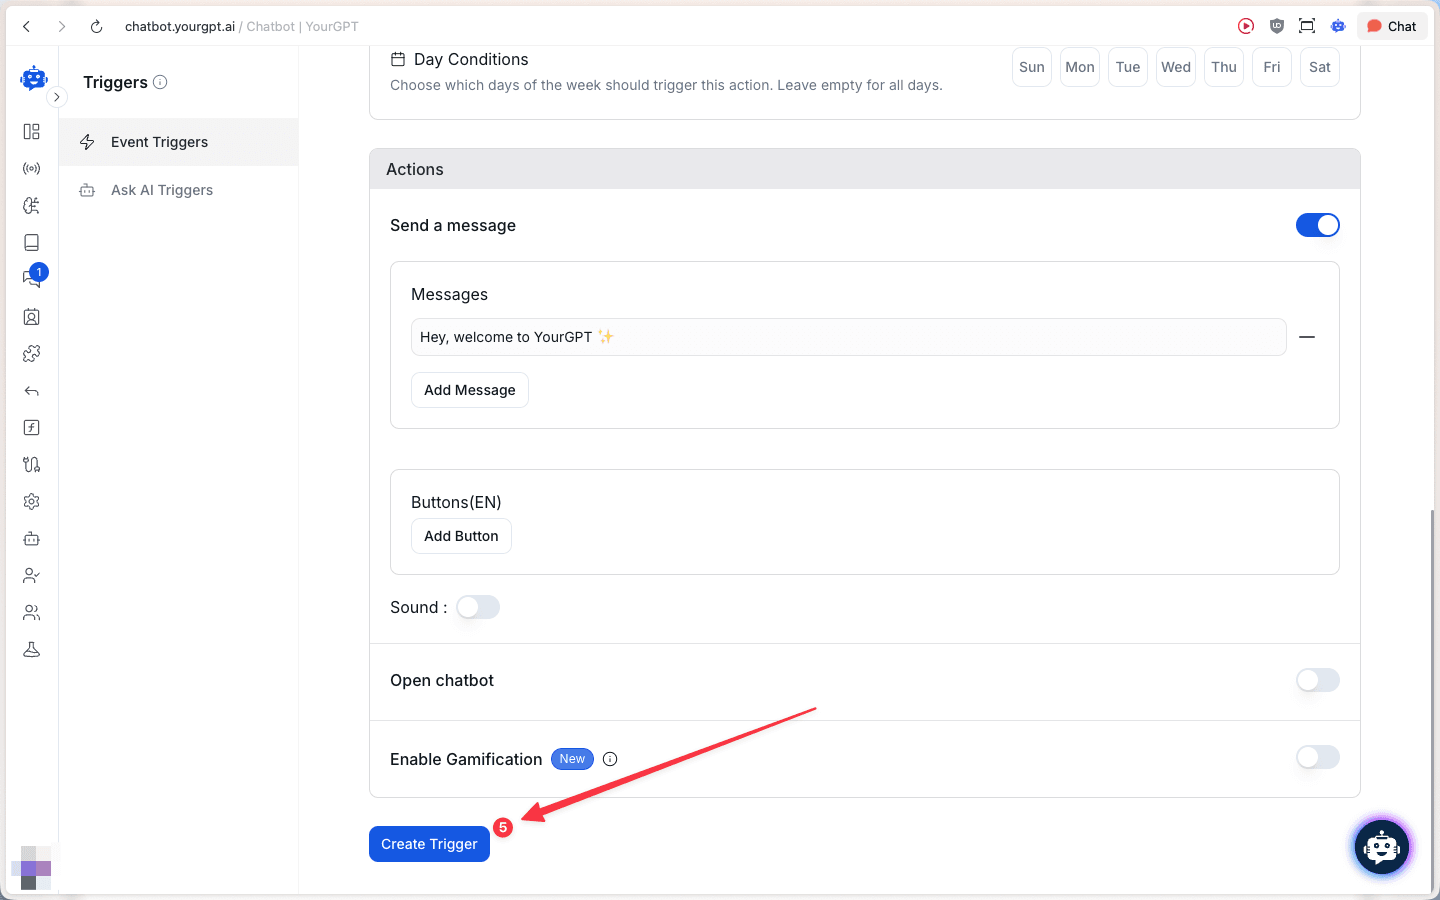
Configure Actions:
- Send a message (add one or more messages, optionally add buttons)
- Open chatbot
- Enable Gamification (see Gamification)
When you’re done, click Create Trigger to save.
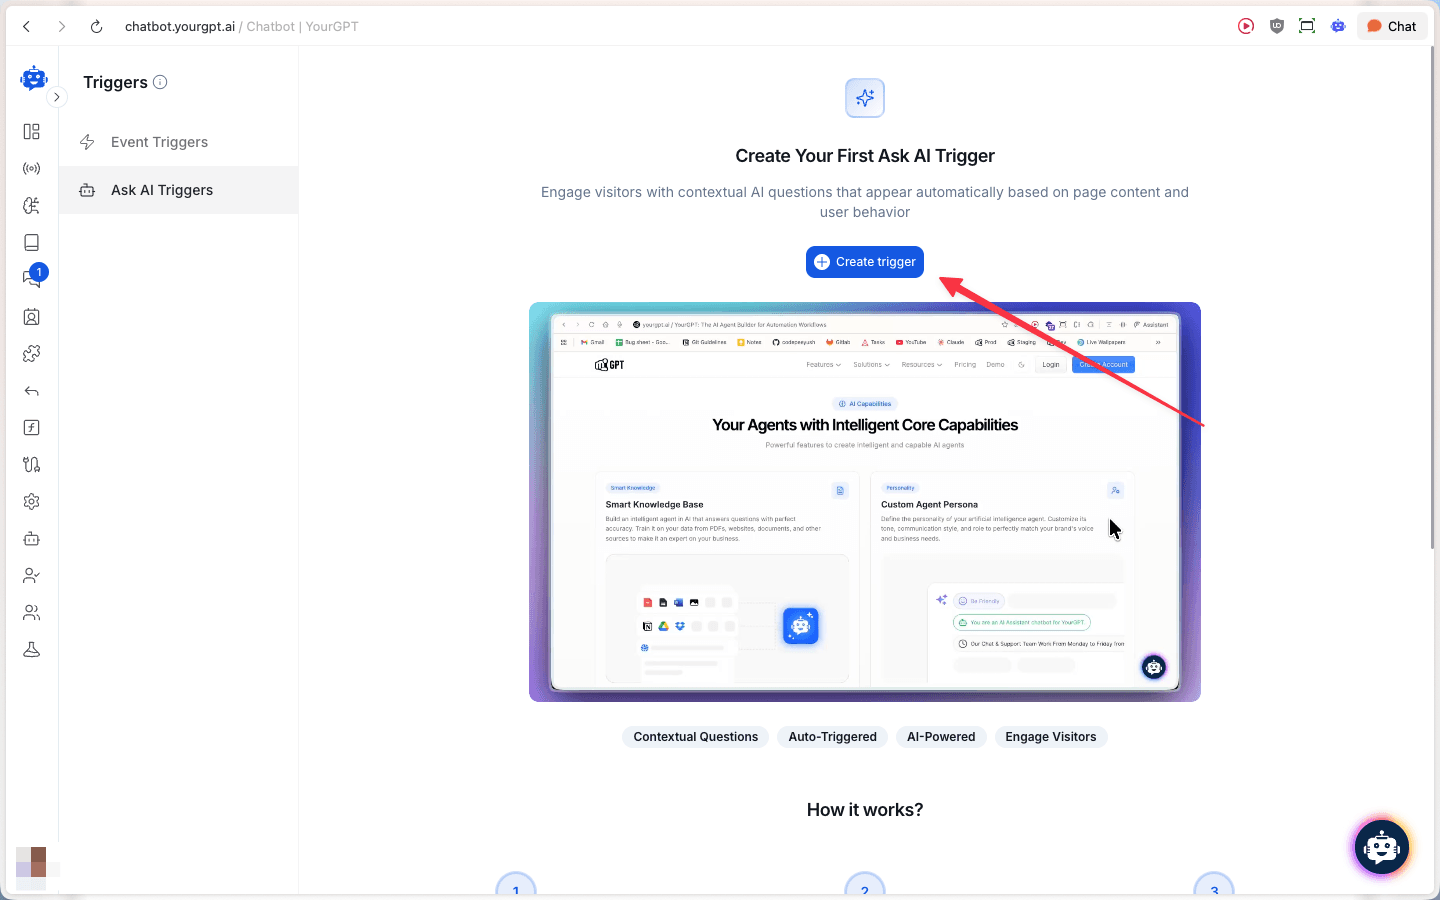
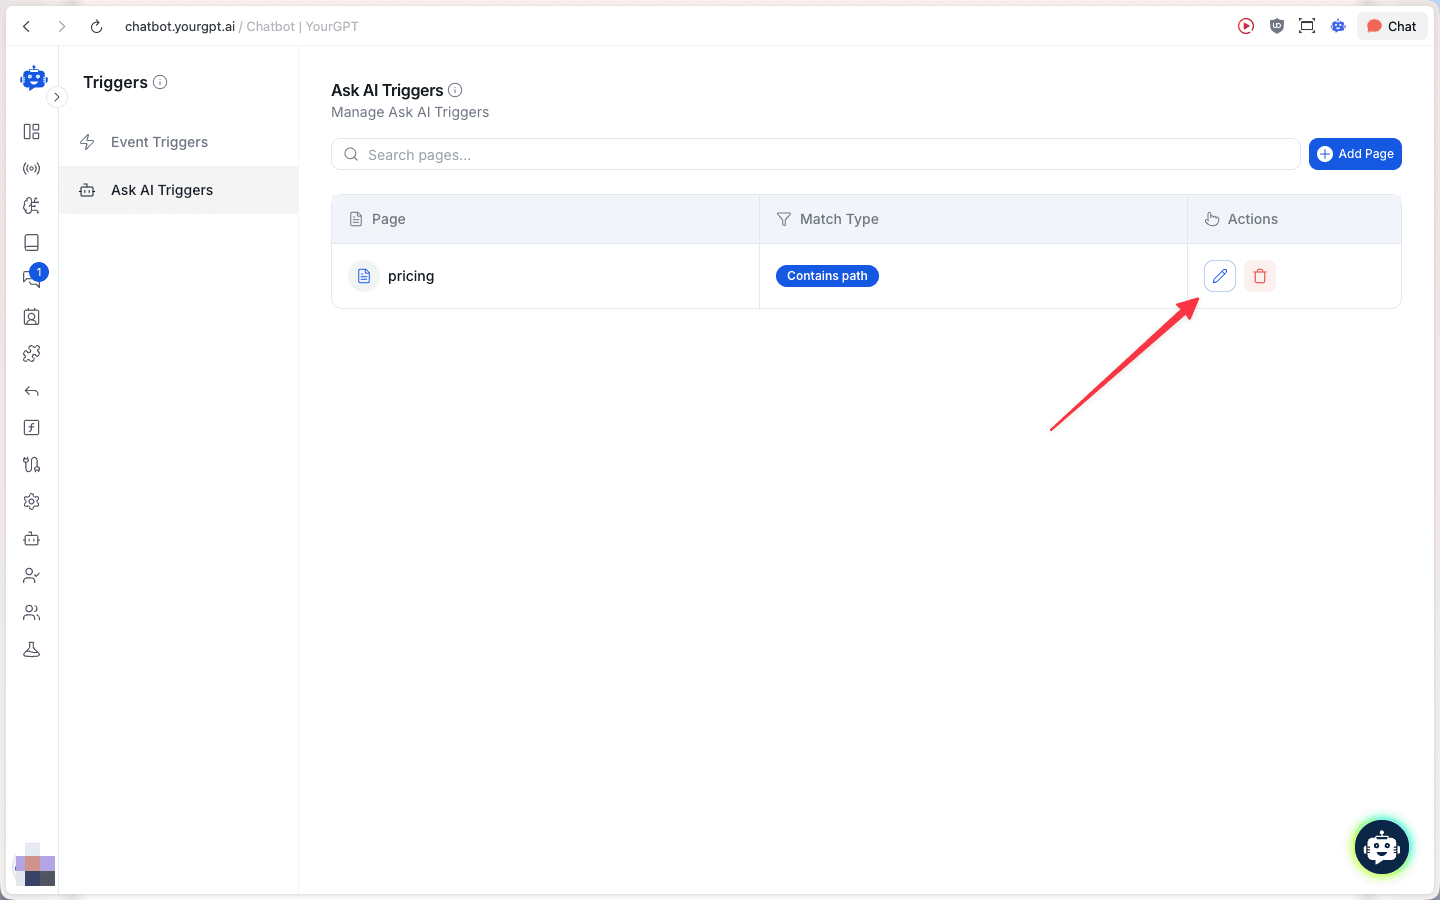
Ask AI Triggers
Ask AI Triggers show contextual AI questions based on your page content and visitor behavior. You configure them per page path and then add elements (text or DOM selectors) that should trigger a question.
1) Create a page rule
Go to Ask AI Triggers and click Create trigger.
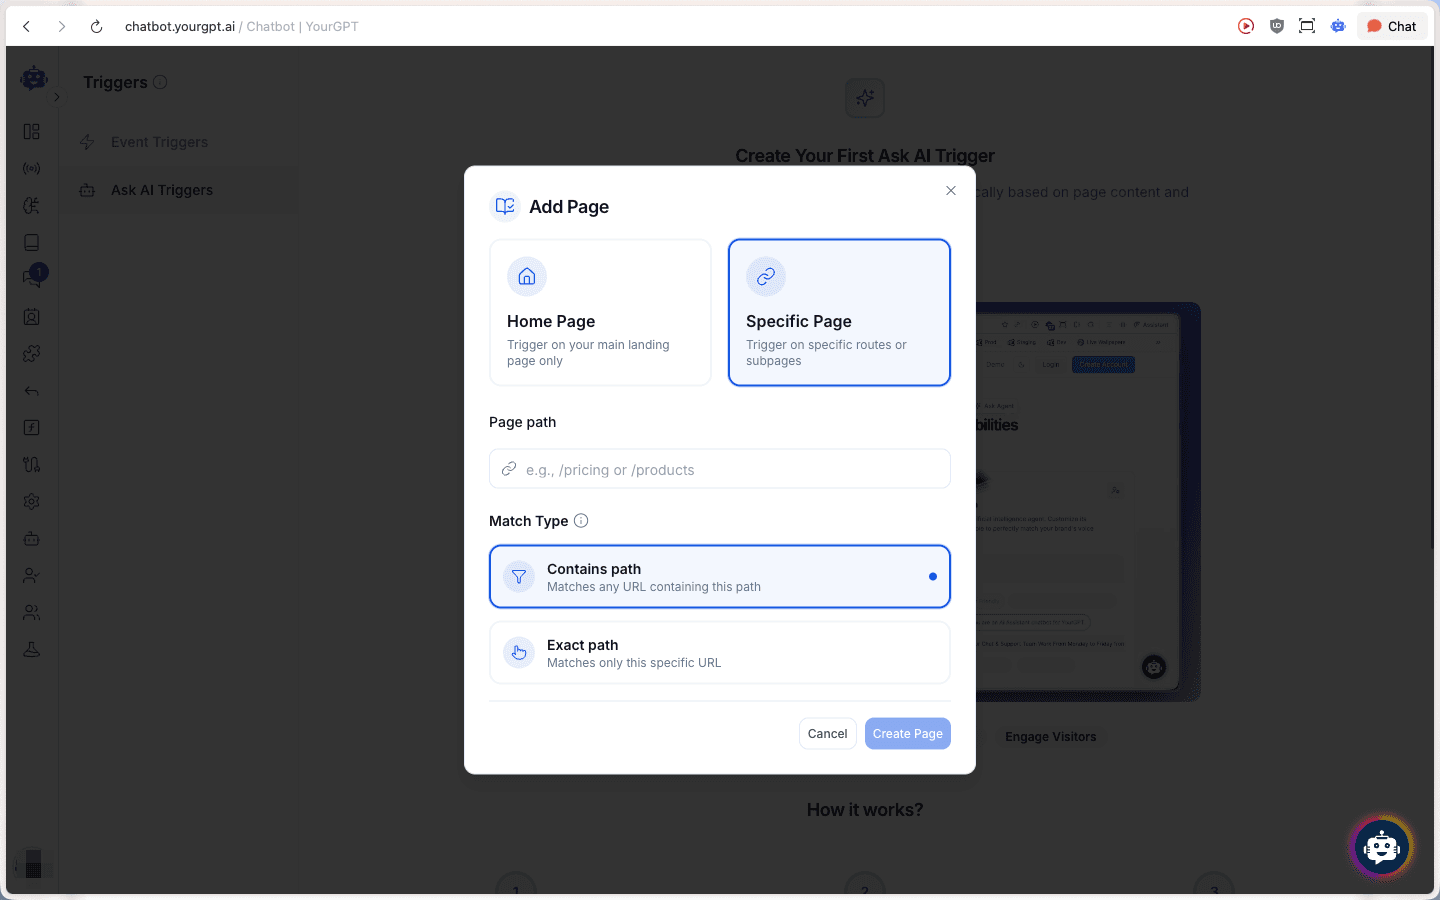
In Add Page:
- Choose Home Page or Specific Page
- Enter the Page path (example:
/pricing) - Select a Match Type:
- Contains path: matches any URL containing this path
- Exact path: matches only this specific URL
Then click Create Page.
After adding pages, you can search, edit, or delete page rules from the list.
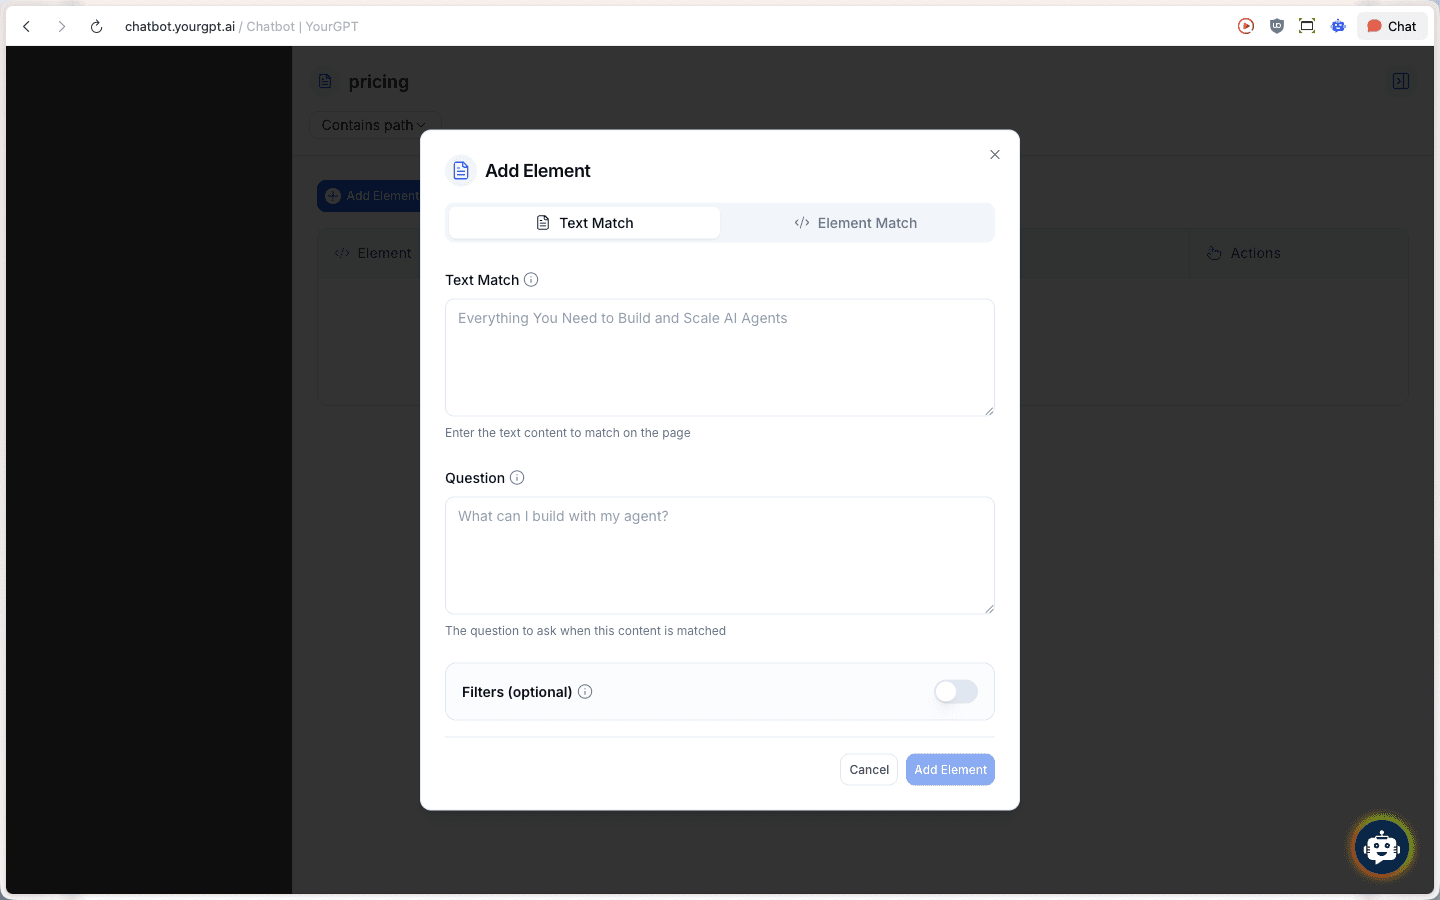
2) Add elements and questions
Open a page rule and click Add Element.
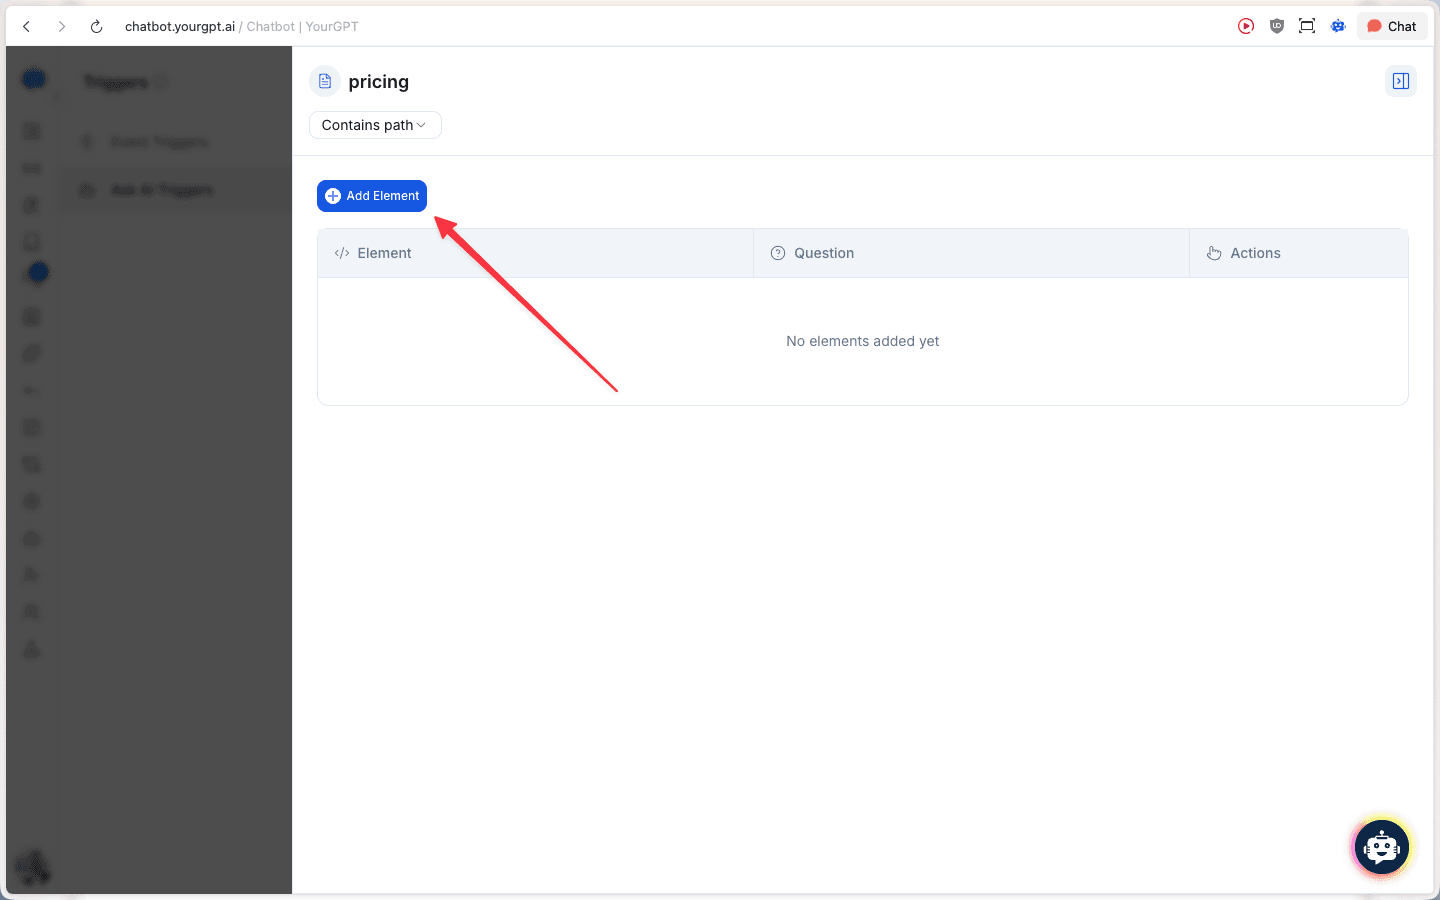
In Add Element:
- Choose Text Match or Element Match
- Enter the text/selector to match on the page
- Add the Question you want to ask when this content is matched
- Optionally enable Filters
Then click Add Element.