Android
Set up push notifications for the YourGPT Android Chatbot SDK using Firebase Cloud Messaging.
This guide explains how to enable push notifications in your Android app using the YourGPT SDK. When set up, your users will receive notifications for new messages from the YourGPT widget even when the app is in the background or closed.
Prerequisites
- A Firebase project linked to your Android app
- Your YourGPT widget UID
- Android 5.0 (API 21) or higher
- Google Play Services on the target device
Step 1: Firebase Configuration
- Go to Firebase Console and create a project (or use an existing one)
- Add your Android app (use your app's package name)
- Download the
google-services.jsonfile - Place
google-services.jsonin your app module directory (e.g.,app/)
Add the Google Services Plugin
In your project-level build.groovy:
buildscript {
    dependencies {
        classpath 'com.google.gms:google-services:4.4.0'
    }
}
In your app-level build.groovy:
plugins {
    id 'com.android.application'
    id 'com.google.gms.google-services'
}
The YourGPT SDK already bundles Firebase Messaging — no additional Firebase dependencies are needed.
Step 2: Configure Push Notifications on YourGPT Dashboard
Before your backend can send FCM notifications, you need to upload your Firebase credentials to the YourGPT dashboard.
-
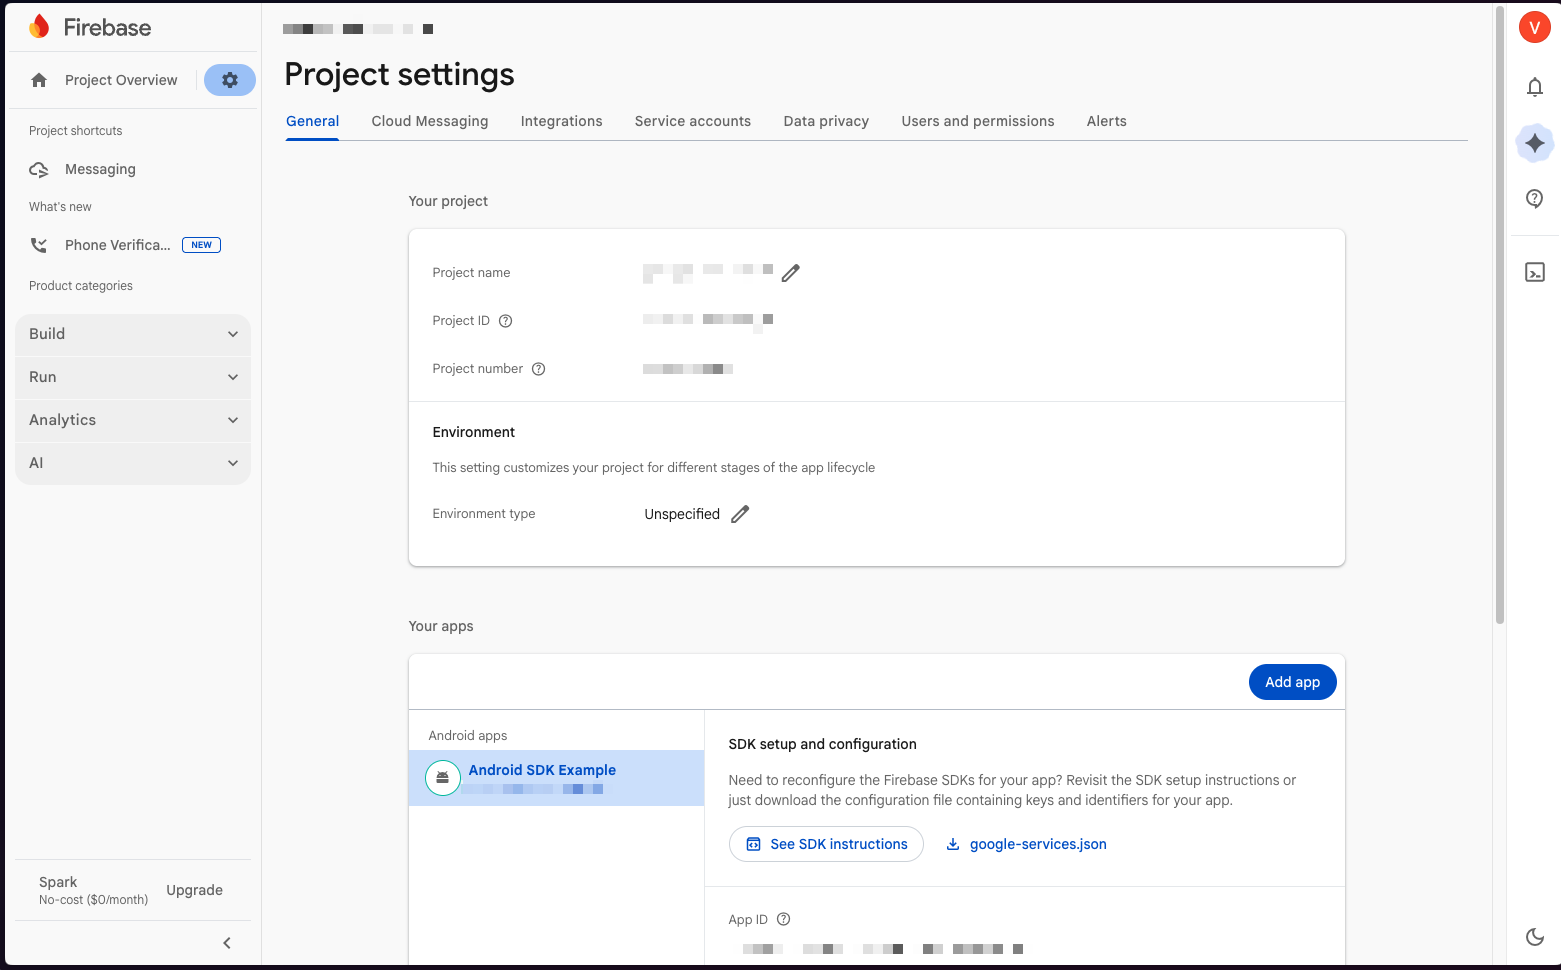
Go to Firebase Console → Project Settings → General and note your Project Number
-
Go to Firebase Console → Project Settings → Service Accounts
-
Click "Generate new private key" and download the
.jsonfile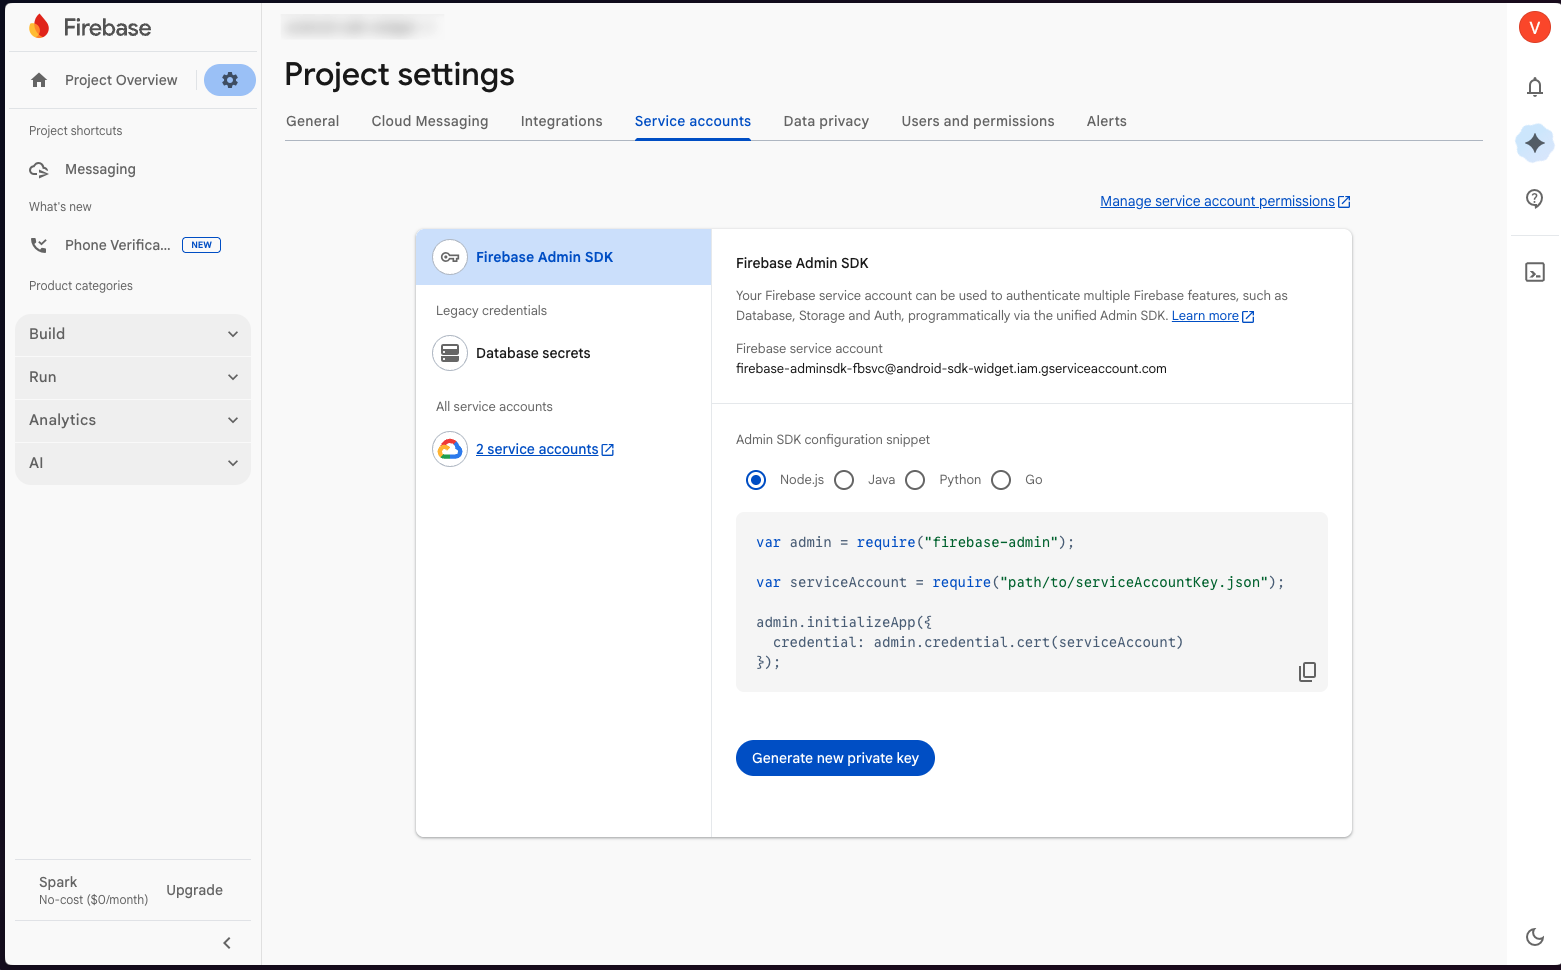
-
Log in to the YourGPT Dashboard
-
Navigate to your chatbot's Settings → Notifications
-
Enable the Firebase Cloud Messaging toggle

-
Enter your Firebase Project Number
-
Upload the service account JSON file you downloaded in step 3
-
Click Save Credentials — the dashboard will verify the credentials automatically
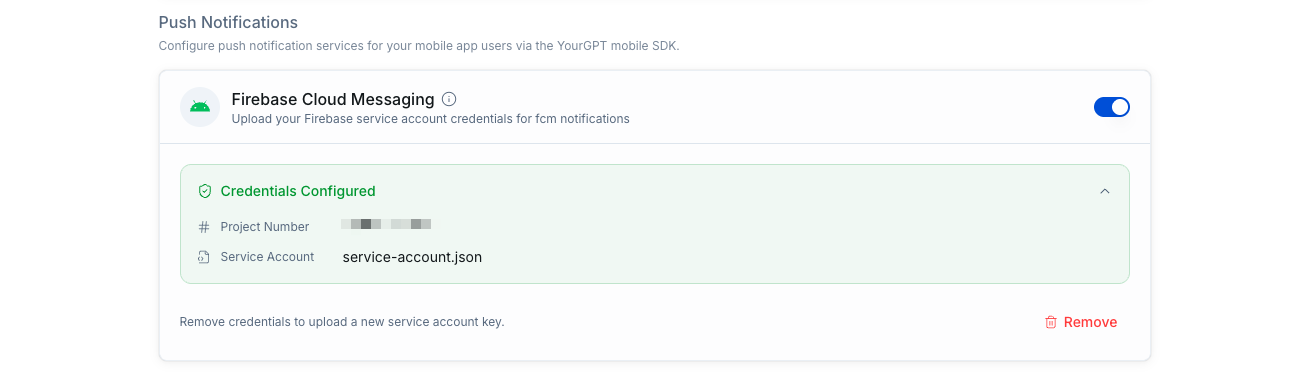
Once the status shows "Configured", your YourGPT backend is ready to send push notifications.
Flutter & React Native
If you are using the Flutter SDK or React Native SDK, you only need to complete Steps 1–2 above. The remaining steps on this page are specific to the native Android SDK. Refer to your SDK's documentation for platform-specific notification setup.
Step 3: Register the Notification Service
Add YourGPTNotificationService to your app's AndroidManifest.xml inside the <application> tag:
<!-- Firebase Messaging Service for YourGPT notifications -->
<service
    android:name="com.yourgpt.sdk.YourGPTNotificationService"
    android:exported="false">
    <intent-filter>
        <action android:name="com.google.firebase.MESSAGING_EVENT" />
    </intent-filter>
</service>
Also ensure you have the notification permission declared:
<uses-permission android:name="android.permission.POST_NOTIFICATIONS" />Step 4: Initialize the SDK with Notifications
There are two ways to initialize: Quick Setup (recommended) or Full Configuration.
Option A: Quick Setup (Recommended)
The simplest way — one line to enable everything:
import com.yourgpt.sdk.*

class MainActivity : AppCompatActivity() {

    override fun onCreate(savedInstanceState: Bundle?) {
        super.onCreate(savedInstanceState)
        setContentView(R.layout.activity_main)

        // Initialize SDK with notifications in one line
        lifecycleScope.launch {
            YourGPTSDK.quickInitialize(this@MainActivity, "YOUR_WIDGET_UID")
        }
    }
}
This automatically:
- Initializes the SDK
- Fetches and caches the FCM token
- Creates the notification channel
- Enables minimalist notification handling
You can also use YourGPTNotificationClient.quickSetup() with a custom notification config:
val notifConfig = YourGPTNotificationConfig.builder()
    .setSmallIcon(R.drawable.ic_notification)  // Your app's notification icon
    .setSoundUri(Uri.parse("android.resource://${packageName}/raw/message_sound"))
    .build()

YourGPTNotificationClient.quickSetup(this, "YOUR_WIDGET_UID", notifConfig)
Option B: Full Configuration
For more control over notification behavior:
import com.yourgpt.sdk.*

class MainActivity : AppCompatActivity() {

    override fun onCreate(savedInstanceState: Bundle?) {
        super.onCreate(savedInstanceState)
        setContentView(R.layout.activity_main)

        // Customize notification icon, sound, vibration, etc.
        val notifConfig = YourGPTNotificationConfig.builder()
            .setSmallIcon(R.drawable.ic_notification)
            .setSoundUri(Uri.parse("android.resource://${packageName}/raw/message_sound"))
            .setVibrationPattern(longArrayOf(0, 300, 200, 300))
            .build()

        val config = YourGPTConfig(
            widgetUid = "YOUR_WIDGET_UID",
            enableNotifications = true,
            notificationMode = NotificationMode.MINIMALIST,  // or ADVANCED
            notificationConfig = notifConfig
        )

        lifecycleScope.launch {
            YourGPTSDK.initialize(this@MainActivity, config)
        }
    }
}
Android 8.0+ (API 26)
On Android O and above, notification sound and vibration are channel-level settings. Once a notification channel is created, the OS will not update its sound/vibration settings on subsequent calls. If you change the custom sound after
the app has already run, users will need to either reinstall the app or clear app data for the new sound to take effect. Alternatively, use a different channelId via .setChannel() to create a fresh channel with the new settings.
Step 5: Request Notification Permission (Android 13+)
Android 13 (API 33) and above requires runtime permission for notifications:
import android.Manifest
import android.content.pm.PackageManager
import android.os.Build
import androidx.activity.result.contract.ActivityResultContracts
import androidx.core.content.ContextCompat

class MainActivity : AppCompatActivity() {

    private val notificationPermissionLauncher = registerForActivityResult(
        ActivityResultContracts.RequestPermission()
    ) { isGranted: Boolean ->
        if (isGranted) {
            // Notifications enabled
        } else {
            // User denied — notifications won't be shown
        }
    }

    override fun onCreate(savedInstanceState: Bundle?) {
        super.onCreate(savedInstanceState)
        // ... SDK initialization ...

        requestNotificationPermission()
    }

    private fun requestNotificationPermission() {
        if (Build.VERSION.SDK_INT >= Build.VERSION_CODES.TIRAMISU) {
            when {
                ContextCompat.checkSelfPermission(
                    this, Manifest.permission.POST_NOTIFICATIONS
                ) == PackageManager.PERMISSION_GRANTED -> {
                    // Already granted
                }
                shouldShowRequestPermissionRationale(Manifest.permission.POST_NOTIFICATIONS) -> {
                    // Show explanation to user, then request
                    notificationPermissionLauncher.launch(Manifest.permission.POST_NOTIFICATIONS)
                }
                else -> {
                    notificationPermissionLauncher.launch(Manifest.permission.POST_NOTIFICATIONS)
                }
            }
        }
    }
}
Step 6: Handle Notification Clicks
When a user taps a notification, the SDK can automatically open the widget. Add click handling in your launcher activity:
class MainActivity : AppCompatActivity() {

    override fun onCreate(savedInstanceState: Bundle?) {
        super.onCreate(savedInstanceState)
        // ... SDK initialization ...

        // Handle notification click that launched the app
        handleNotificationIntent(intent)
    }

    override fun onNewIntent(intent: Intent?) {
        super.onNewIntent(intent)
        // Handle notification click when app is already running
        intent?.let { handleNotificationIntent(it) }
    }

    private fun handleNotificationIntent(intent: Intent) {
        // Let the SDK handle it — opens the widget automatically
        if (YourGPTNotificationClient.handleNotificationClick(this, intent)) {
            return
        }

        // Optional: if you plan to use ADVANCED mode and want custom navigation behavior (e.g. switching to the Support tab before opening the widget).
        if (intent.action == "com.yourgpt.sdk.OPEN_WIDGET") {
            val config = YourGPTConfig(widgetUid = "YOUR_WIDGET_UID")
            YourGPTSDK.openChatbotBottomSheet(supportFragmentManager, config)
        }
    }
}
Step 7: Open the Widget at Least Once
The FCM token is registered with the YourGPT backend through the WebView JS bridge when the widget is opened. Until the widget is opened at least once, the backend won't know where to send notifications.
// Open the widget (e.g., on a button click)
val config = YourGPTConfig(widgetUid = "YOUR_WIDGET_UID")
YourGPTSDK.openChatbotBottomSheet(supportFragmentManager, config)
After the widget loads, the SDK automatically sends the cached FCM token to the backend. Subsequent token refreshes are also sent automatically the next time the widget is opened.
How It Works
Here's the full notification flow:
1. App starts → SDK initializes → FCM token fetched and cached locally
2. User opens widget → Token sent to YourGPT backend via WebView JS bridge
3. New message on backend → FCM data message sent to device
4. YourGPTNotificationService receives message → YourGPTNotificationClient handles it
5. Notification displayed → User taps → Widget opens via handleNotificationClick()
Notification Modes
| Mode | Description | Use Case |
|---|---|---|
MINIMALIST | Auto-handles everything: display, grouping, click actions | Most apps — zero custom code needed |
ADVANCED | SDK identifies YourGPT notifications but does not display them; your app handles display | Apps that need custom notification UI |
DISABLED | No notification handling | Apps that don't want push notifications |
Setting the Mode
// Via config during initialization
val config = YourGPTConfig(
    widgetUid = "YOUR_WIDGET_UID",
    enableNotifications = true,
    notificationMode = NotificationMode.MINIMALIST  // or ADVANCED, DISABLED
)

// Or change at runtime
YourGPTNotificationClient.setNotificationMode(NotificationMode.ADVANCED)
Available Configuration Options
| Option | Default | Description |
|---|---|---|
setNotificationsEnabled(Boolean) | true | Enable/disable notifications |
setSmallIcon(Int) | System default | Notification icon resource |
setLargeIcon(Bitmap?) | null | Large icon shown in expanded notification |
setSoundEnabled(Boolean) | true | Play sound on notification |
setSoundUri(Uri?) | System default | Custom notification sound |
setVibrationEnabled(Boolean) | true | Vibrate on notification |
setVibrationPattern(LongArray) | [0, 250, 250, 250] | Custom vibration pattern |
setLedEnabled(Boolean) | true | LED indicator |
setLedColor(Int) | Color.BLUE | LED color |
setPriority(Int) | PRIORITY_HIGH | Notification priority |
setAutoCancel(Boolean) | true | Dismiss notification on tap |
setQuietHours(Boolean, Int, Int) | Disabled | Suppress notifications during hours (24h format) |
setMessagePreview(Boolean, Int) | true, 100 chars | Show message preview in notification |
setChannel(String, String, String) | yourgpt_messages | Custom notification channel ID, name, description |
setGroupMessages(Boolean) | true | Group notifications by conversation |
setStackNotifications(Boolean, Int) | true, 5 | Stack notifications with a max count |
SDK Methods Reference
Notification Identification
// Check if a RemoteMessage is from YourGPT
val isYourGPT = YourGPTNotificationClient.isYourGPTNotification(remoteMessage)

// Let the SDK handle an incoming notification
// Returns true if handled (MINIMALIST mode), false otherwise
val handled = YourGPTNotificationClient.handleNotification(context, remoteMessage)
Notification Click Handling
// Handle notification tap — opens the widget automatically
// Call in both onCreate() and onNewIntent()
val handled = YourGPTNotificationClient.handleNotificationClick(activity, intent)
Widget
// Open the YourGPT widget programmatically
YourGPTNotificationClient.openWidget(activity)

// Open the widget and navigate to a specific conversation
YourGPTSDK.openSession(activity, sessionUid = "conversation-uid")
State & Mode
// Check if notification client is initialized
val ready = YourGPTNotificationClient.isInitialized()

// Get current notification mode
val mode = YourGPTNotificationClient.getNotificationMode()

// Change notification mode at runtime
YourGPTNotificationClient.setNotificationMode(NotificationMode.ADVANCED)
Advanced Mode: Custom Notification Handling
If you use ADVANCED mode, the SDK identifies YourGPT notifications but does not display them — your app handles display. This gives you full control over styling, actions, and message routing.
When to Use Advanced Mode
- Custom notification styling beyond the SDK defaults
- Different handling for different message types (urgent, promotional, etc.)
- Integration with your own backend alongside YourGPT
- Custom actions on notifications
- Analytics or logging of notification events
Important
Only one FirebaseMessagingService can handle MESSAGING_EVENT per app. If you register a custom service, do not also register com.yourgpt.sdk.YourGPTNotificationService.
Complete Example
class MainActivity : AppCompatActivity() {

    private val notificationPermissionLauncher = registerForActivityResult(
        ActivityResultContracts.RequestPermission()
    ) { granted -> /* handle result */ }

    override fun onCreate(savedInstanceState: Bundle?) {
        super.onCreate(savedInstanceState)
        setContentView(R.layout.activity_main)

        // 1. Initialize SDK with notifications
        lifecycleScope.launch {
            YourGPTSDK.quickInitialize(this@MainActivity, "YOUR_WIDGET_UID")
        }

        // 2. Request notification permission (Android 13+)
        if (Build.VERSION.SDK_INT >= Build.VERSION_CODES.TIRAMISU) {
            notificationPermissionLauncher.launch(Manifest.permission.POST_NOTIFICATIONS)
        }

        // 3. Handle notification click
        handleNotificationIntent(intent)

        // 4. Open widget on button click
        findViewById<Button>(R.id.btn_open_chat).setOnClickListener {
            val config = YourGPTConfig(widgetUid = "YOUR_WIDGET_UID")
            YourGPTSDK.openChatbotBottomSheet(supportFragmentManager, config)
        }
    }

    override fun onNewIntent(intent: Intent?) {
        super.onNewIntent(intent)
        intent?.let { handleNotificationIntent(it) }
    }

    private fun handleNotificationIntent(intent: Intent) {
        YourGPTNotificationClient.handleNotificationClick(this, intent)
    }
}
Testing
- Install the app on a physical device (FCM may not work on emulators without Google Play Services)
- Grant notification permission when prompted
- Open the widget at least once (so the FCM token is registered with the backend)
- Close the app
- Send a test message through the YourGPT dashboard
Troubleshooting
Notifications not received
- Verify Firebase credentials are uploaded and showing "Configured" on the YourGPT Dashboard (Settings → Push Notifications)
- Verify
google-services.jsonis in the correct location and matches your package name - Confirm the
YourGPTNotificationServiceis declared in yourAndroidManifest.xml - Check that notification permission is granted (Settings > Apps > Your App > Notifications)
- Ensure the widget was opened at least once after SDK initialization (for token registration)
- Check logcat for
YourGPTNotificationClientorYourGPTNotificationServicelogs
Notifications received but not displayed
- Ensure
POST_NOTIFICATIONSpermission is granted on Android 13+ - Check that the notification channel
yourgpt_messagesis not disabled in device settings - Verify
notificationModeis not set toDISABLED
Widget doesn't open on notification tap
- Ensure
handleNotificationClick()is called in bothonCreate()andonNewIntent() - Verify your launcher activity handles the
com.yourgpt.sdk.OPEN_WIDGETaction
Token not registered
- The FCM token is sent via the WebView JS bridge — the widget must be opened at least once
- Check logcat for
"FCM token successfully sent to widget backend"message - If the token was refreshed while the widget was closed, it will be re-sent next time the widget opens