Conditions
What Are Conditions?
Conditions allow your chatbot to make decisions during a conversation.
You can branch the AI agents flow based on user input, stored variables, or AI understanding. If a condition is met, the AI follows that specific path. If no condition matches, it takes the No Match path.
Types of Conditions
YourGPT AI Studio supports two types of conditions:
- AI Condition: for flexible matching using natural language
- Manual Condition: for logical rules using variables or expressions
Let's understand them in detail.
1. AI Condition: Intent Matching
AI Condition uses natural language understanding to define the possible paths (A, B, C, etc.) and the AI determines which path best matches the condition & provided context type. This is much more flexible than writing complex logical rules.
How to Use AI Condition
To use AI Condition, follow these 5 steps:
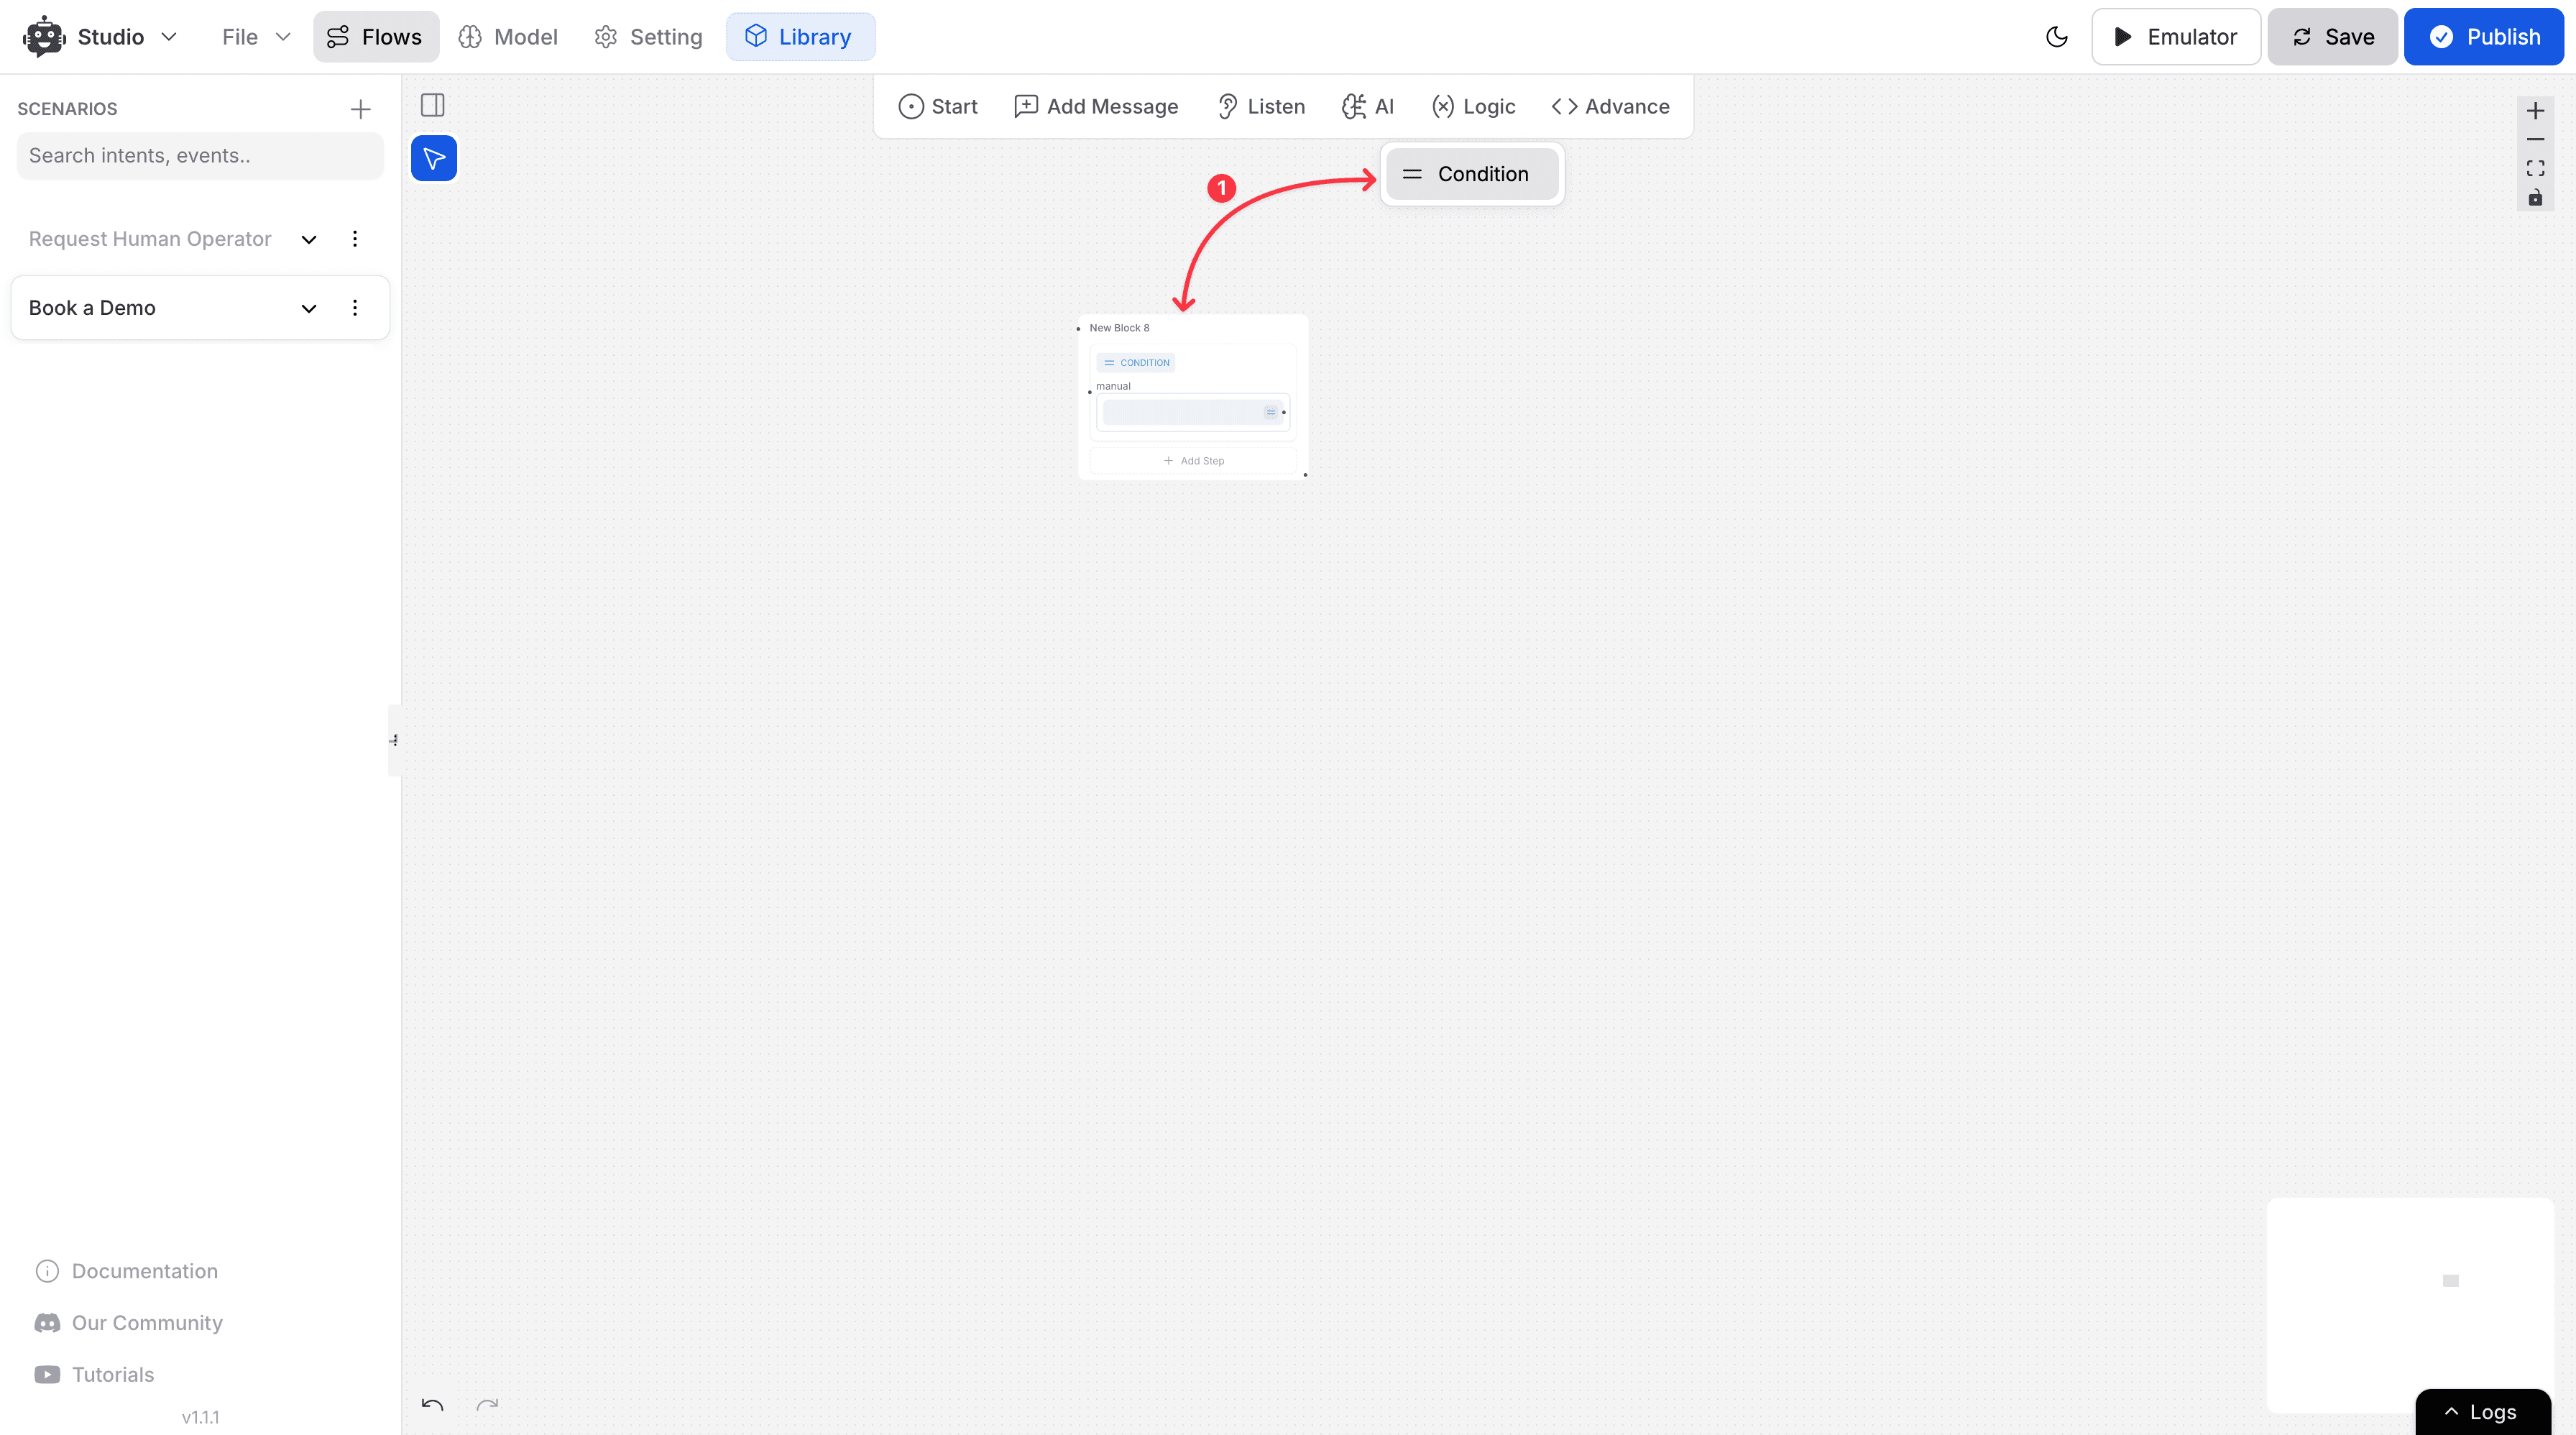
- Add a Condition Step: Click on "Logic" - then drag the "Condition node" in your flow.
-
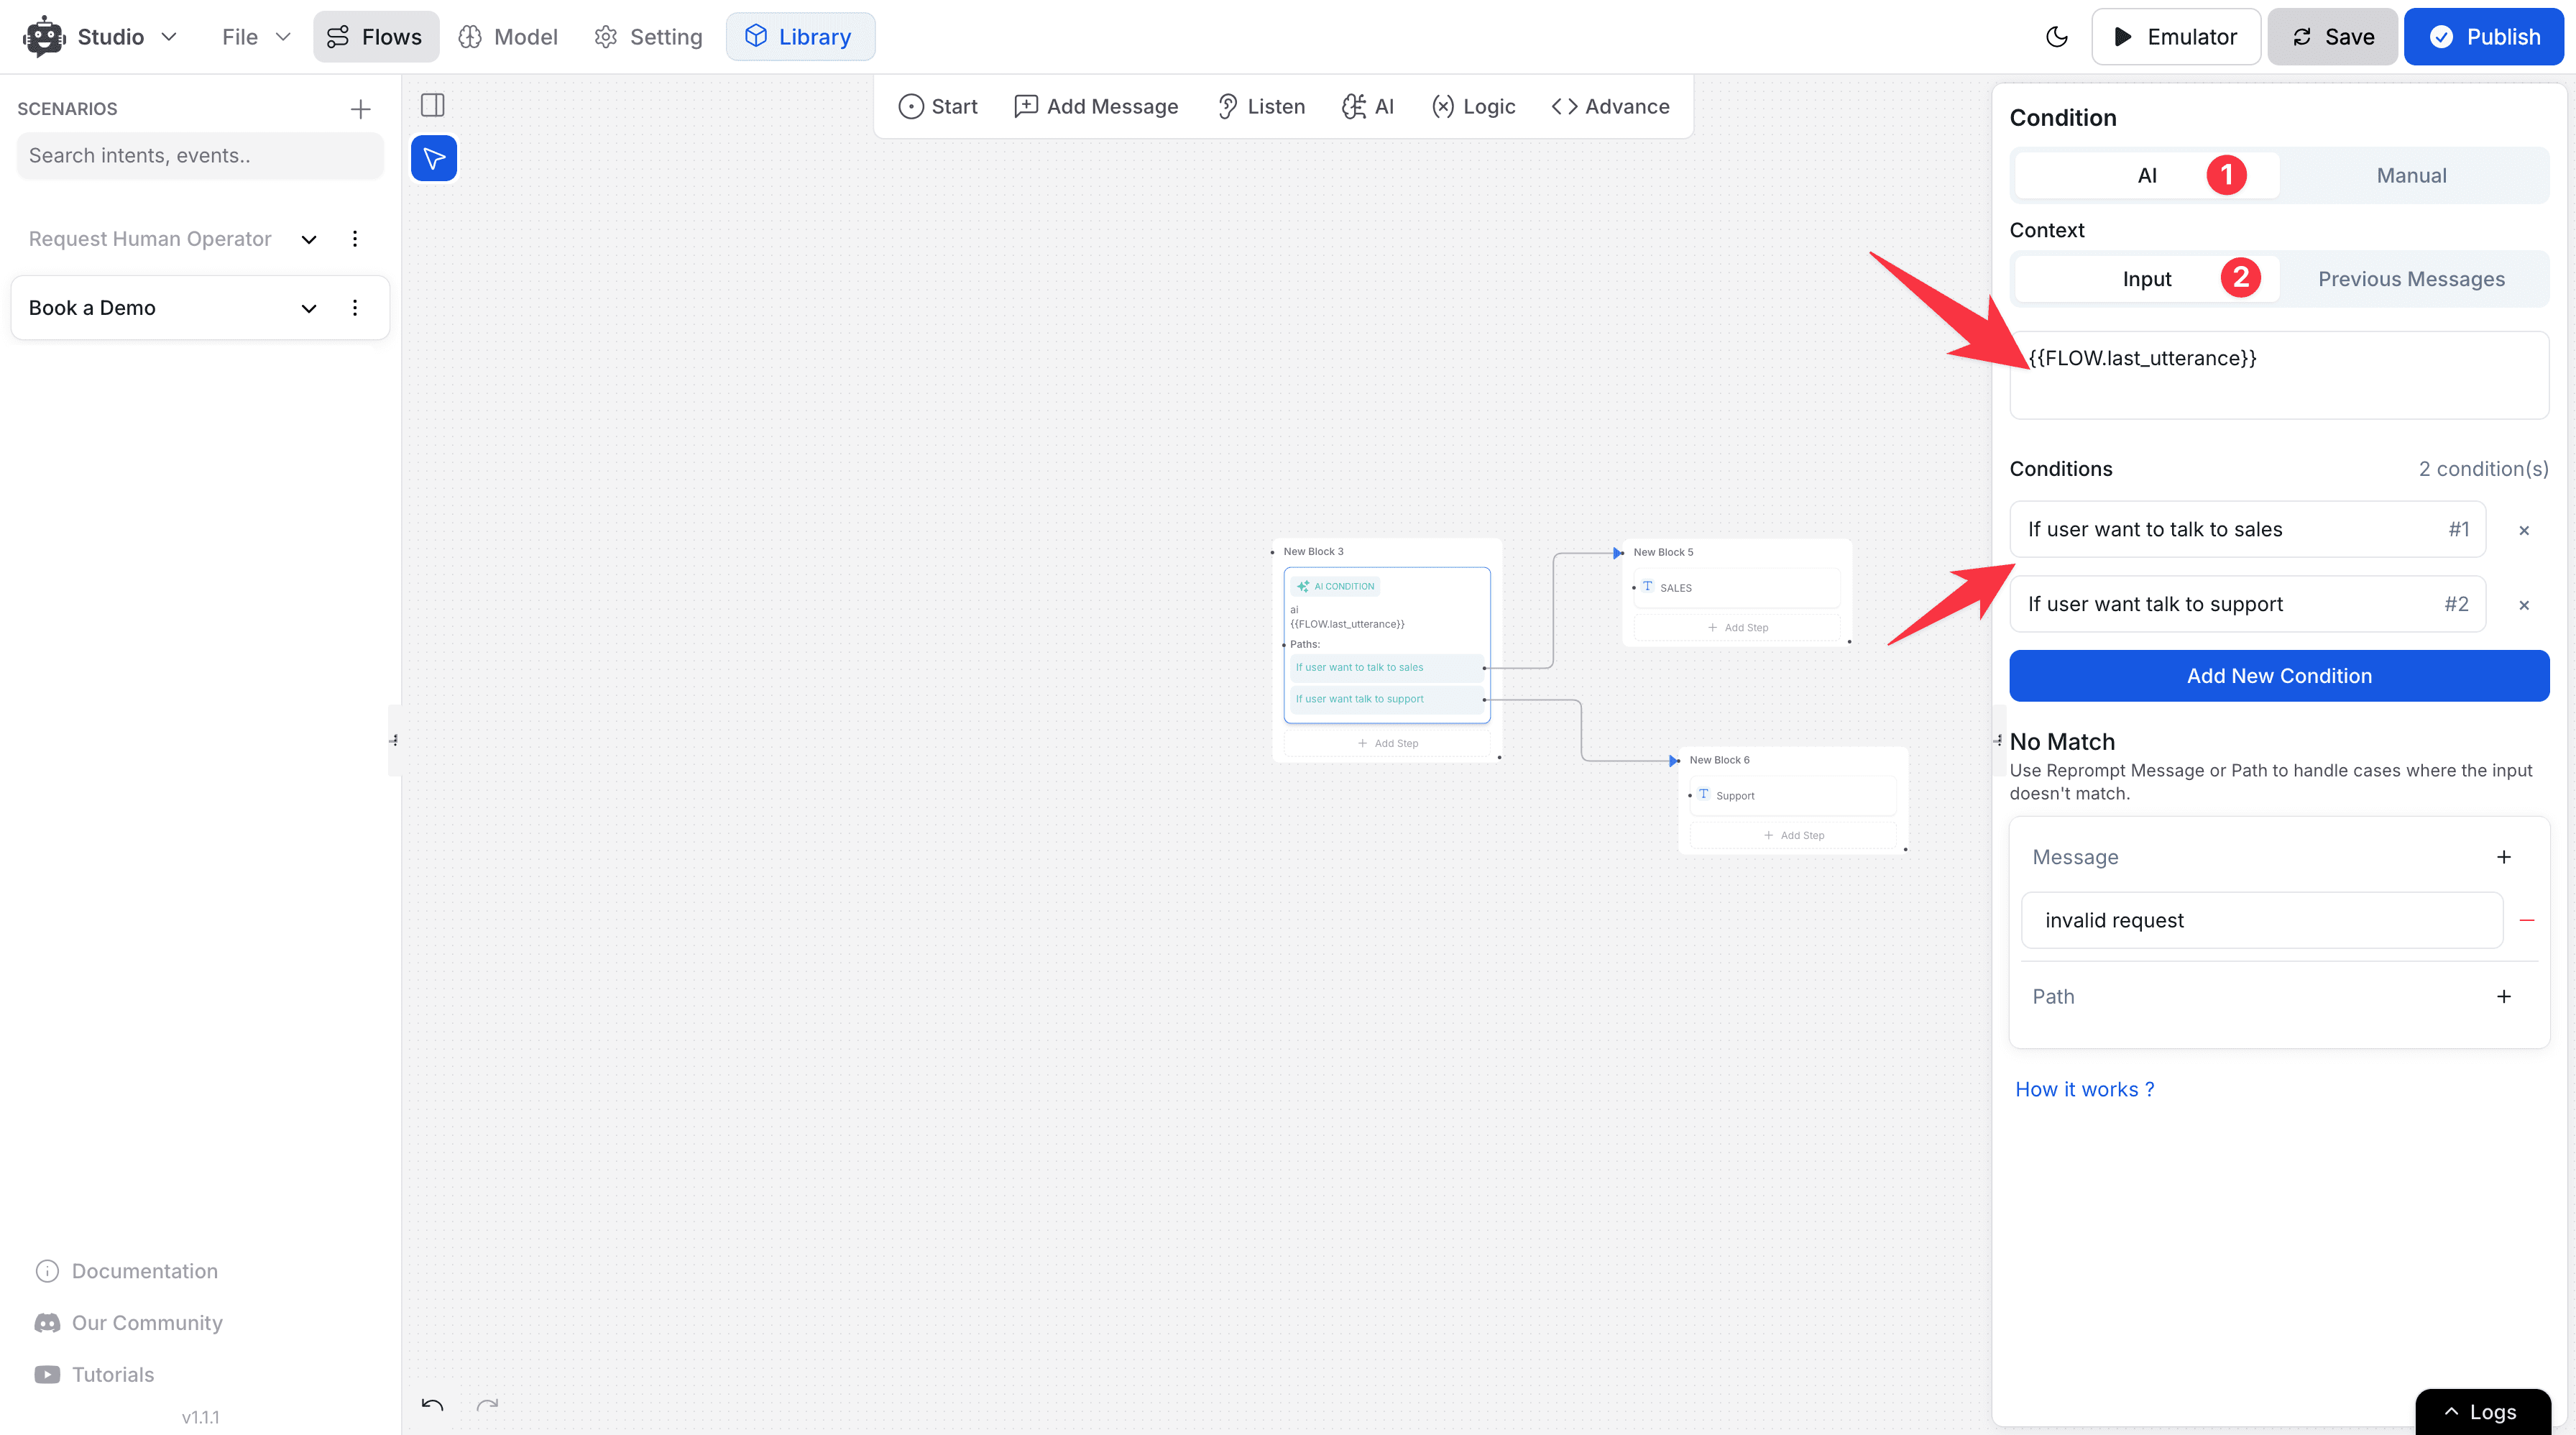
Context: You can choose between the AI condition context type - what the AI should analyze:
- Input: Use this when you want to use custom logic & want to use variables. (You can add your input in the field e.g.
{{FLOW.message}}) - Previous Messages: Use this when you want to consider the last few messages in the conversation (You can pick number to e.g. 5 messages)
- Input: Use this when you want to use custom logic & want to use variables. (You can add your input in the field e.g.
-
Conditions: Add natural language statements that represent possible user intents. The AI will match the input to the most relevant Context condition.
-
No Match: Set a fallback message or path to follow if none of the conditions apply.
Use AI Condition when you need to make decisions based on natural language understanding rather than exact matches. This is ideal for situations where users might express the same intent in different ways, making rigid pattern matching insufficient for capturing the full range of possible inputs.
2. Manual Condition: Rule-Based Matching
Use Manual Condition when you know what specific input to check, such as email, numbers, or dropdown values.
How to Use Manual Condition
Follow these 6 steps to set it up:
-
Add a Condition Step: Click Add Step → Condition in your flow.
-
Name the Condition: Use clear names like
Check Support TypeorCheck Email. -
Add Expression(s): Click Add Expression and choose the expression type:
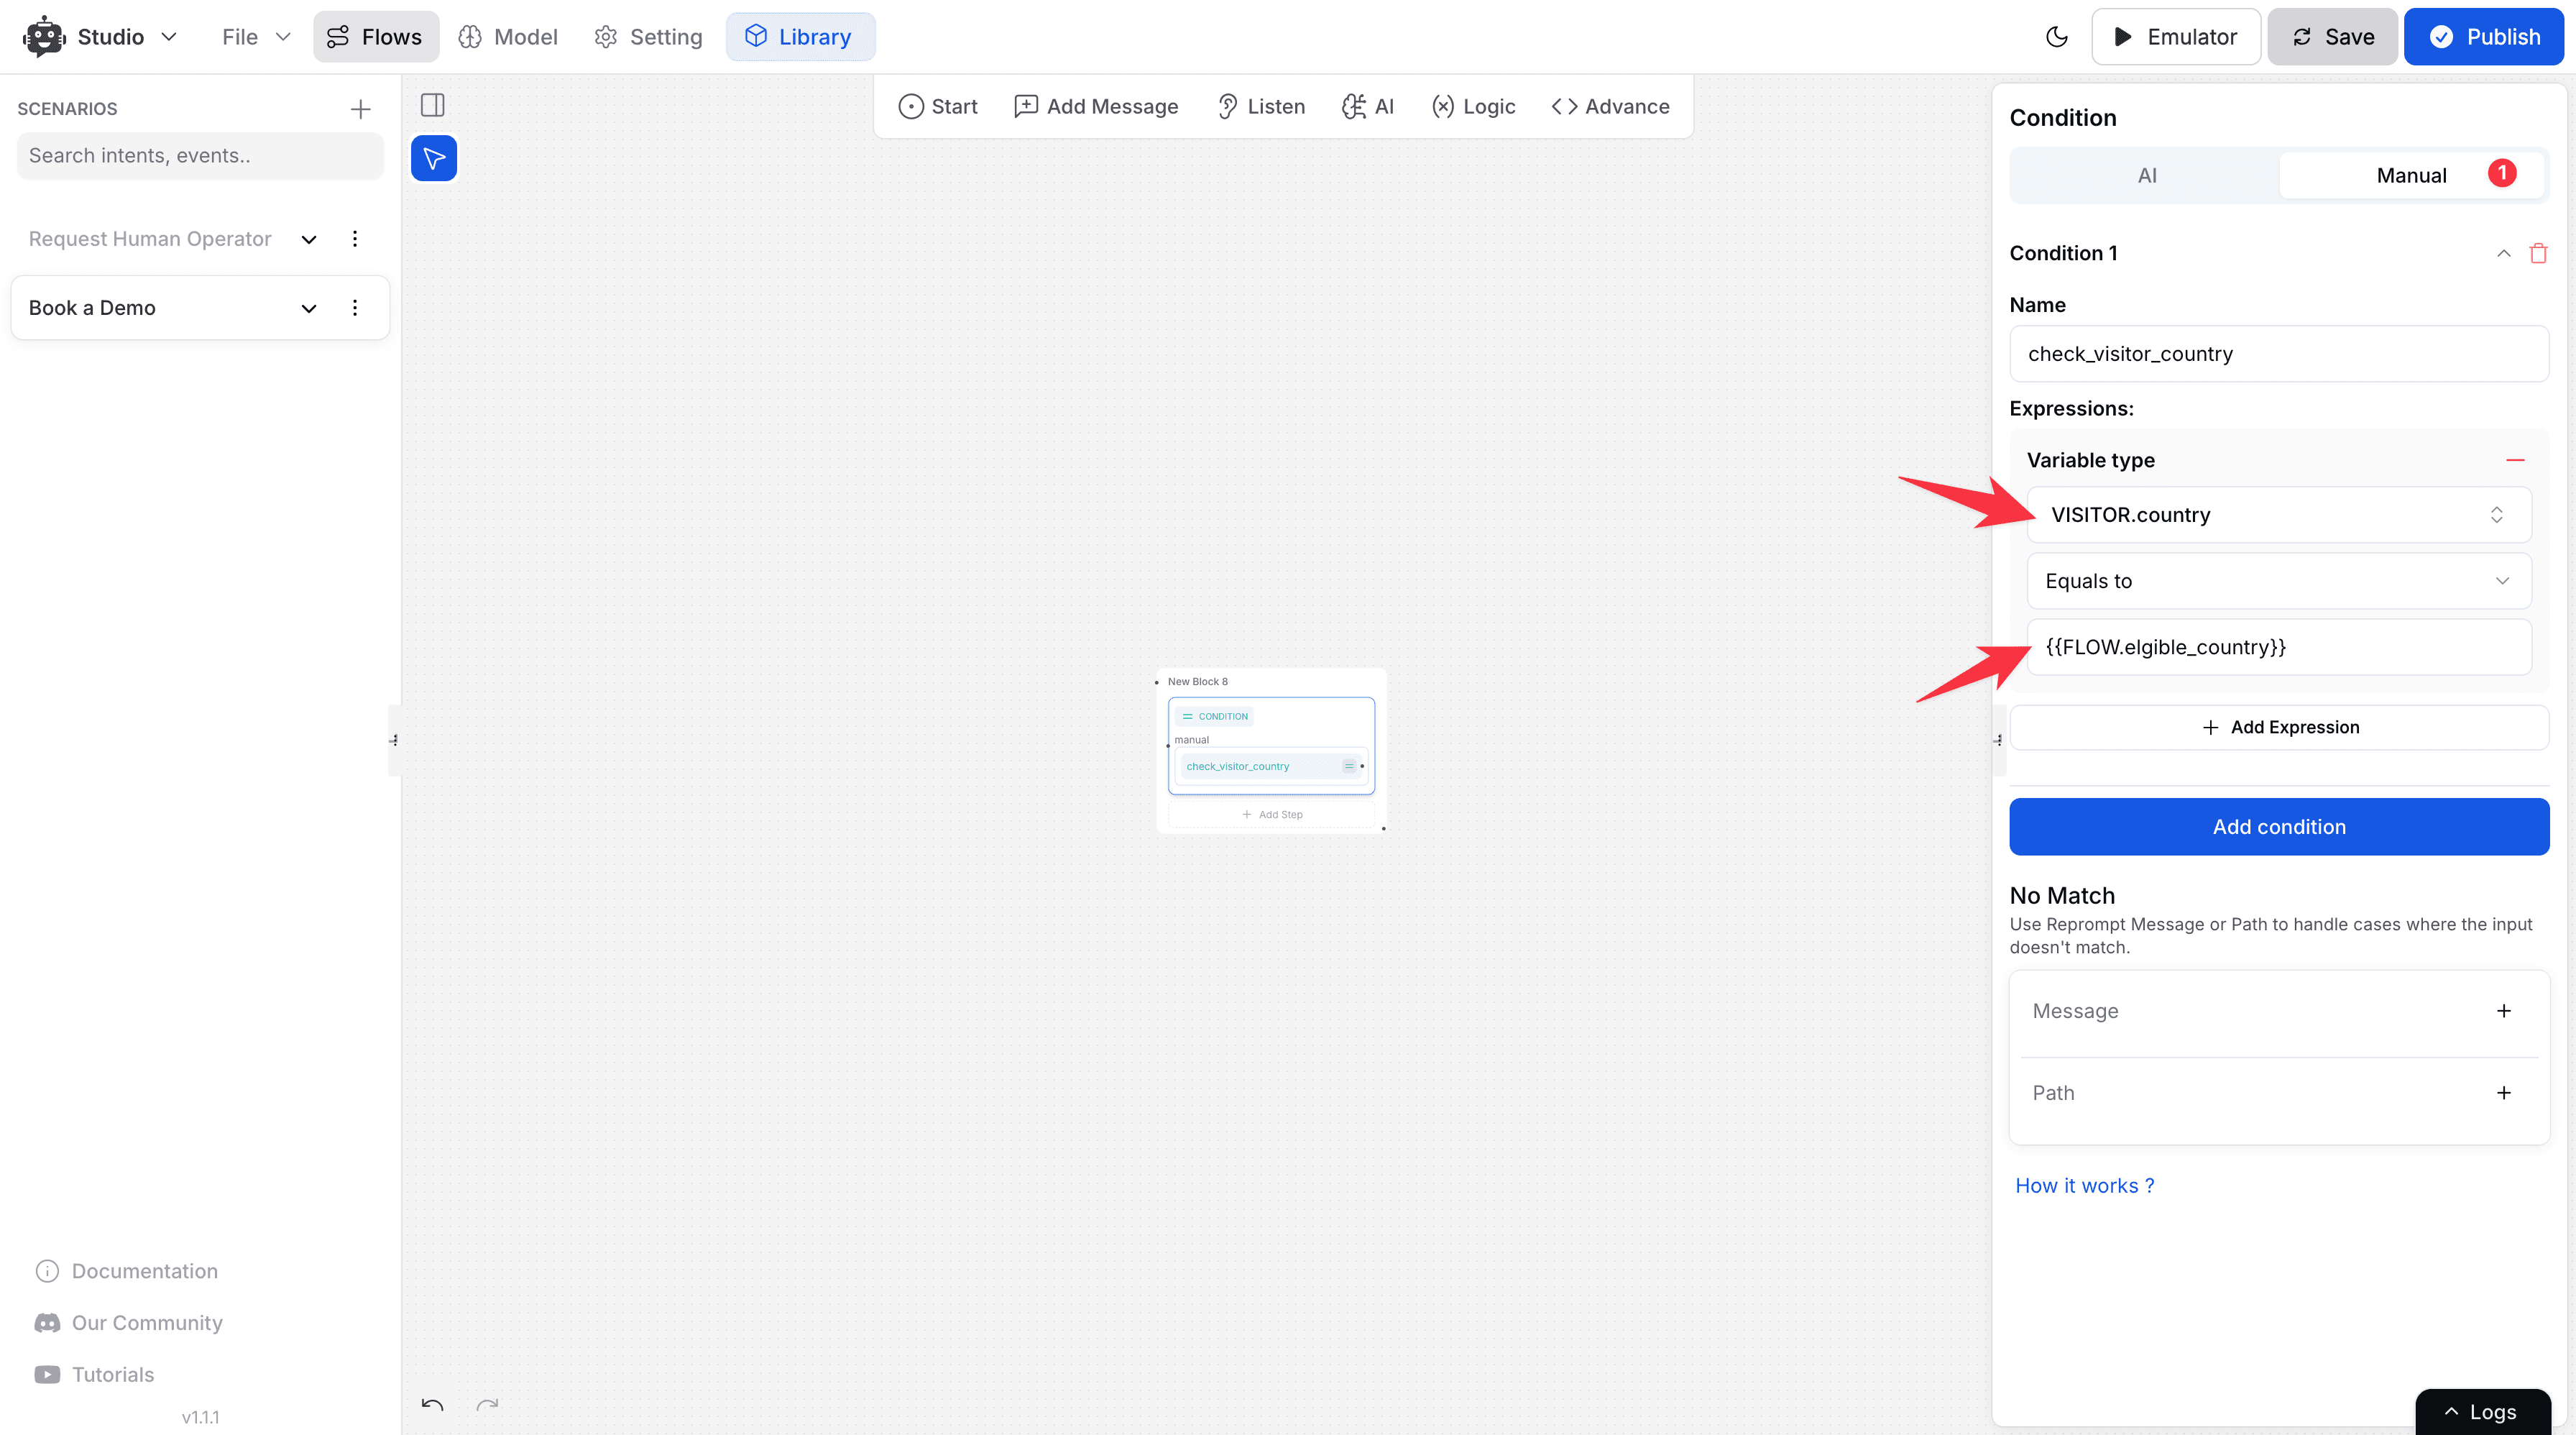
- Variable Type: Check against a stored variable (e.g.
{{USER.email}}) - Value Type: Compare input with a fixed value
- Logic Group: Combine expressions using
AND/OR
- Choose the Operator
Supported operators:
- Equals to
- Contains
- Greater than / Less than
Add the value or variable to check.
Use Add Expression for multiple checks.
- Add Fallback (No Match)
Set up a Reprompt Message or a fallback Path when nothing matches.
- Remove Condition (Optional)
Click Remove Condition to delete the condition block.
Best Practices & Common Pitfalls
Avoid these common mistakes when setting up conditions:
- Generic names: Avoid names like
Check 1. Use descriptive titles. - Wrong operator: Use "Contains" for partial matches. "Equals to" checks for exact values.
- No fallback: Always define a No Match path.
- Case sensitivity (for Manual Conditions): "yes" ≠ "Yes". Use lowercase consistently or add conditions for both.
- Overcomplicating logic: Keep Manual Conditions simple and readable.
Note
To know more about conditions in YourGPT Chatbot Studio, follow our AI Helpdesk article.