WordPress
Add your AI chatbot to WordPress in minutes using our official plugin
Integrate YourGPT Chatbot into your WordPress website to provide instant, AI-powered support. Our official plugin makes the setup effortless and requires no coding.
WordPress Plugin Benefits
The official plugin automatically handles script injection and works seamlessly with all WordPress themes and page builders like Elementor, Divi, and Beaver Builder.
Quick Installation
The fastest way to get started is by using the official plugin from the WordPress marketplace.
WordPress Plugin Installation
To install the plugin, follow these steps:
Prerequisites
- A YourGPT account with an active chatbot.
- Admin access to your WordPress site.
- Your unique Widget ID from the YourGPT dashboard.
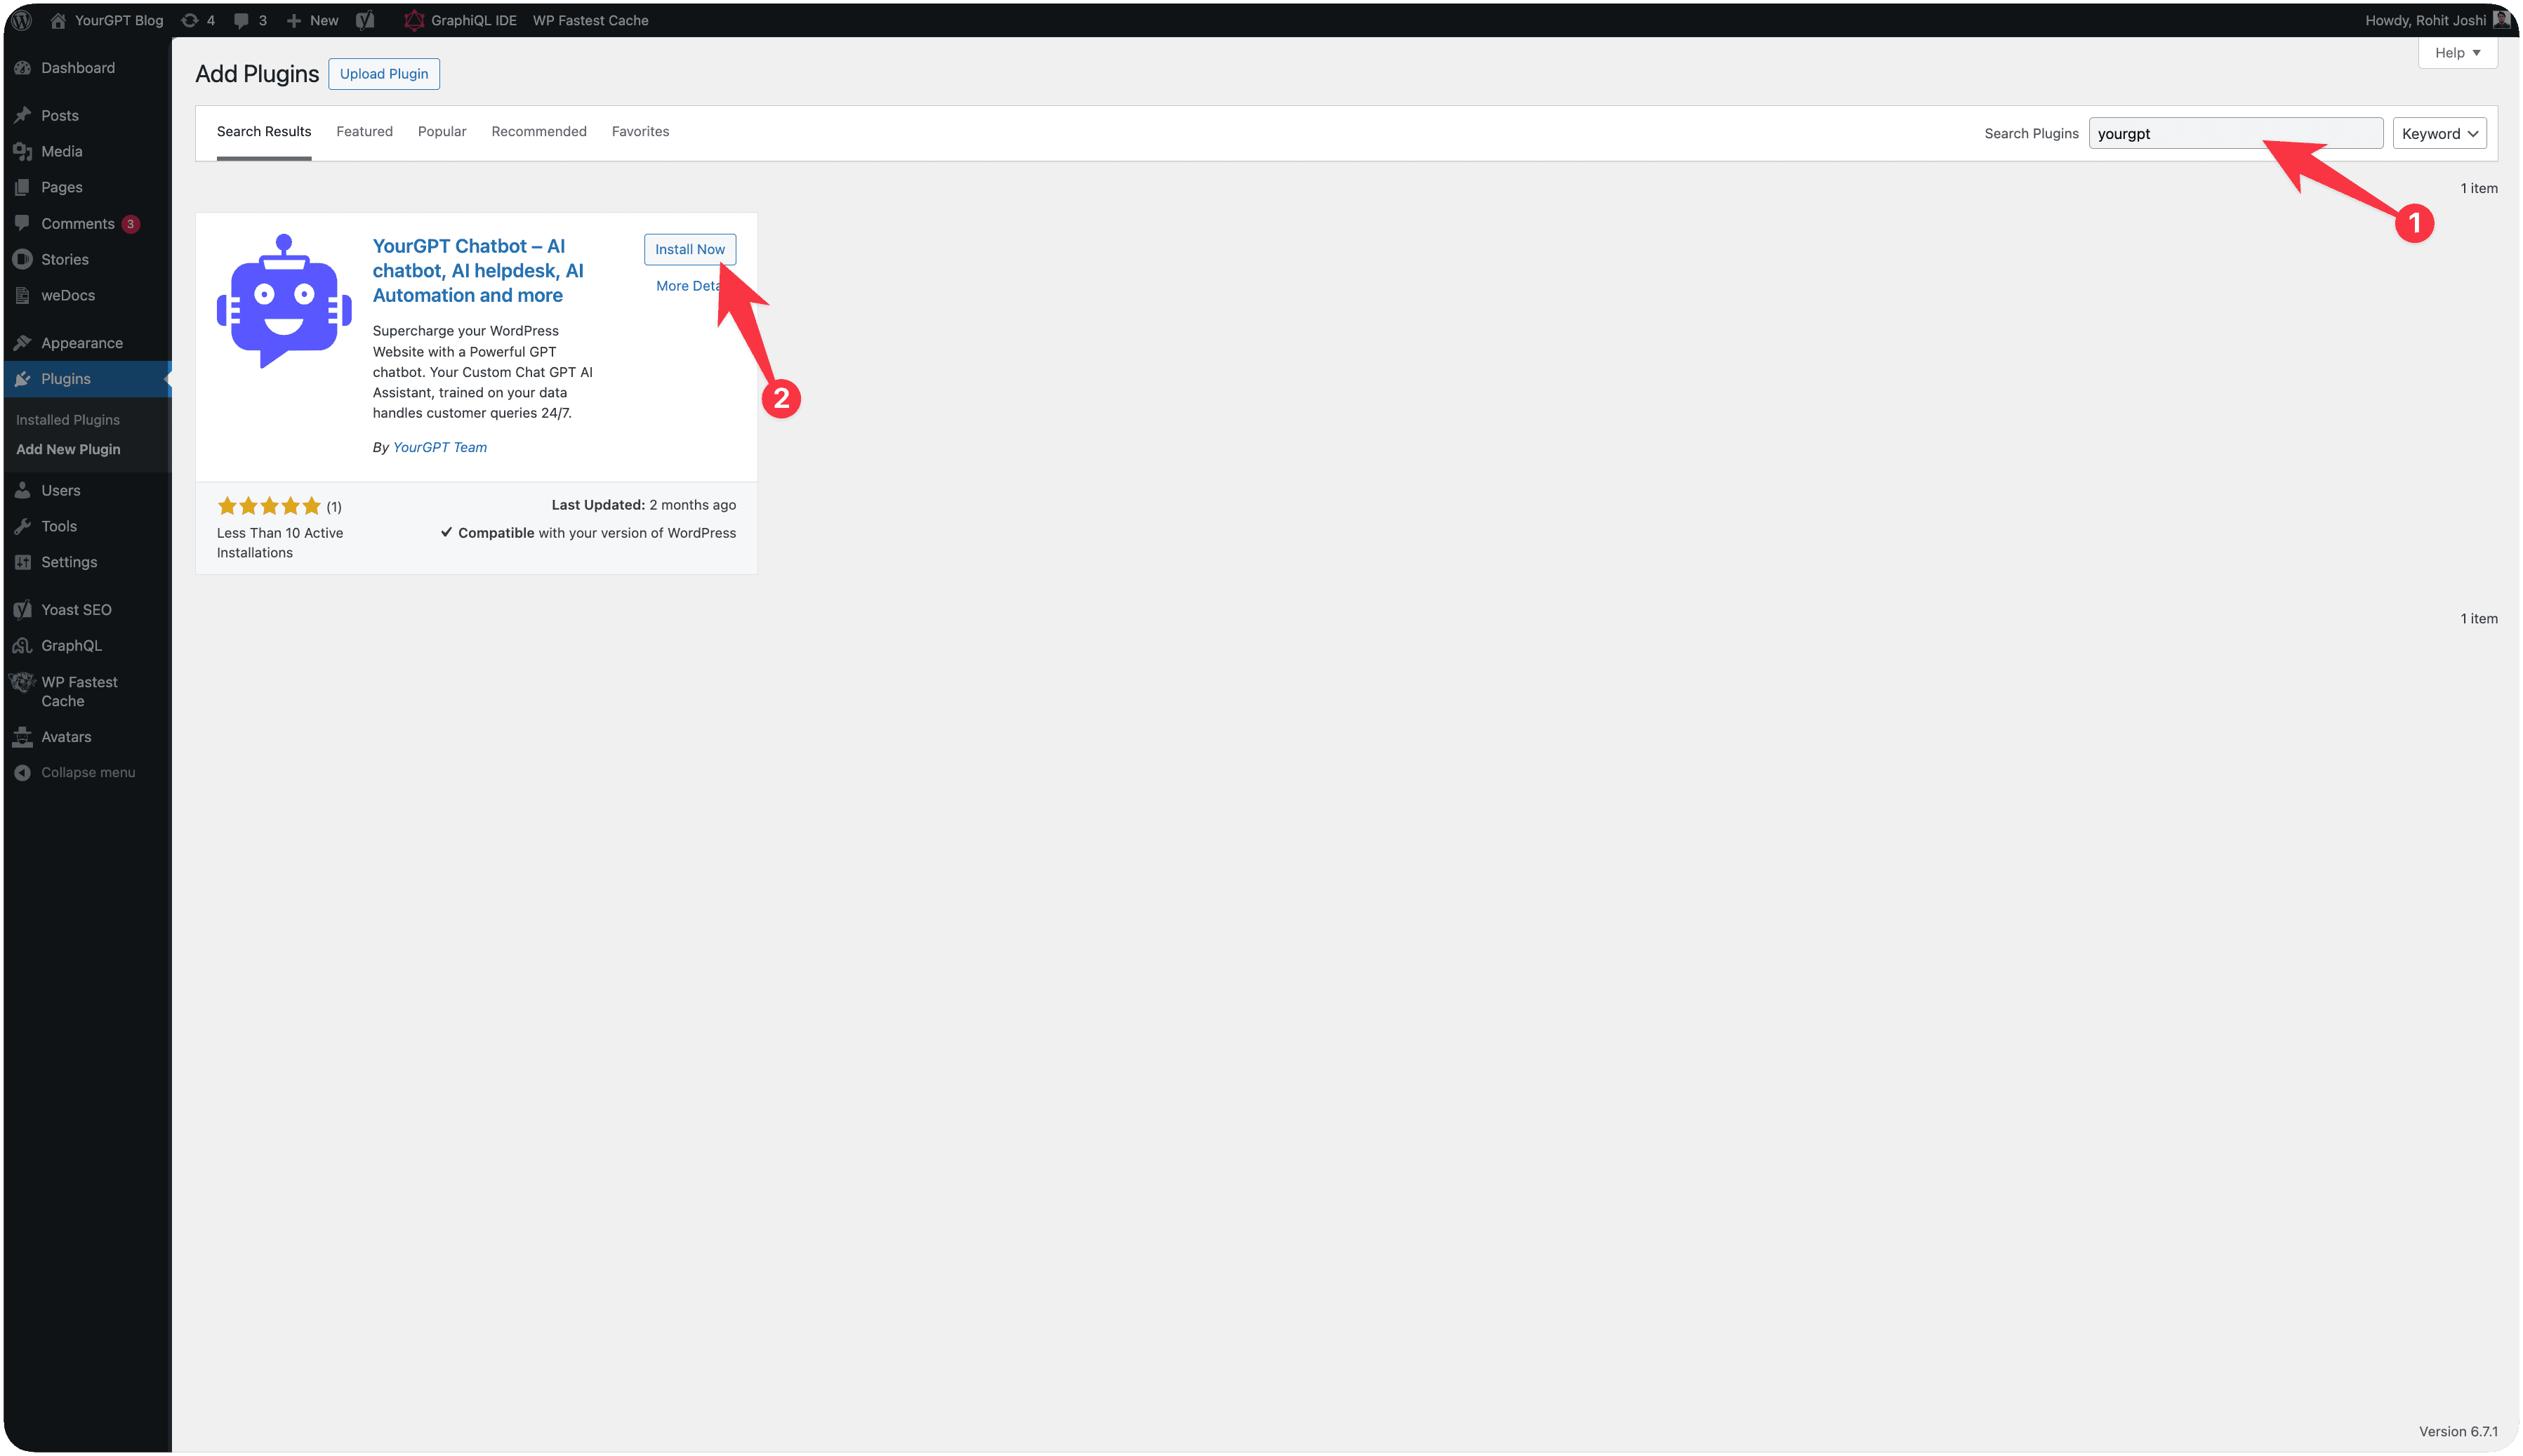
Log in to your WordPress dashboard, navigate to Plugins → Add New, and search for "YourGPT Chatbot".
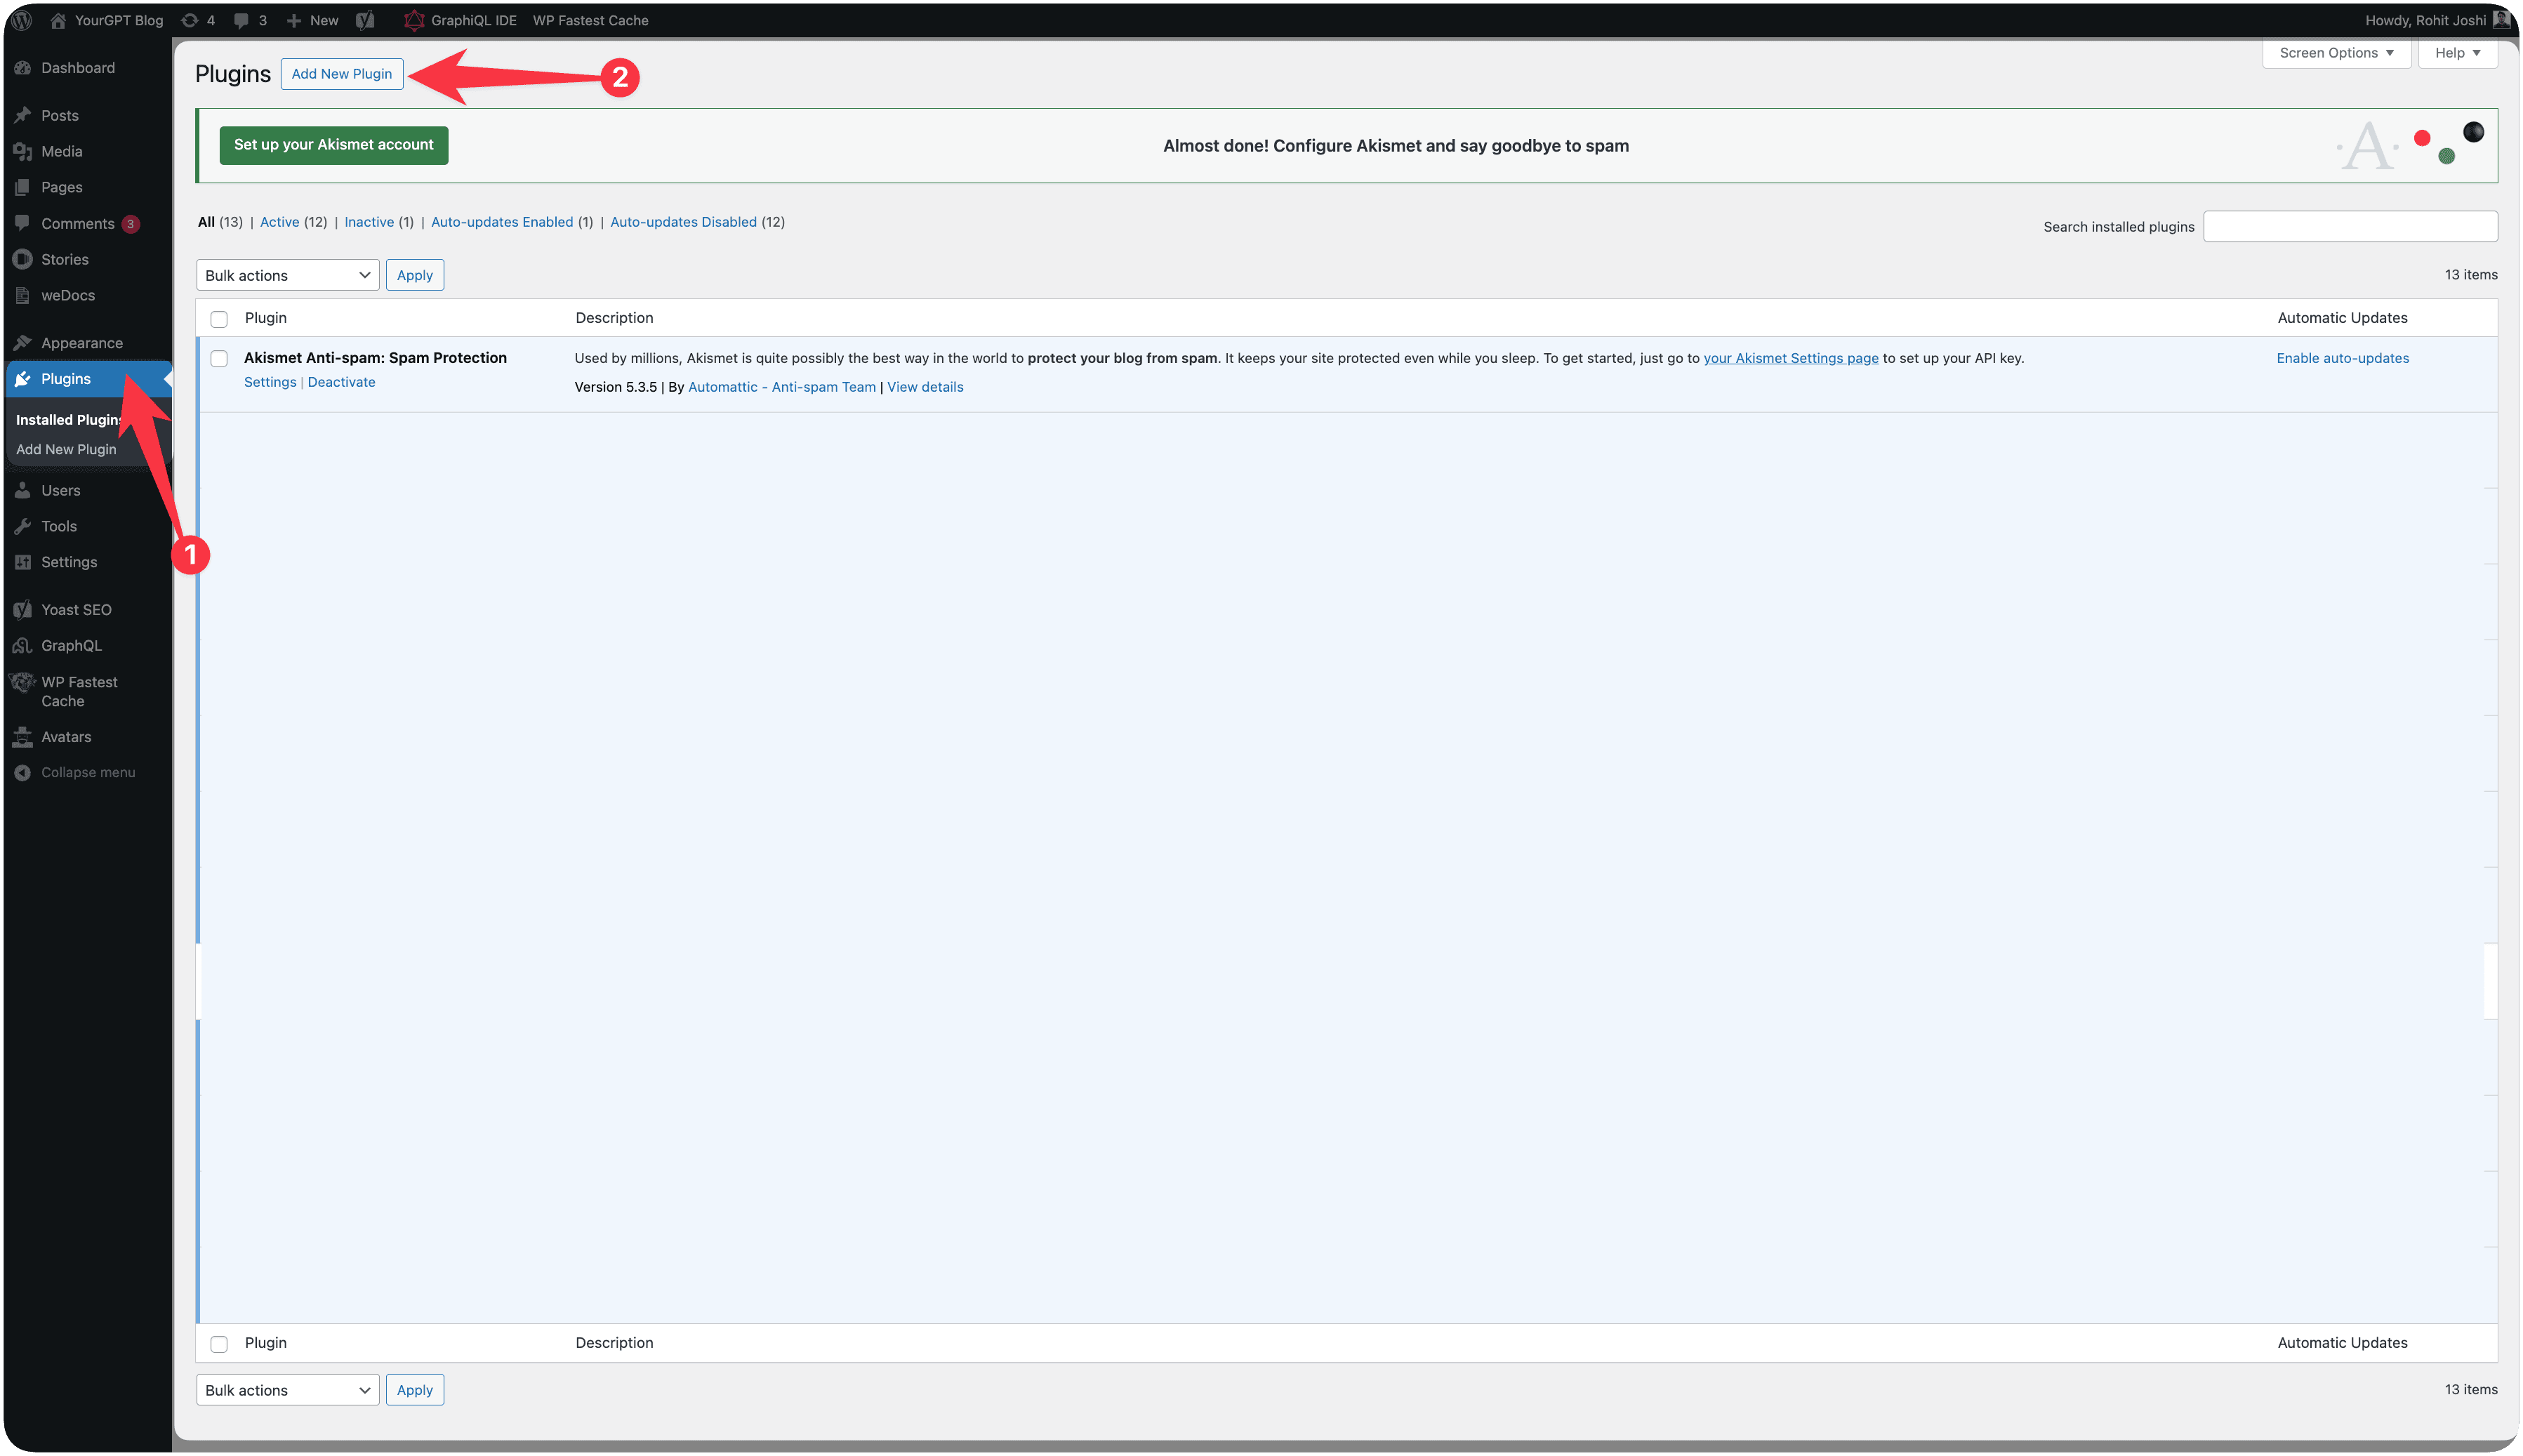
Click Install Now, then Activate the plugin to enable it on your site.
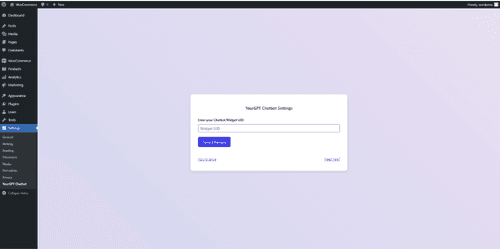
Go to Settings → YourGPT Chatbot, paste your Widget ID, and click Save Changes.
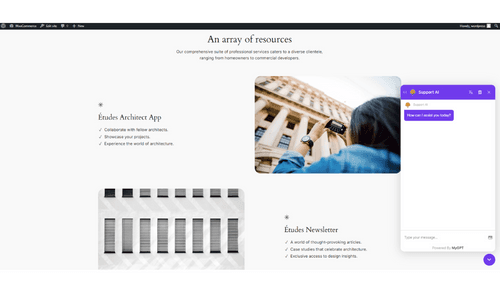
Visit your website. Your AI chatbot should now be active in the bottom-right corner.
WooCommerce Integration
Connecting your chatbot to WooCommerce enables advanced features like product search, order status tracking, and customer cart assistance.
Setup API Credentials
Follow these steps to generate the required API credentials for your chatbot:
In WordPress, go to WooCommerce → Settings → Advanced → REST API and click Add Key.
Provide a description (e.g., "YourGPT AI") and set Permissions to Read/Write.

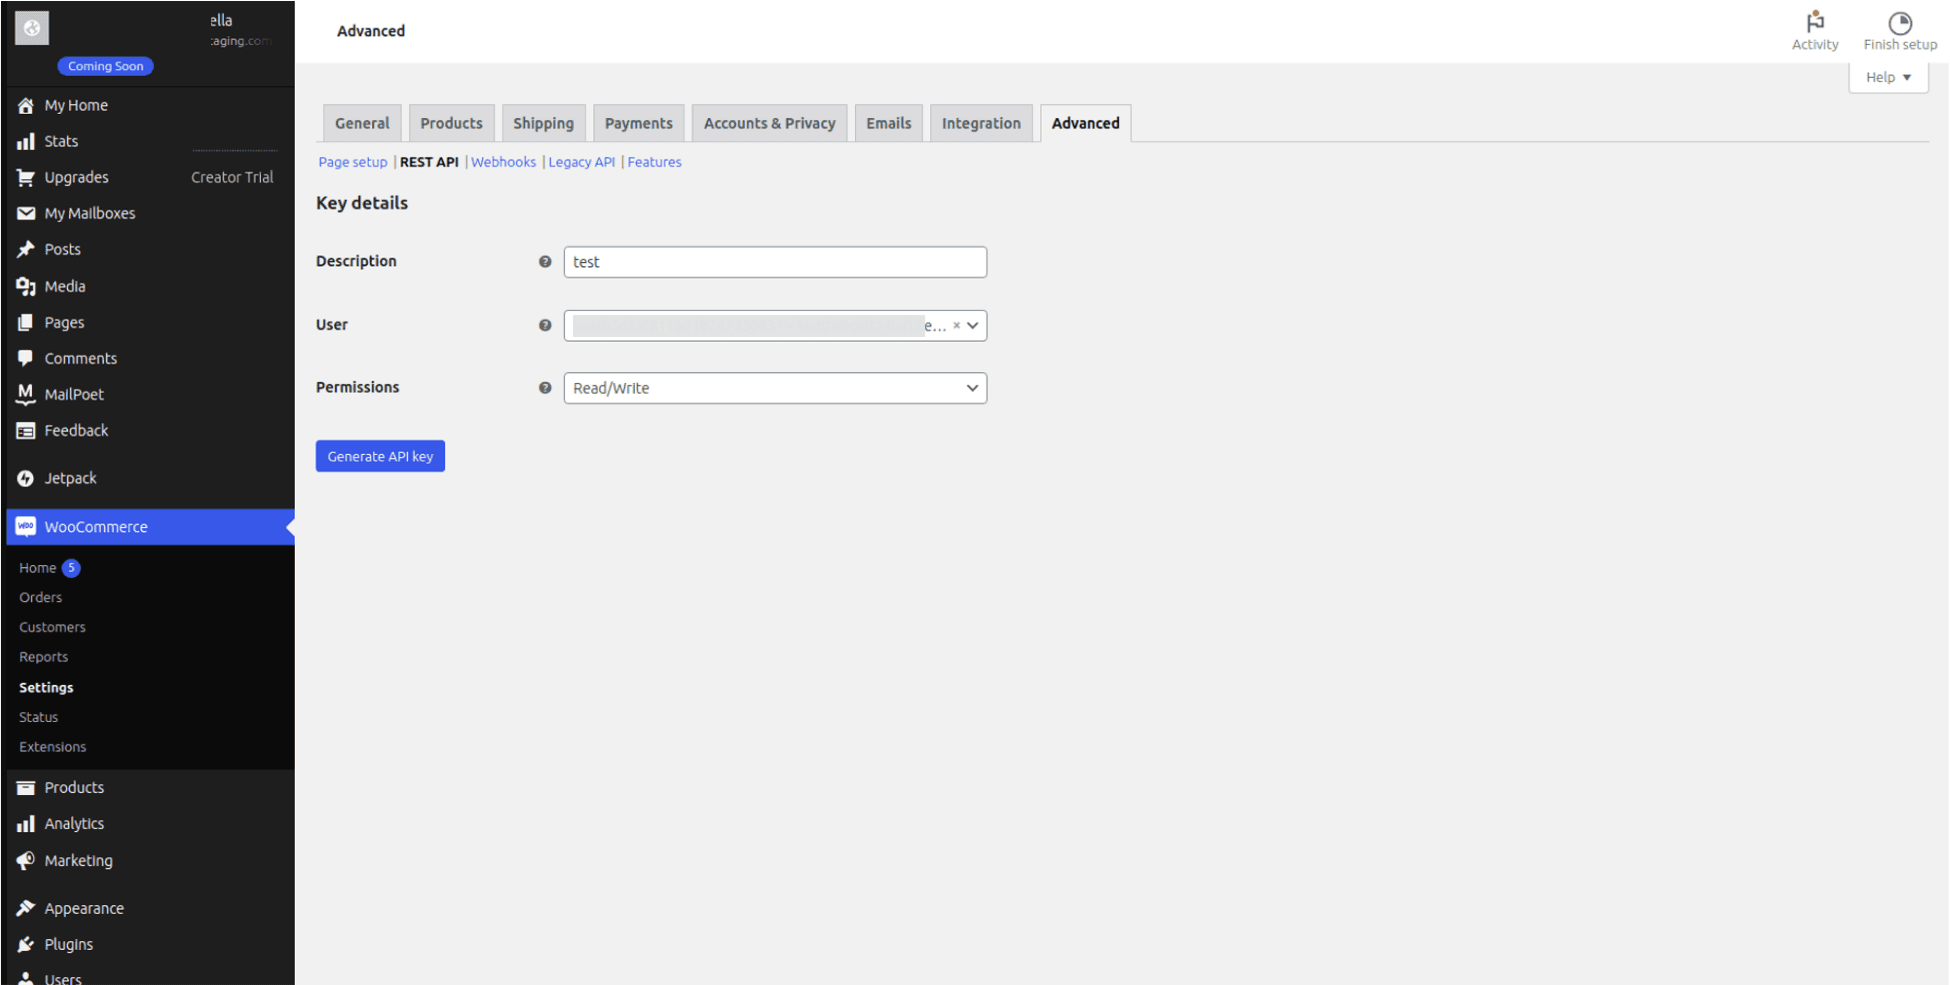
Click Generate API Key. Copy both the Consumer Key and Consumer Secret.
Important
Save these keys securely. The Consumer Secret will not be shown again after you leave this page.
Paste the keys into the WooCommerce integration section of your YourGPT Dashboard.
Advanced & Troubleshooting
Next Steps
Maximize your chatbot's performance with these advanced features:
Train Your Knowledge Base
Upload documents and URLs to make your AI truly expert in your business.
Design Your Widget
Perfect the look and feel to match your brand identity.
Create Custom Workflows
Create multi-step flows for lead gen and support using AI Studio.
Connecting with Other Integrations
Connect your chatbot to other integrations like whatsapp, Instagram, Telegram, and more.
If you need help, our support team is available 24/7 to help with any technical issues.
Enjoy an enhanced user experience with GPT Chatbot seamlessly integrated into your WordPress site!