Discord Integration
Connect YourGPT AI Chatbot to Discord. Set up auto integration, custom bot, or self-hosted Ping Mode to respond to @mentions and channel messages.
💡 Connecting Your Chatbot with Discord
Auto Installation
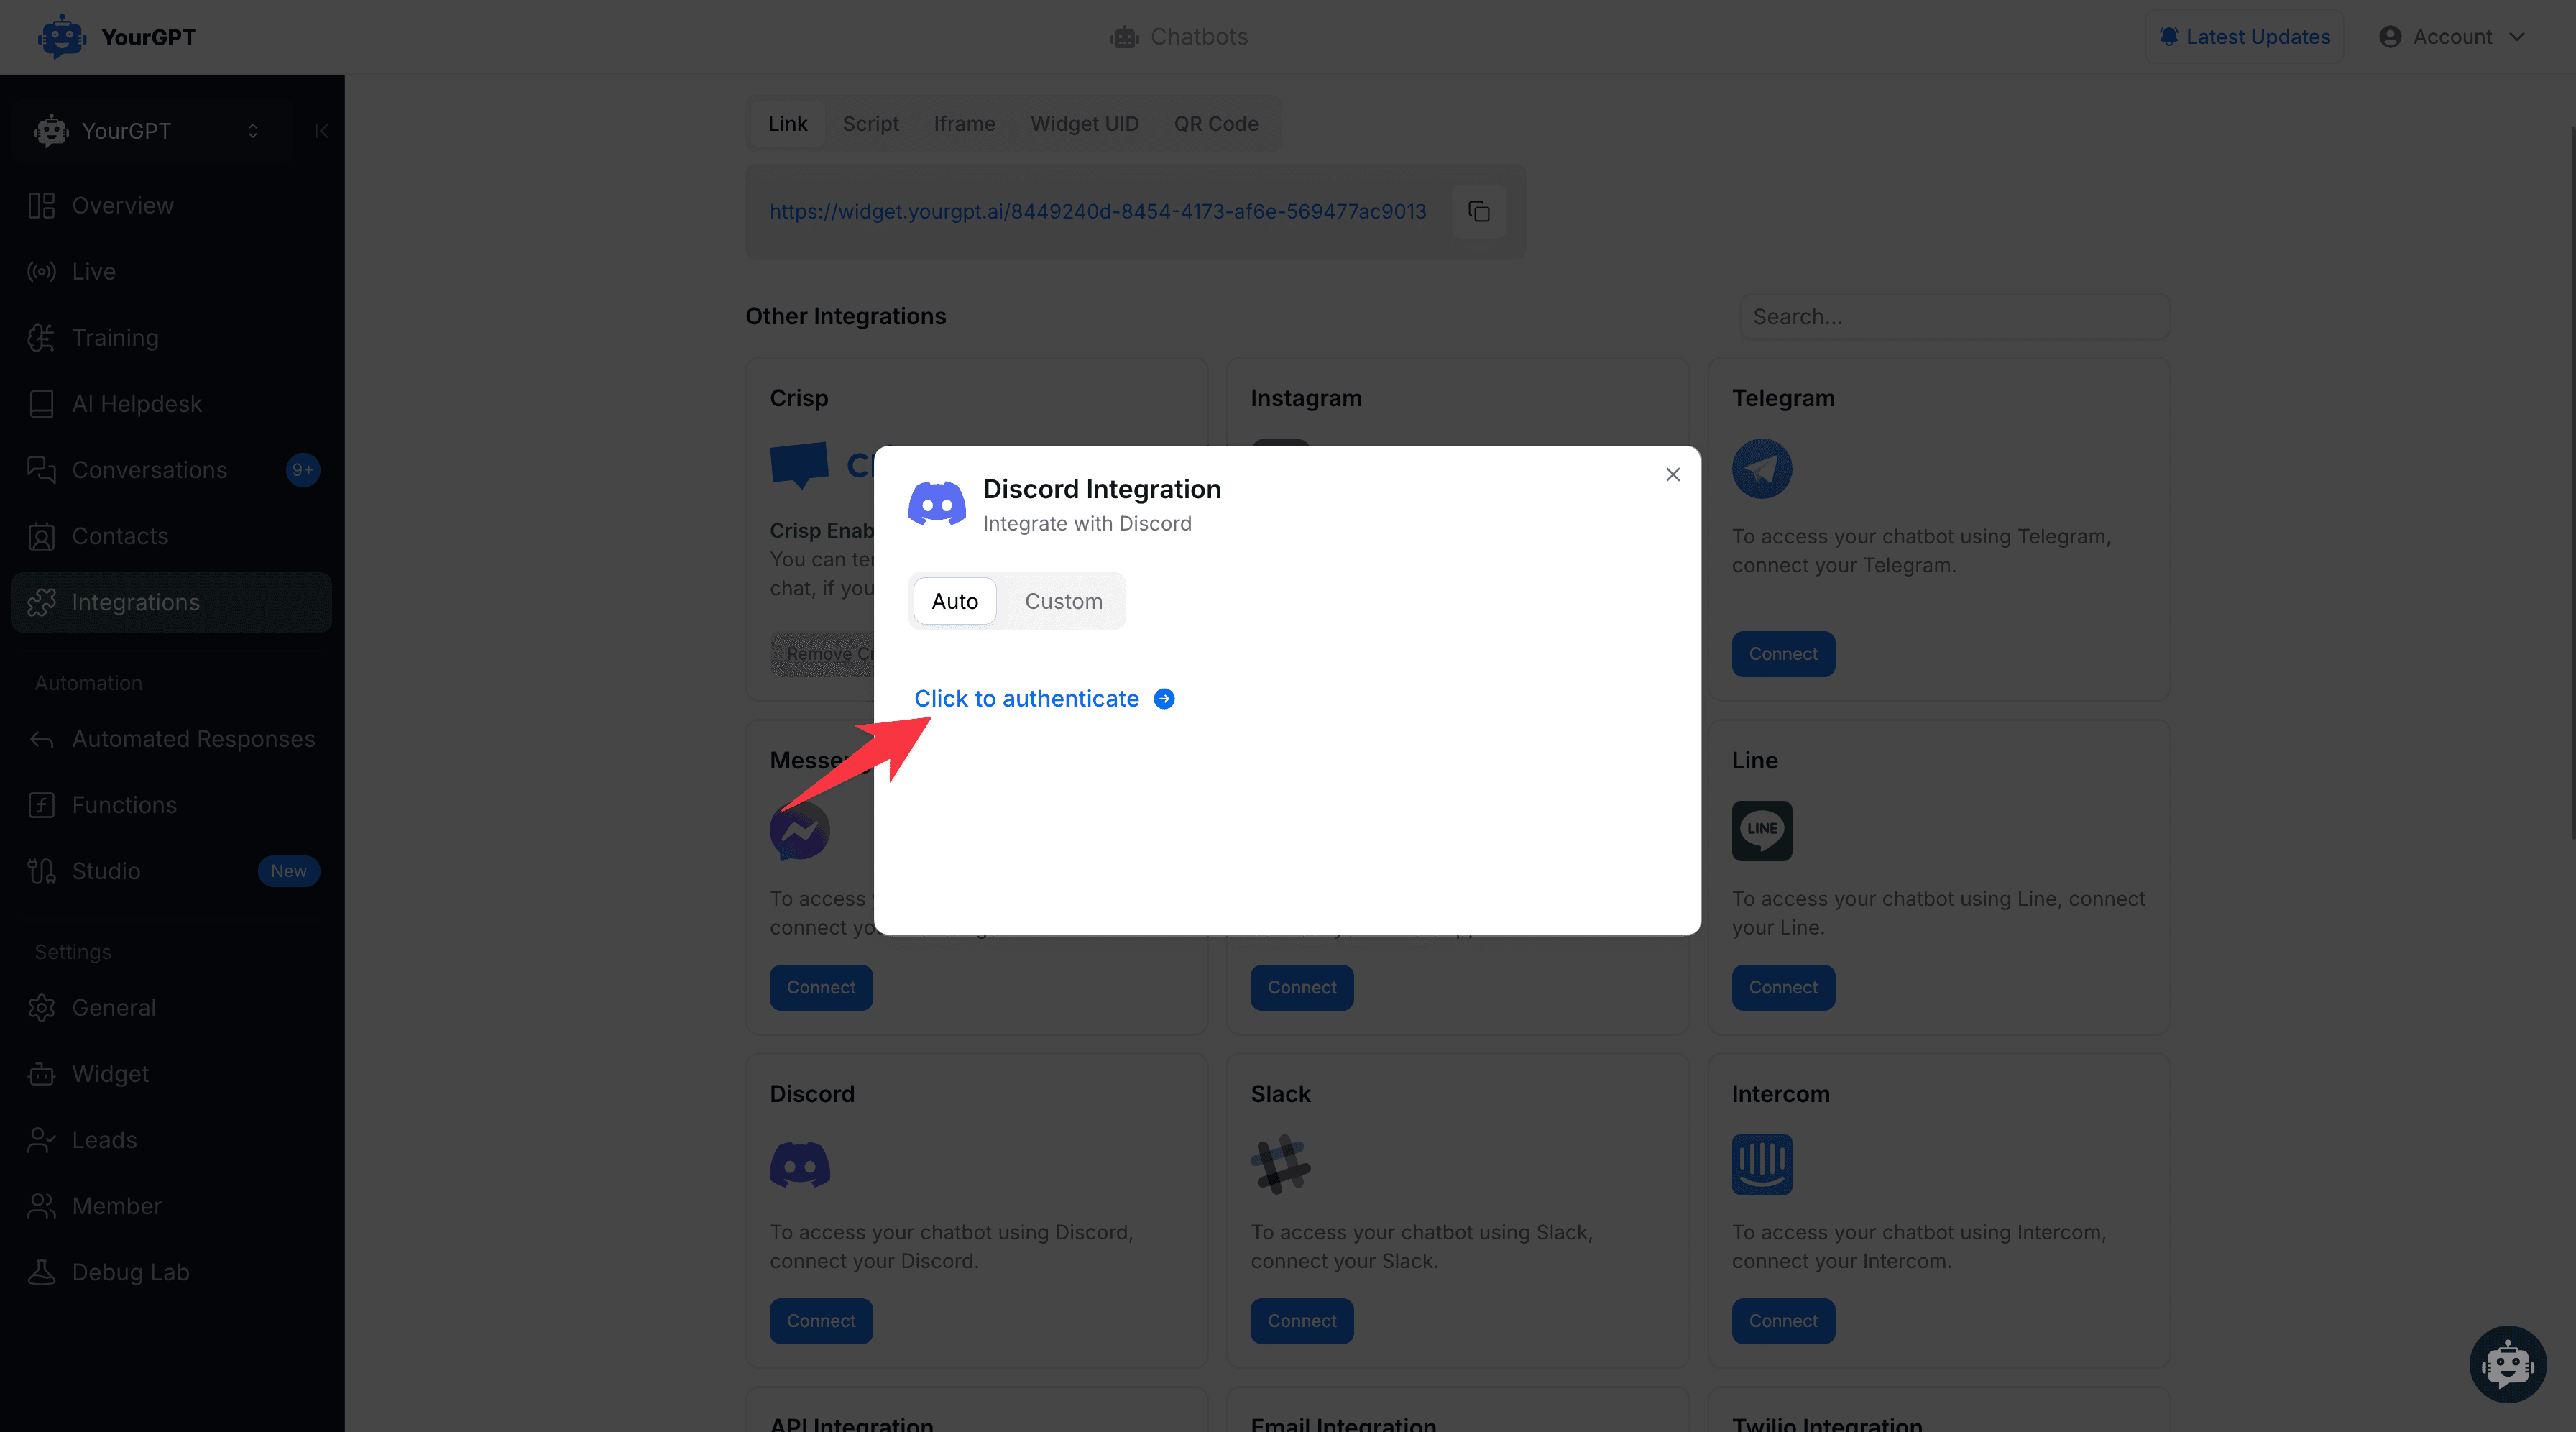
Select Auto and Authenticate
Select Auto from the integration options, then tap on "Click to Authenticate".
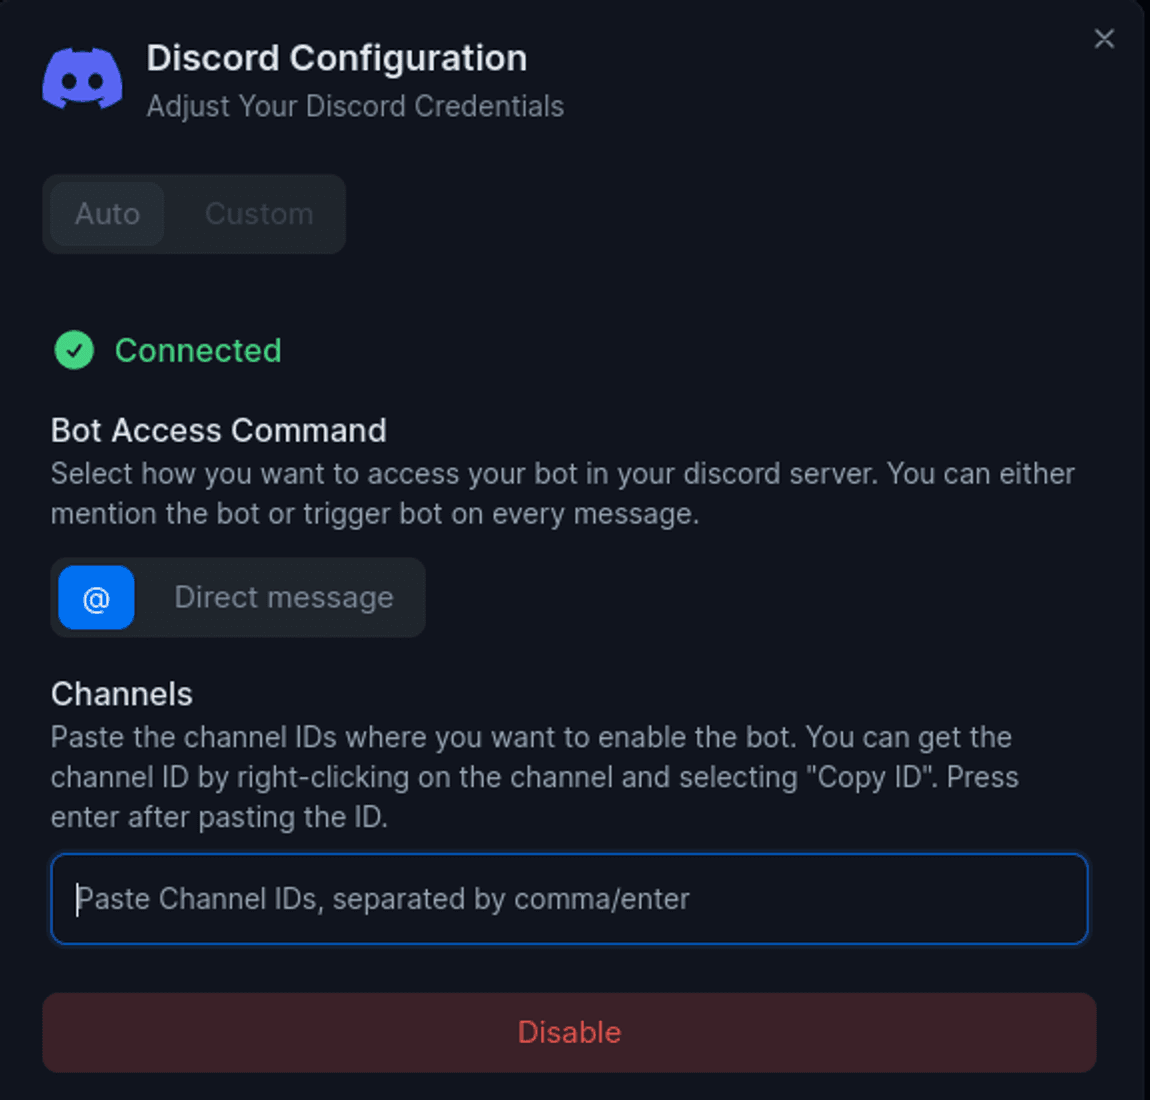
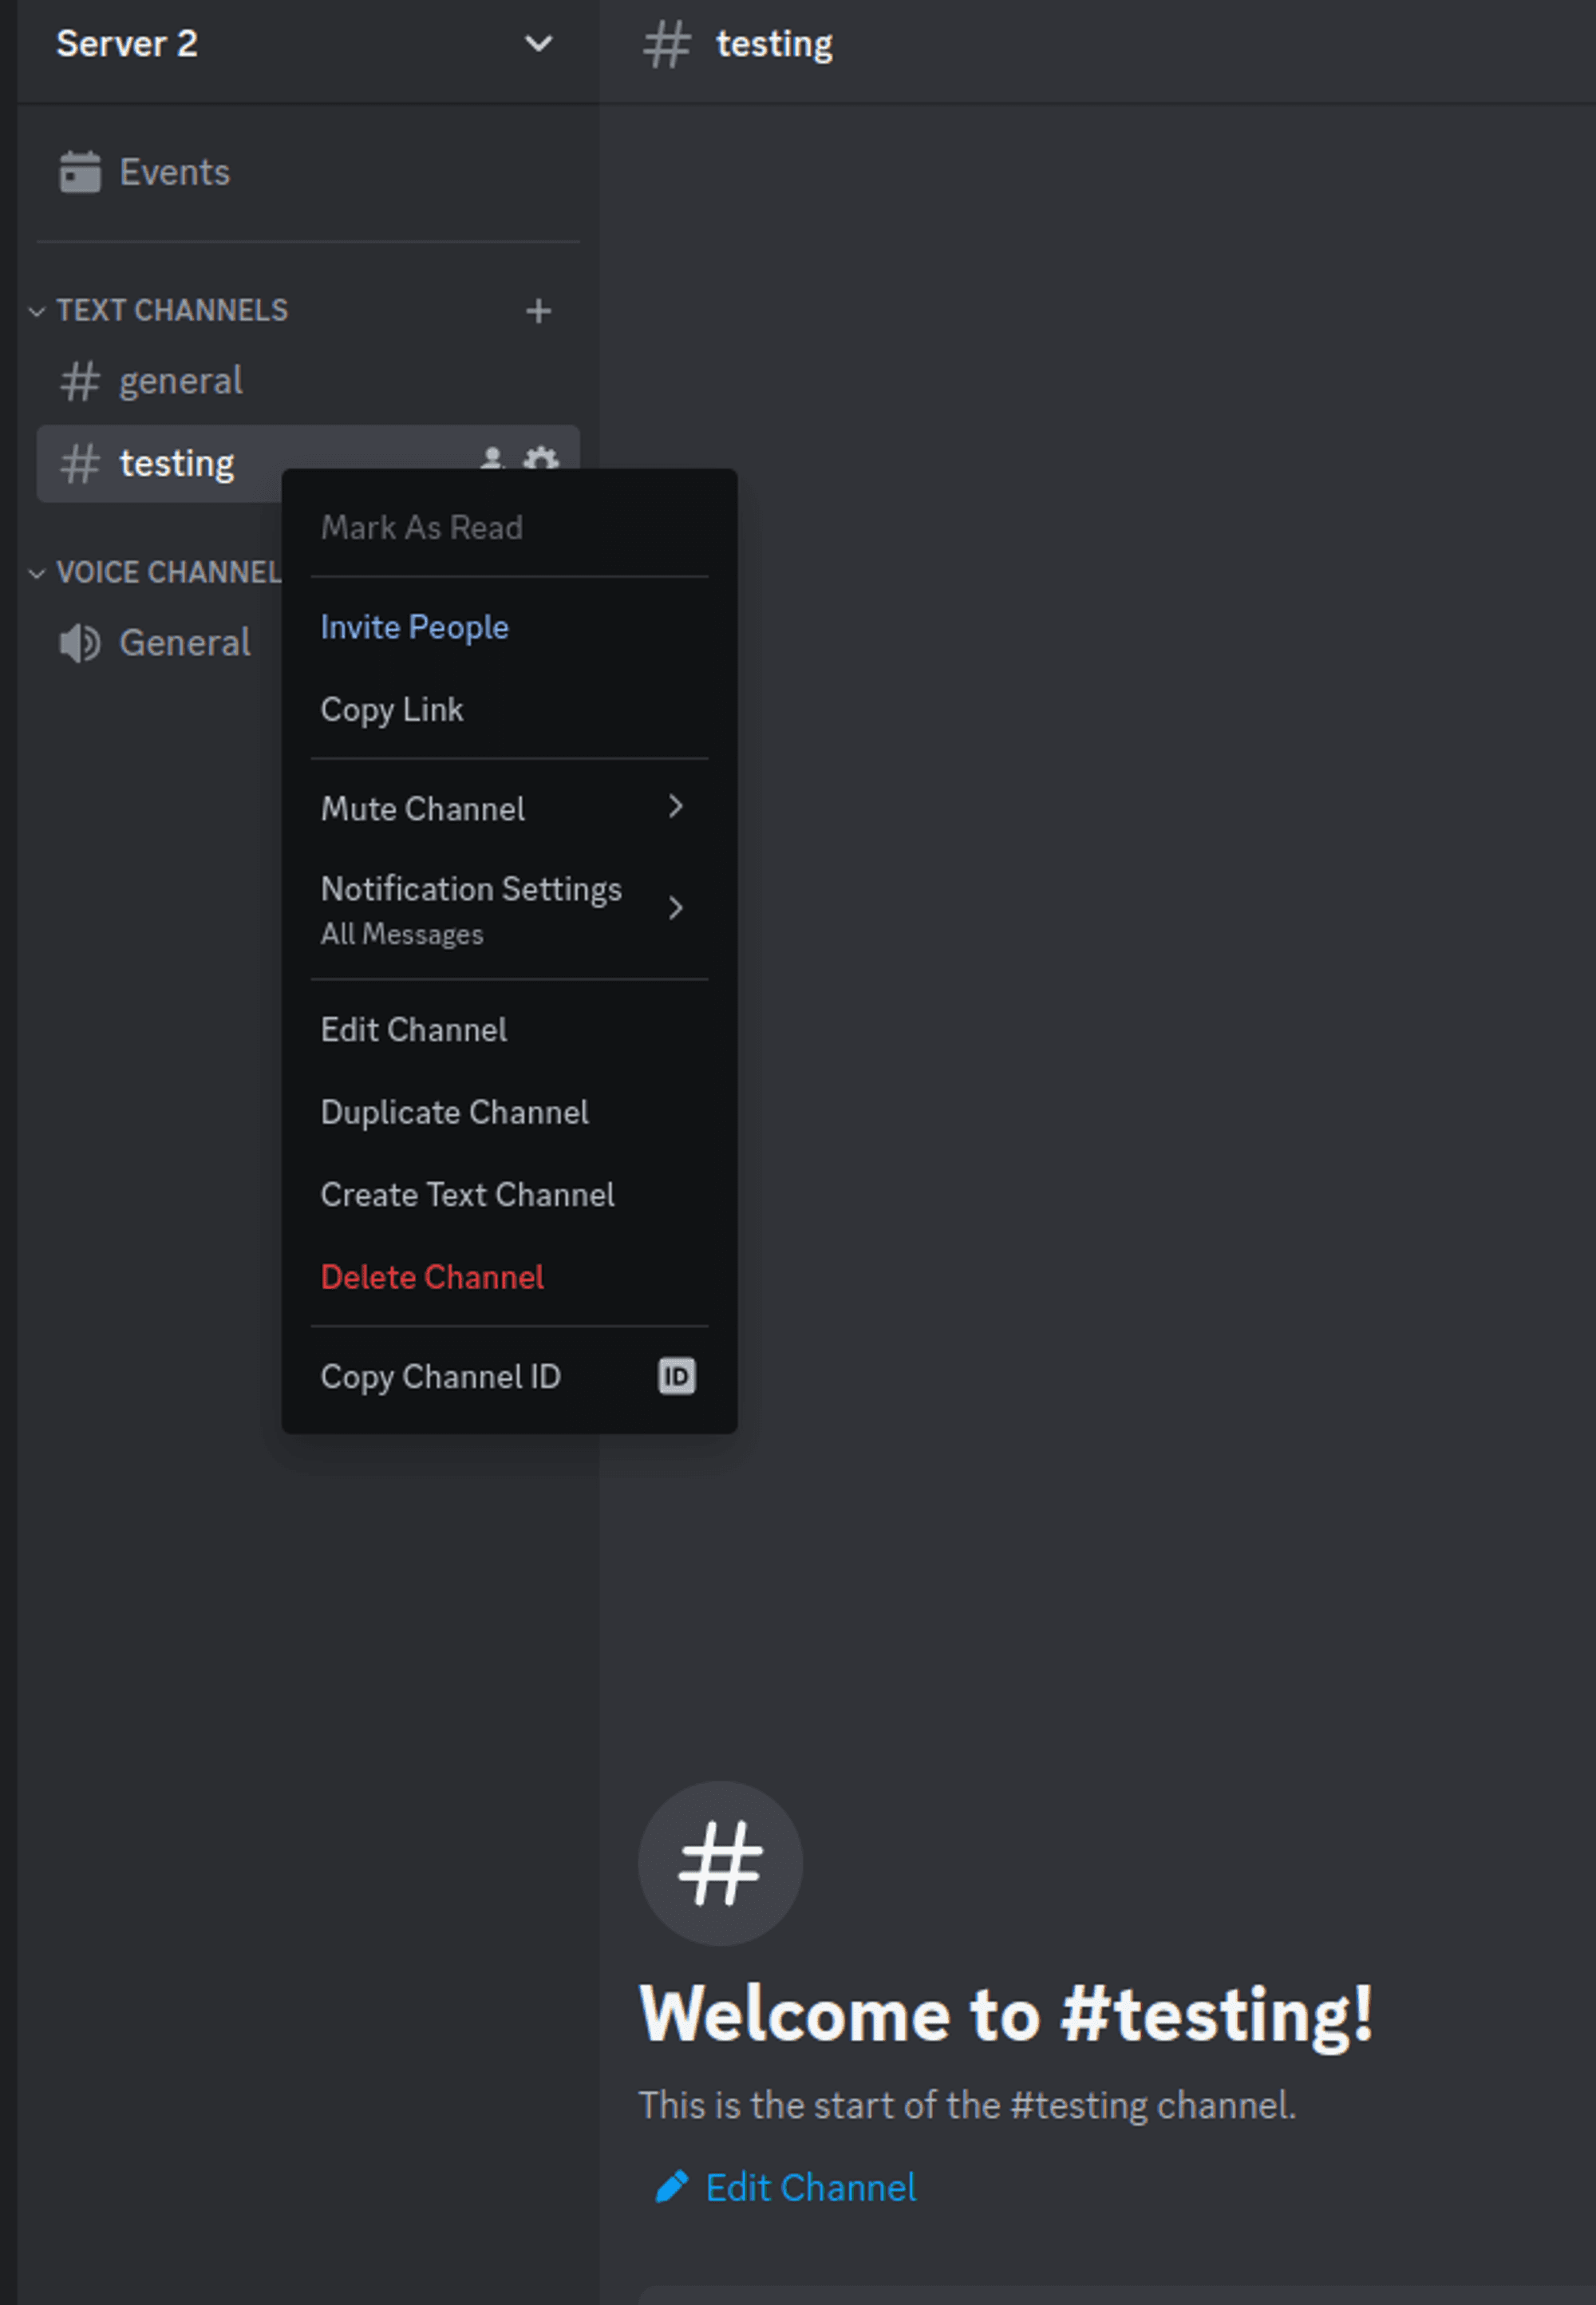
Add Channel ID
Go to the integration page and add the channel ID by copying and pasting the channel ID. Right-click on the channel settings icon to copy the channel ID.
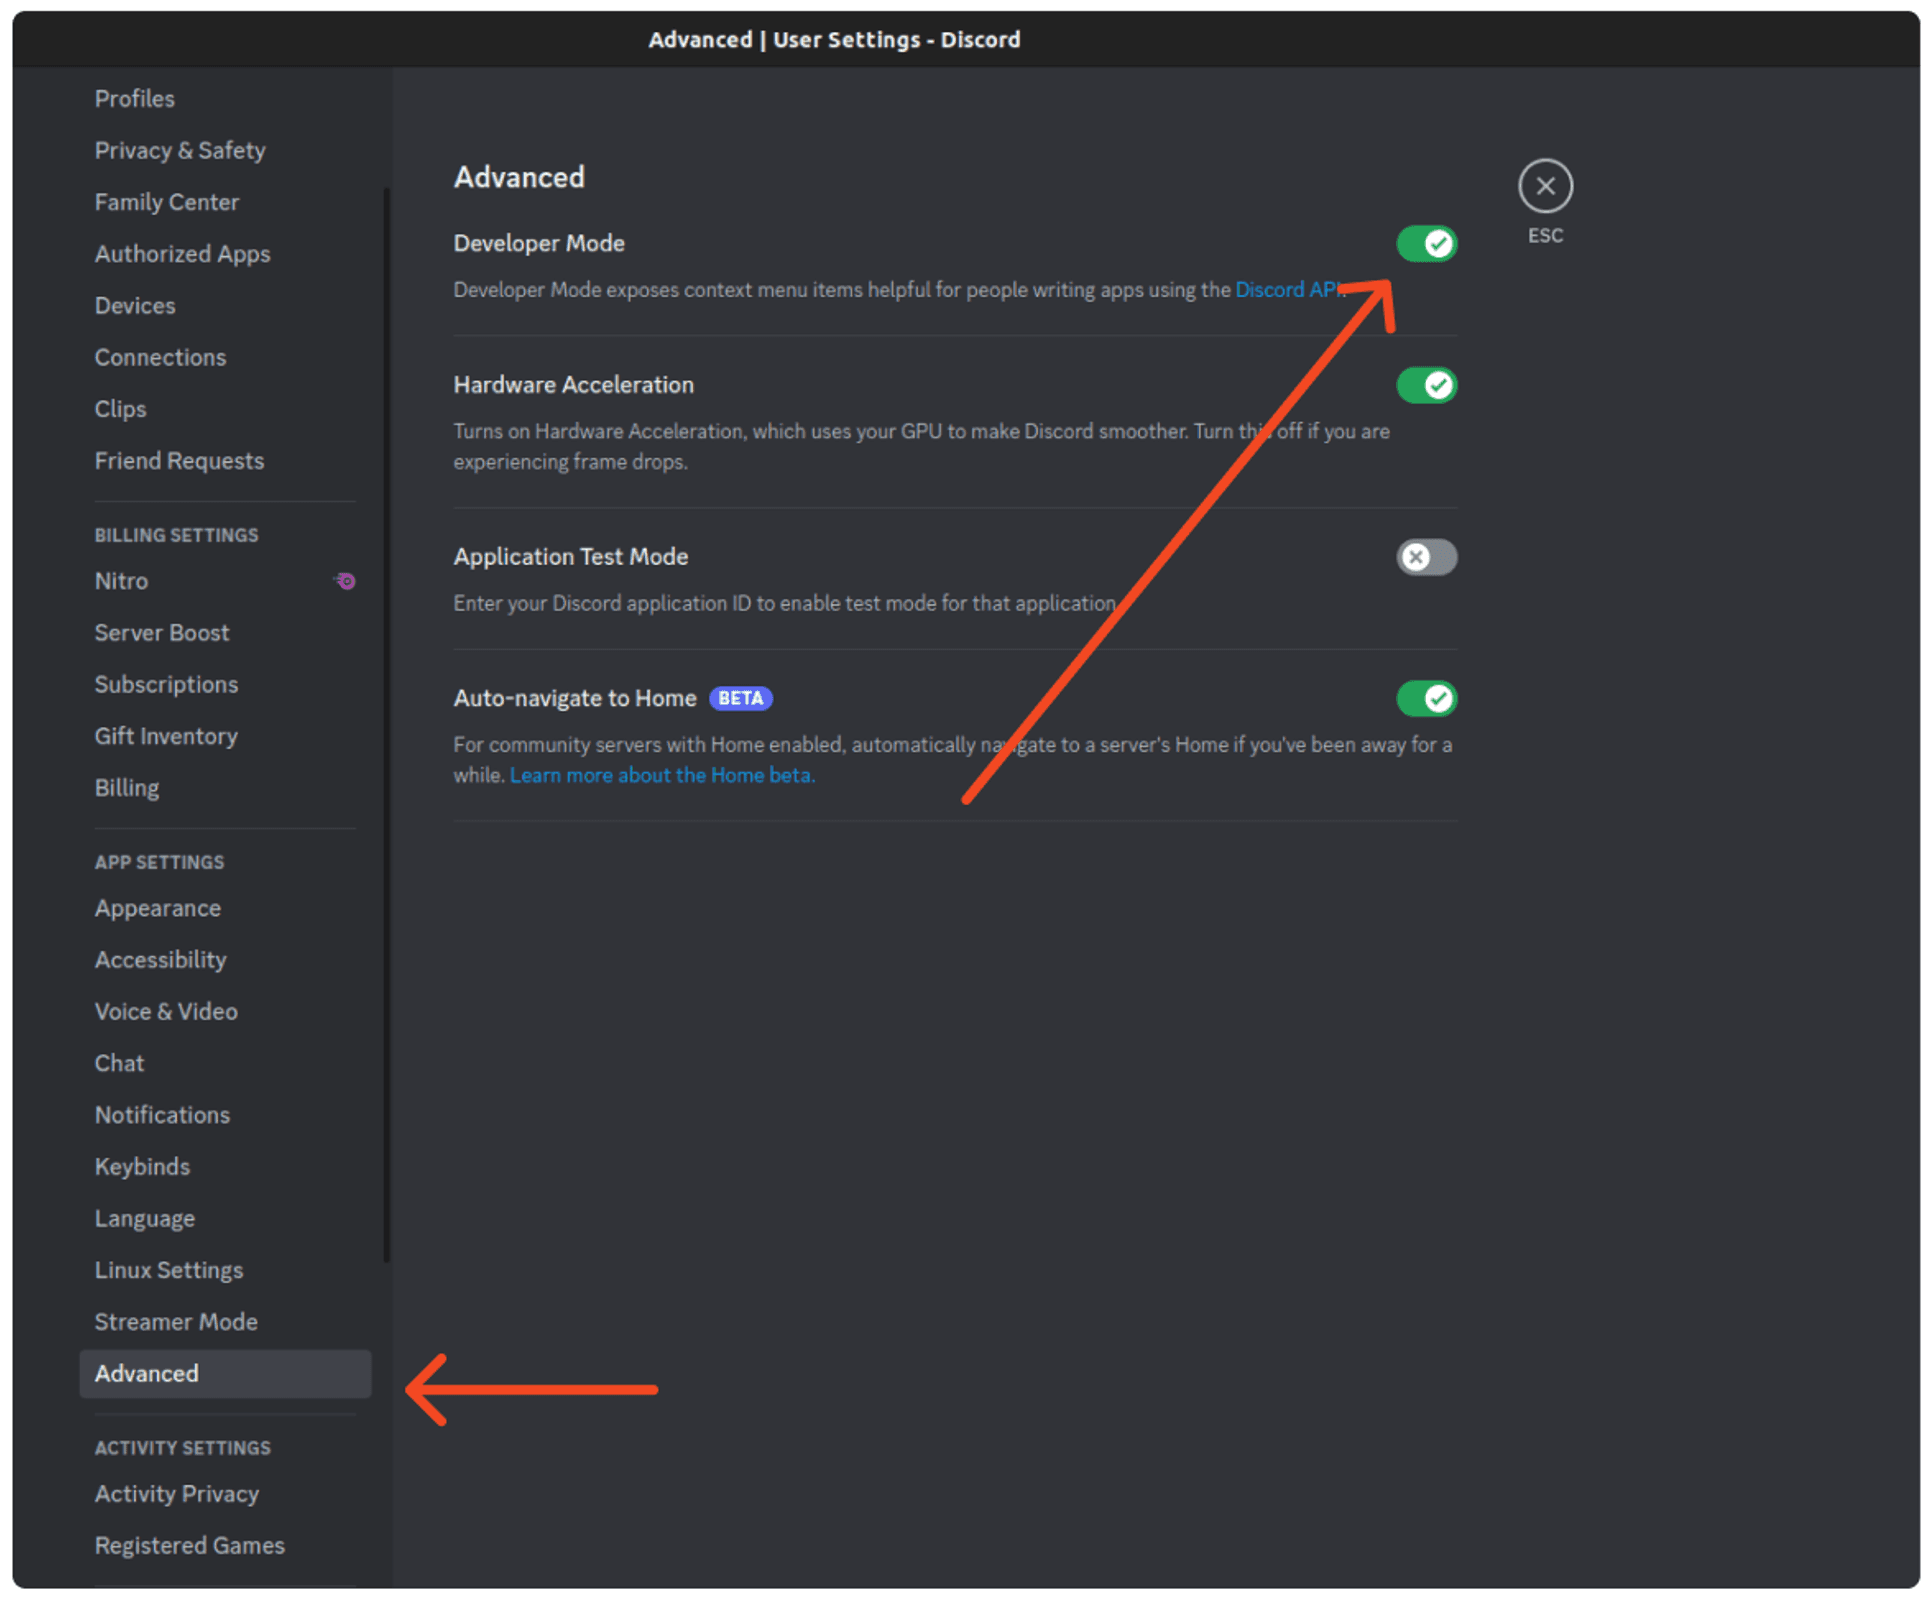
Enable Developer Mode
To get the Channel ID, first enable Developer mode. From Discord Settings → Click on Advanced → Enable the Developer mode.
Start Chatting
Now you can chat with the YGC AI Chatbot in your server.
Custom Installation
Prerequisites
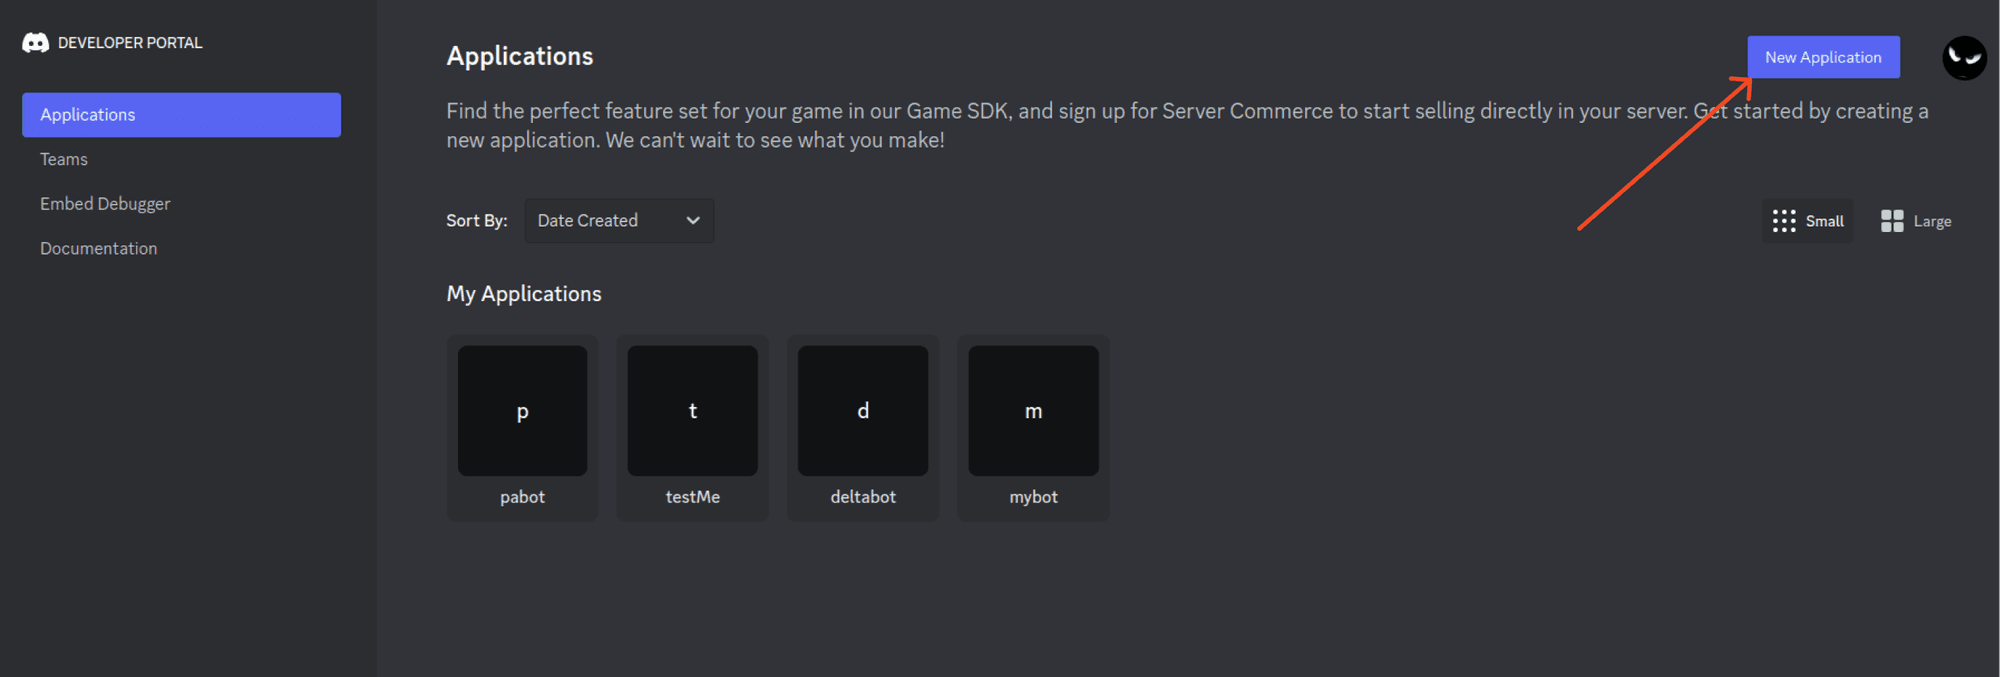
Ensure you have a developer portal account for Discord. If not, sign up at Discord Developer Portal.
Visit the URL Discord Developer Applications and create a new application.
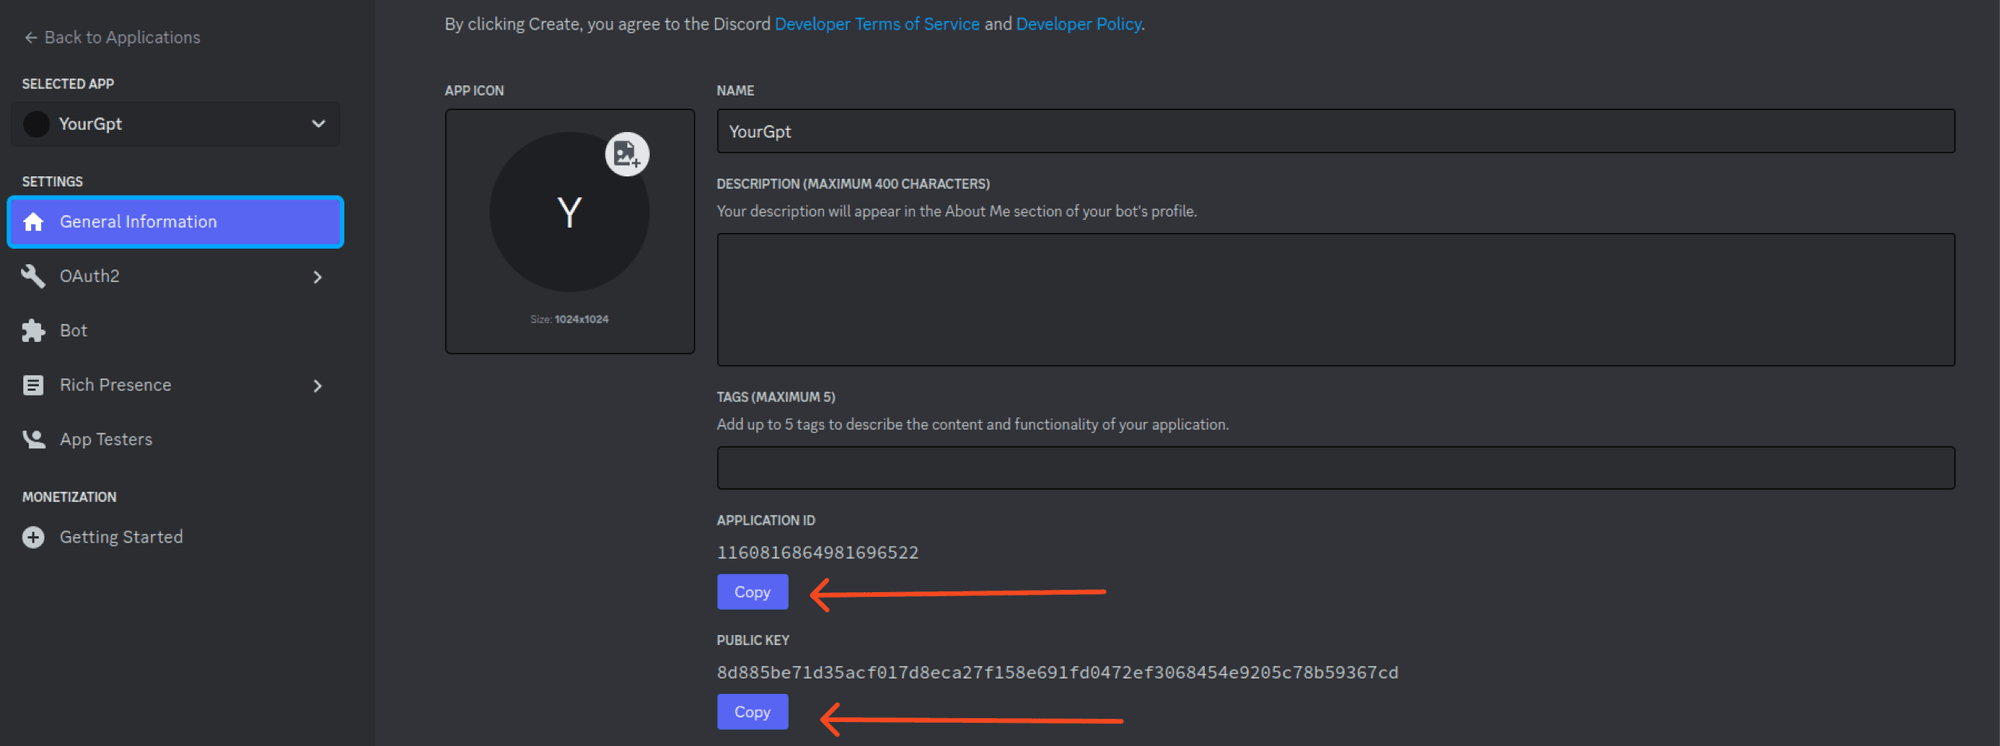
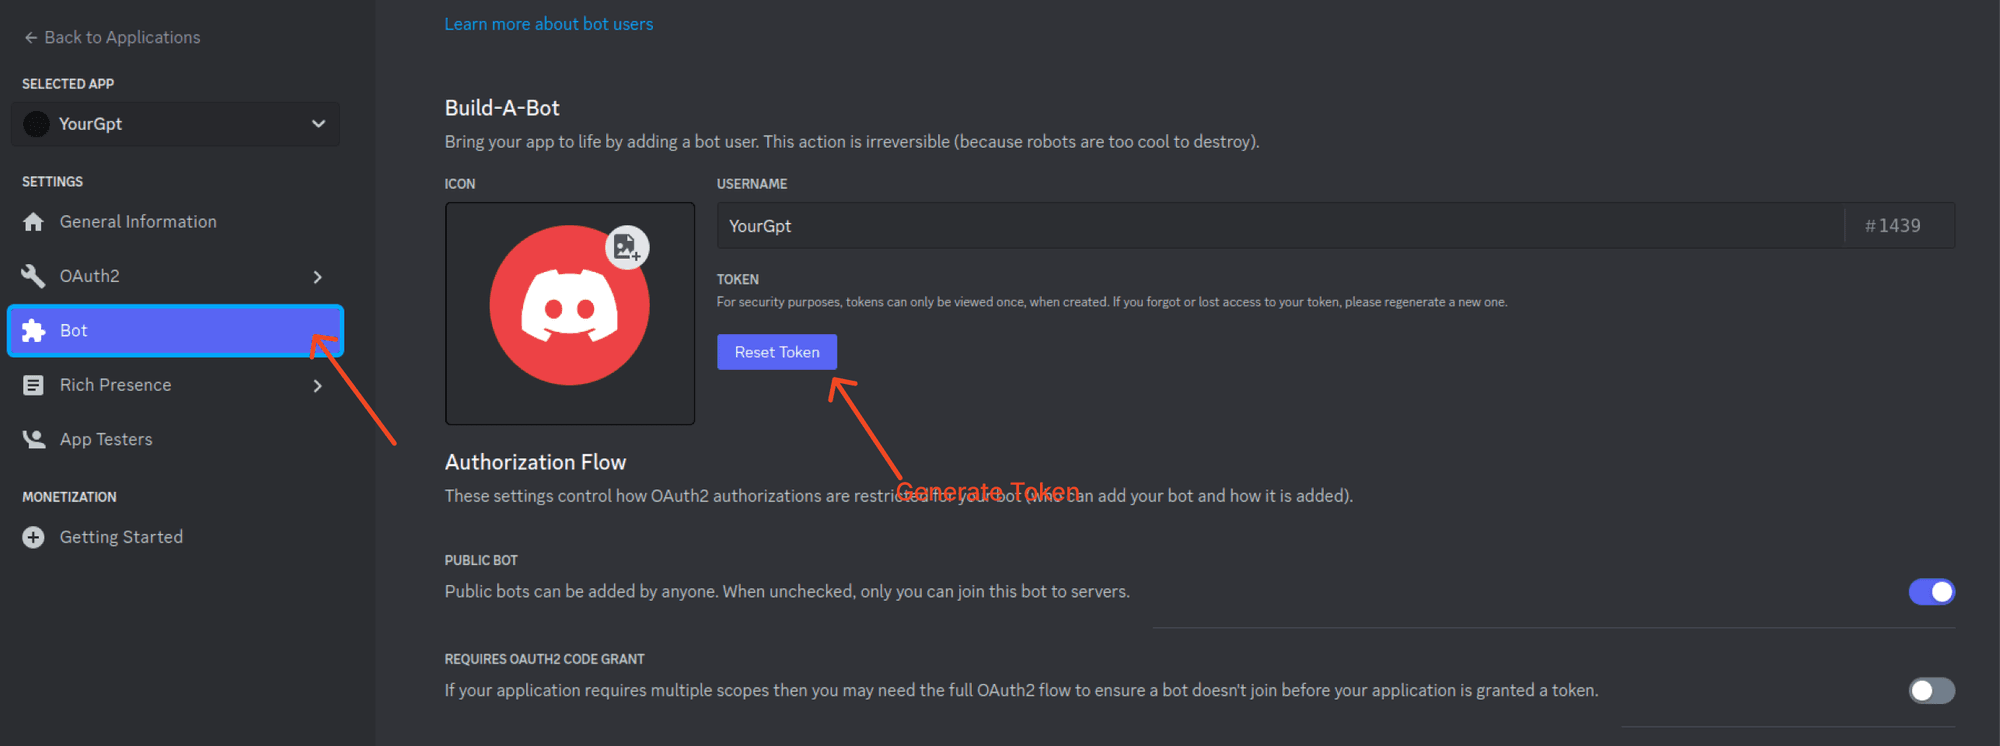
Create a Bot and Generate Token
Create a Bot within your application and generate a Token for the bot. Copy the token.
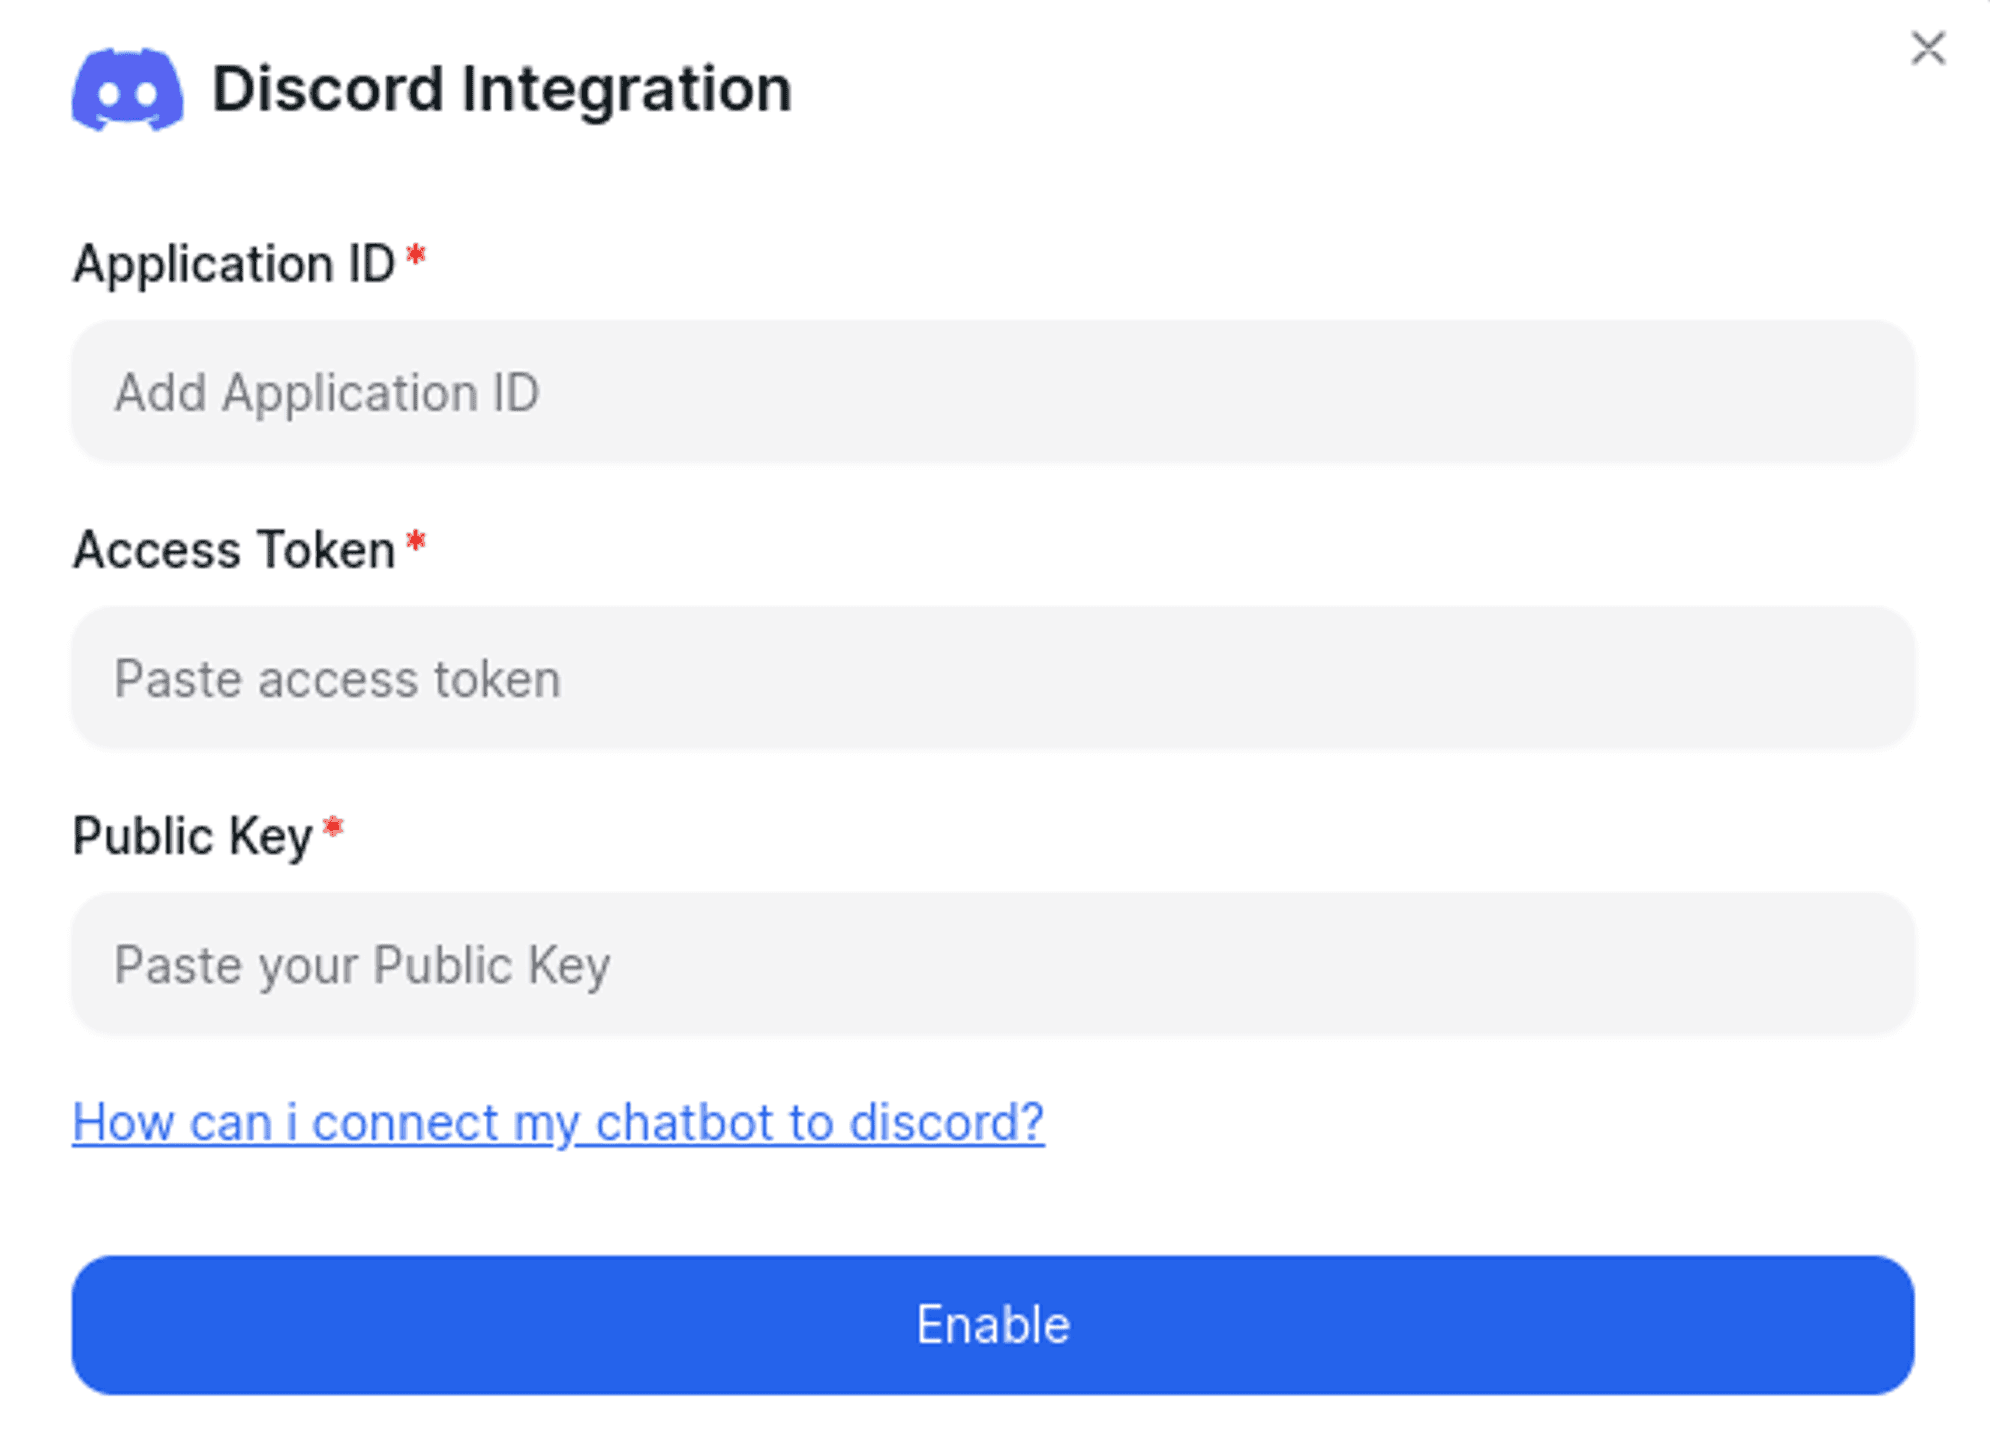
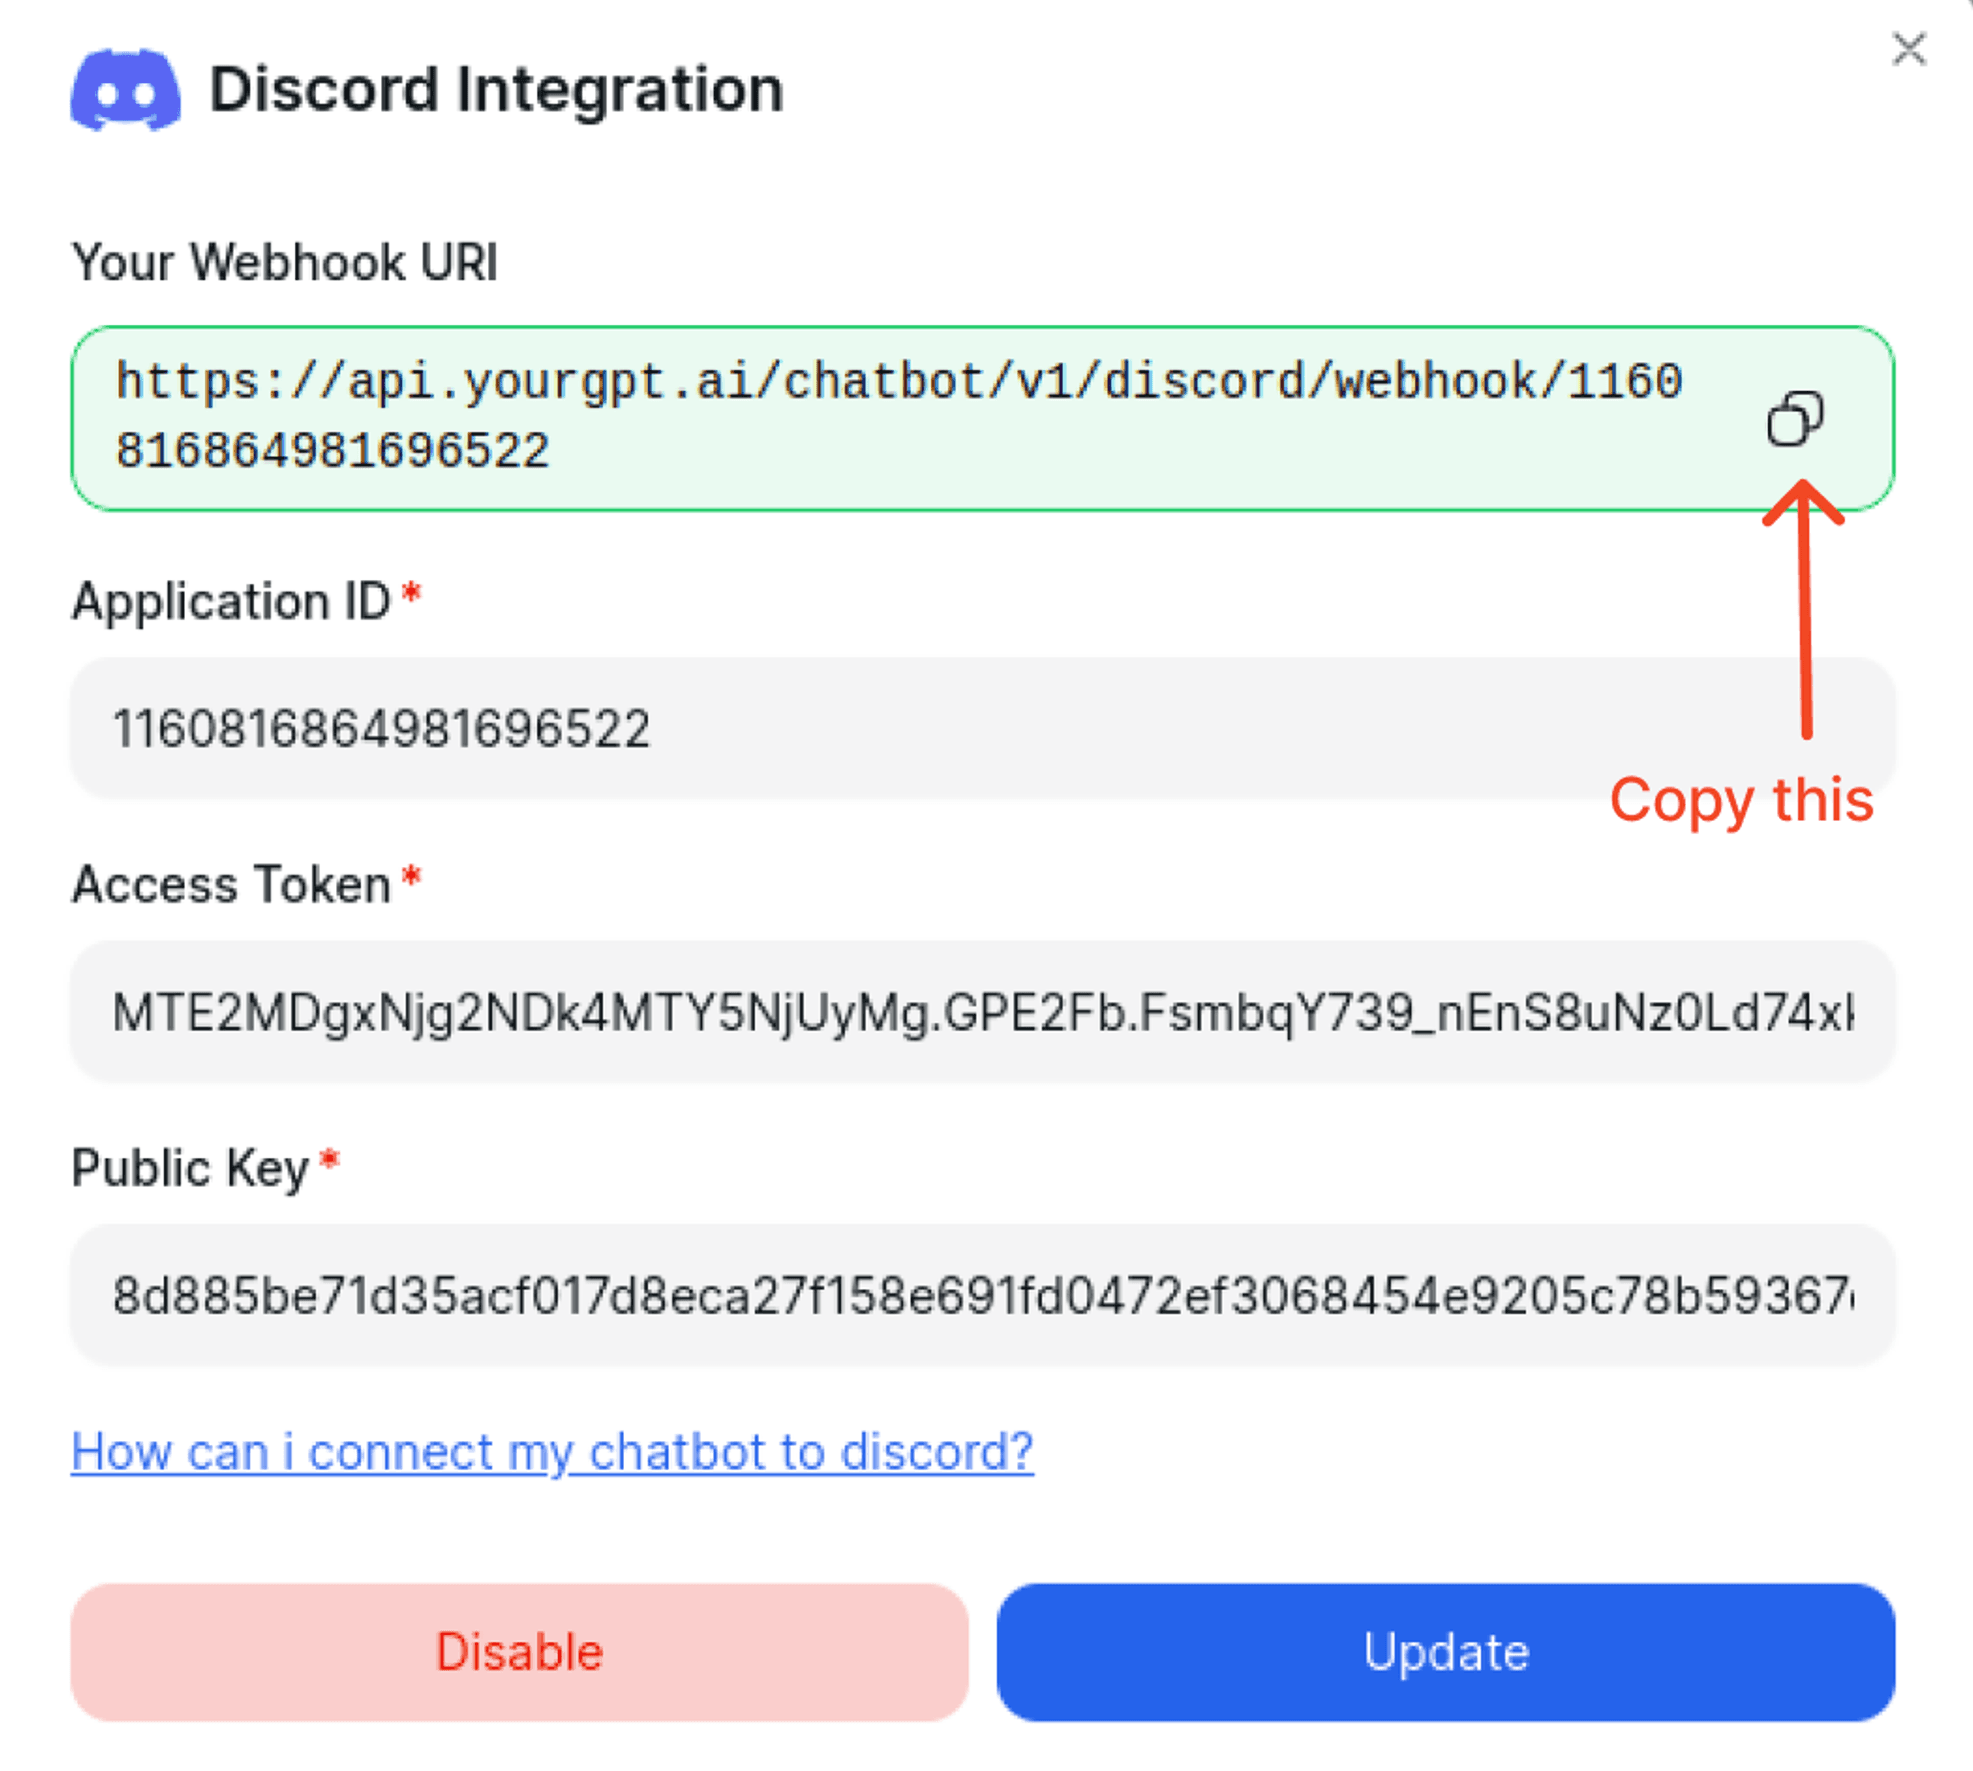
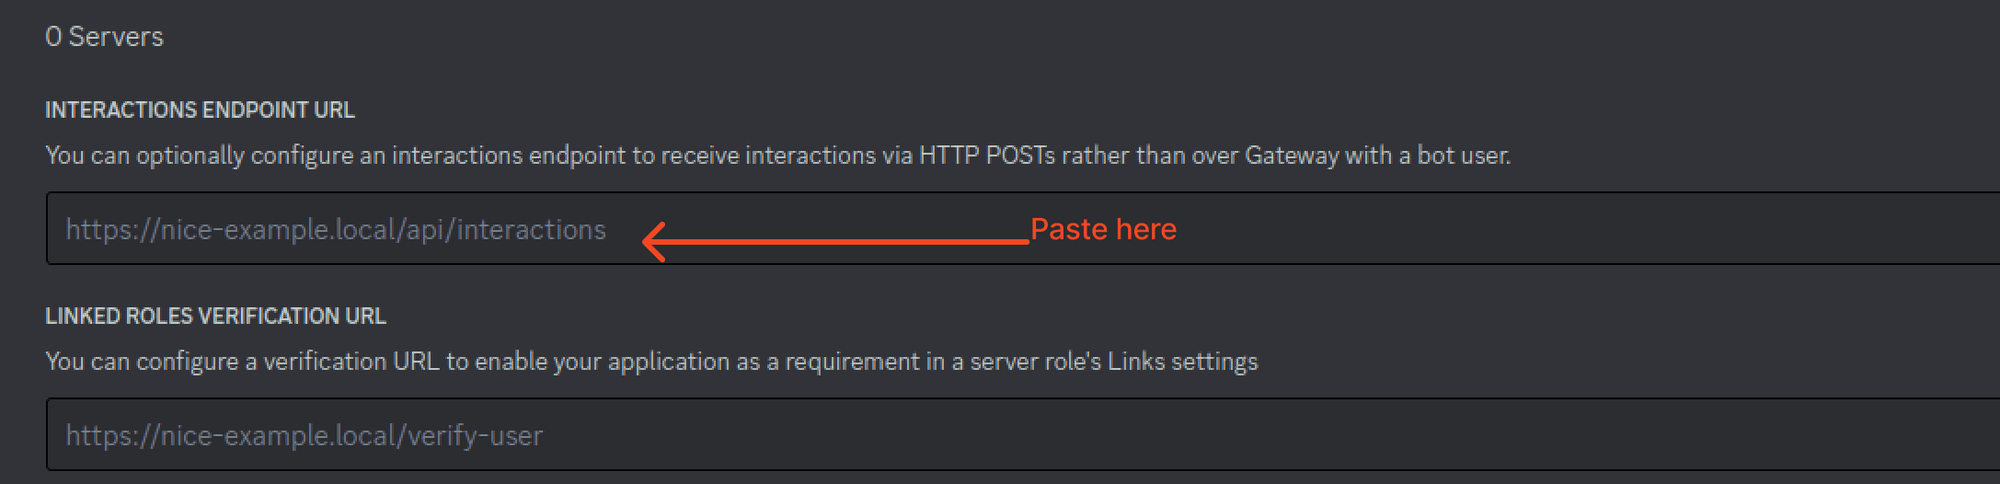
Integration Process
Paste the copied Webhook URL into your application. Successful integration means the webhook is added; otherwise, update the integration credentials with the correct data.
Add Permissions
Go to OAuth 2 → Bot permissions. Grant the Bot necessary text permissions. Copy the generated URL and paste it to your browser to add the bot to your server.
Test the Integration
To initiate a conversation, you must use chat slash commands. For instance, you can type /ask.

Ping Mode — Self-Hosted Bot
Ping Mode allows your custom Discord bot to respond to messages using YourGPT AI. You host the bot on your own server and it works directly with your Discord server.
Prerequisite
Complete the Custom Installation steps above before enabling Ping Mode.
Enable Ping Mode
In your YourGPT dashboard, go to the Discord integration settings. Under the Custom Bot section, scroll to Ping Mode and toggle it ON.
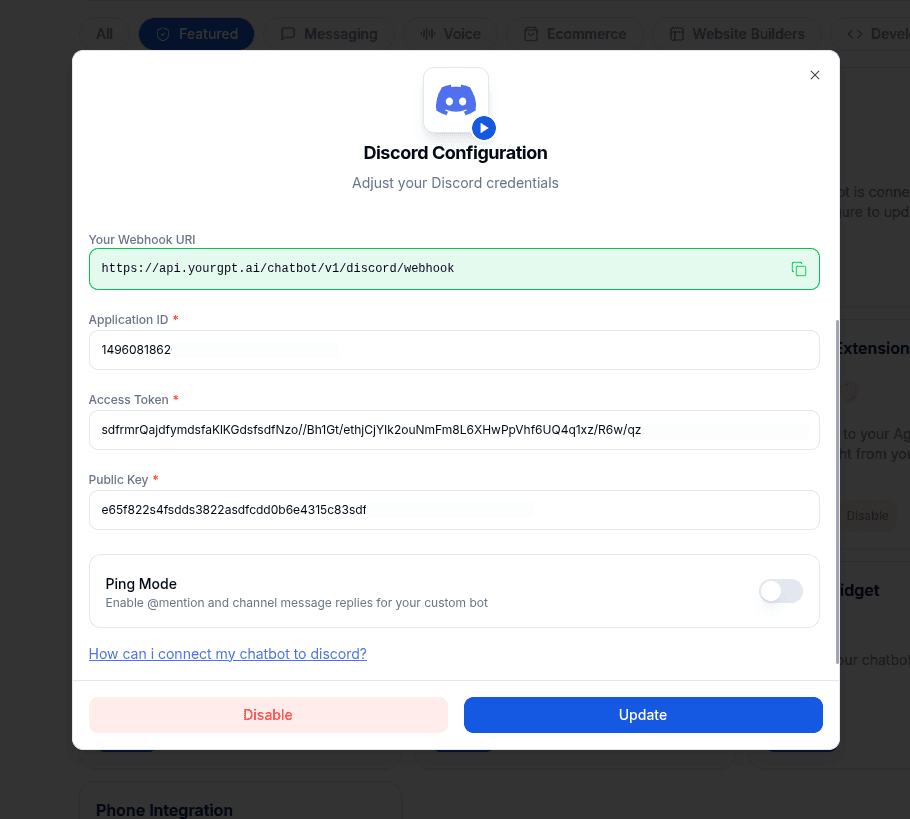
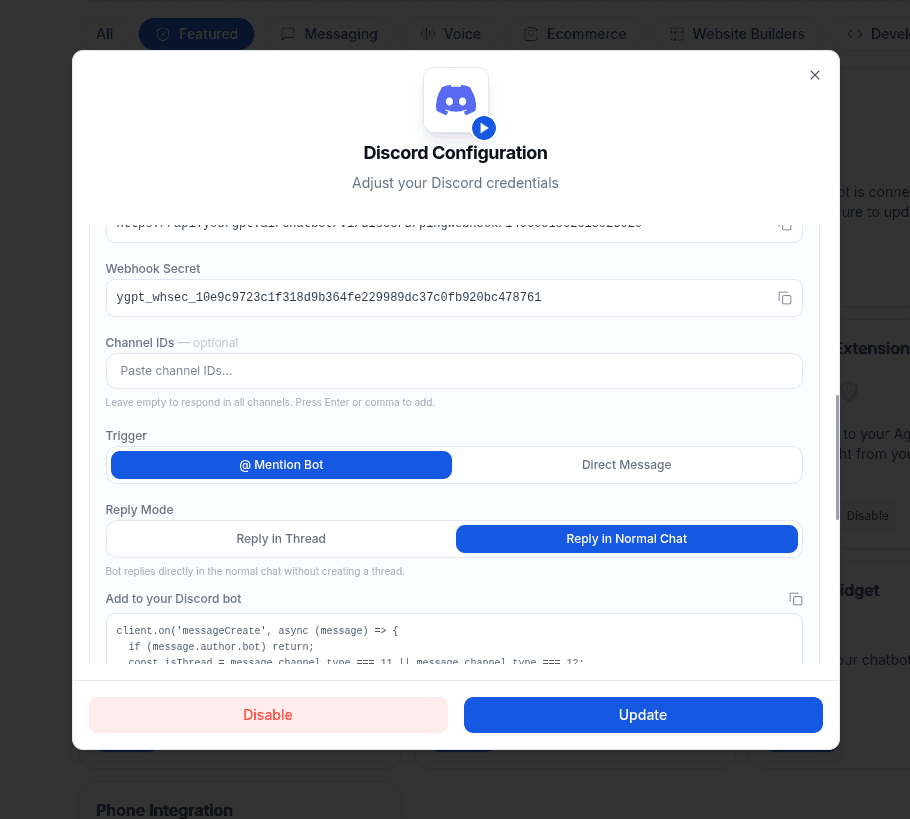
Copy the Webhook URL and Webhook Secret that appear — you will need these when setting up your bot.
Choose How Your Bot Responds
Configure the following settings in the Ping Mode section:
Trigger — when the bot should respond:
- @ Mention Bot — responds only when a user @mentions your bot. Best for public channels.
- Direct Message — responds to every message in the monitored channels. Best for dedicated support or Q&A channels.
Reply Mode (for @ Mention Bot only):
- Thread — starts a new thread for each conversation, keeping the main channel clean.
- Channel — replies directly in the channel.
Channel IDs — enter specific channel IDs to limit which channels the bot monitors. Leave blank to monitor all channels.
Enable Message Content Intent
Go to Discord Developer Portal → your app → Bot → scroll to Privileged Gateway Intents → enable MESSAGE CONTENT INTENT → click Save Changes.
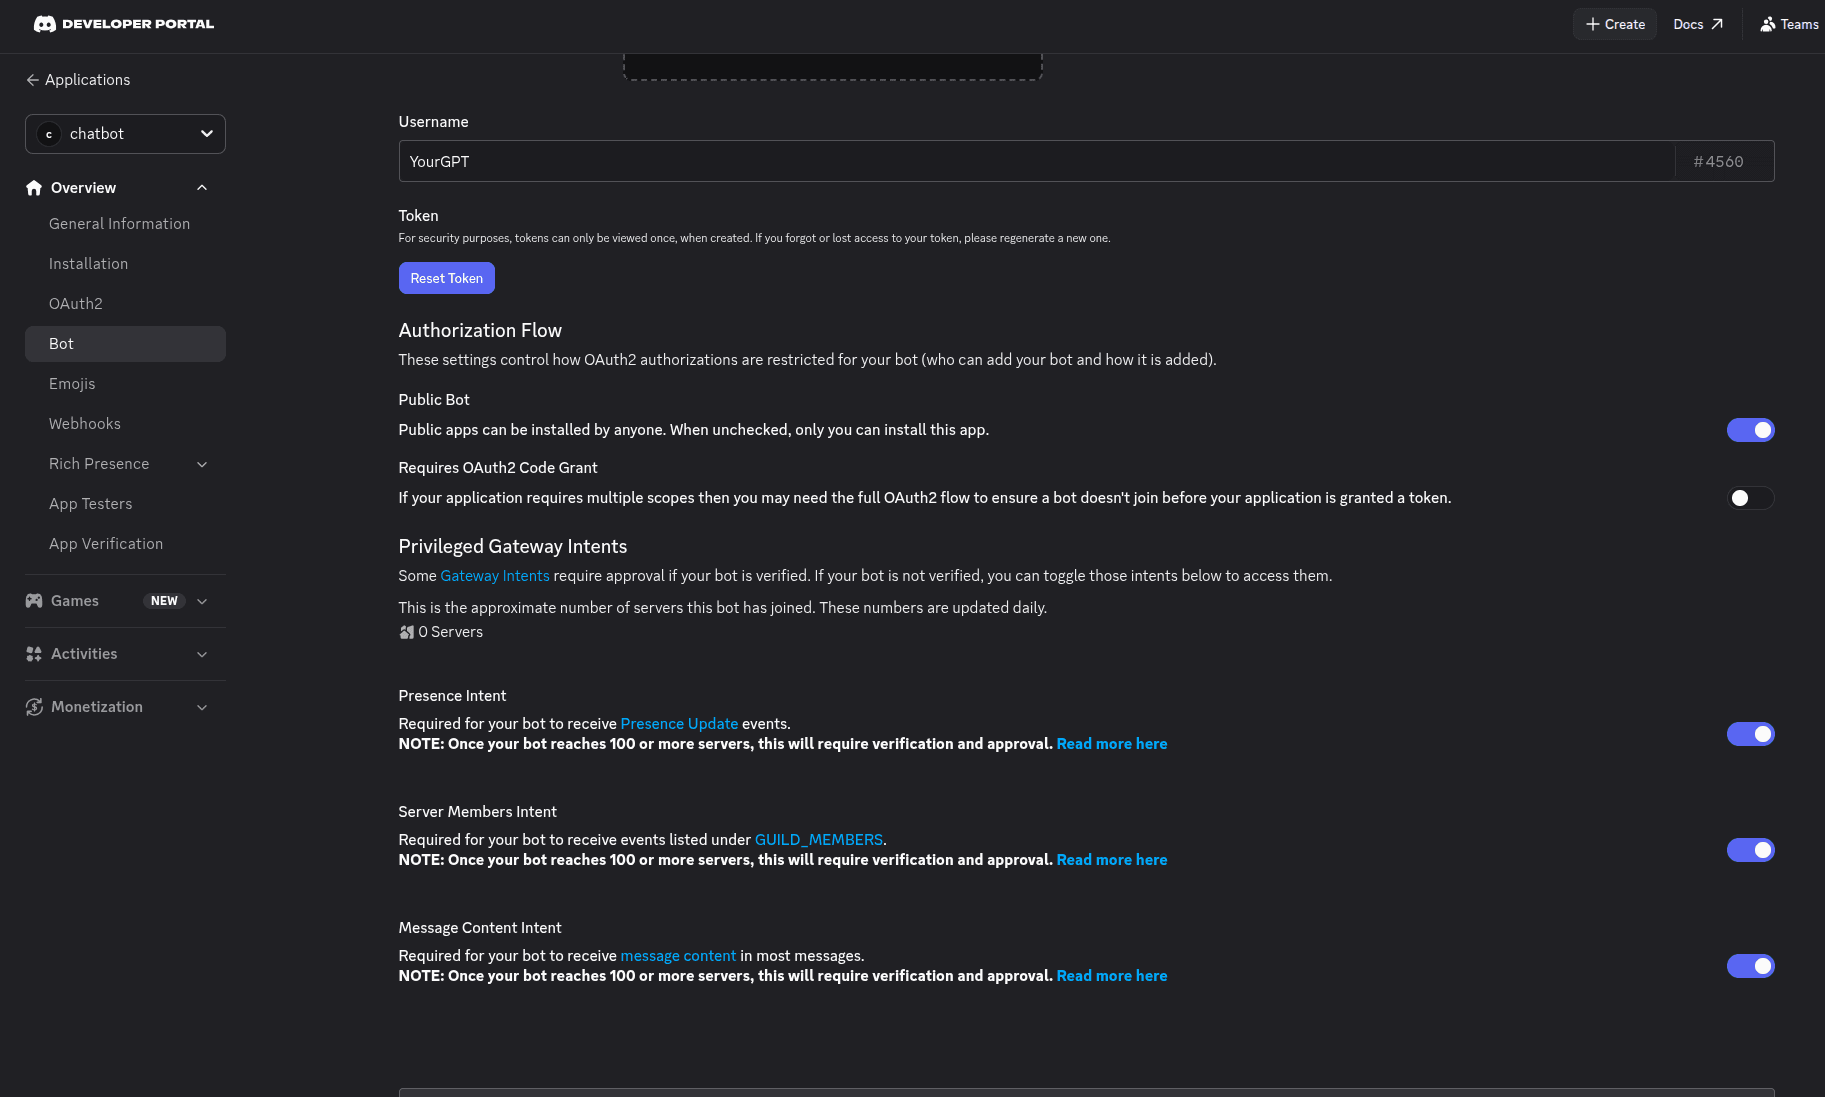
Important
Without MESSAGE CONTENT INTENT enabled, the bot will appear online but will not respond to any messages.
Set Up and Run Your Bot
Download the bot from our GitHub repository and follow the setup instructions in the README:
github.com/YourGPT/custom-discord-server
Use the Webhook URL and Webhook Secret from Step 1 when configuring the bot.
Test the Integration
- @ Mention Bot: type
@YourBot helloin your Discord channel. - Direct Message: send any message in a monitored channel.
The bot will reply with an AI-generated response.
Integration Supported Types
The Integration ID for Discord is 15 and the supported types are:
Supported Types
- Text
Note
You can chat by using specific commands that start with a @ or by using Direct Message if Direct Message is enabled in the integration settings.
If Direct Message is not enabled, you can only interact by using commands that start with a @ symbol.
By following these steps, you can integrate YourGPT AI chatbot with Discord. For any questions, contact our team via Live support or Mail Us.