Crisp
Integrate YourGPT Chatbot with Crisp to enhance your live chat experience.
💡 Connecting Your Chatbot with Crisp
Welcome to the Documentation page for integrating YourGPT AI Bot with Crisp! This section provides you with comprehensive guidance on seamlessly incorporating the power of YourGPT AI Bot into your Crisp chat platform.
Note
Empower crisp chat with YourGPT AI chatbot for offline supercharged support. Provide seamless customer assistance even when you're offline or away.
Setup


Choose Project
After the installation, it will redirect you to our website where you can choose the project to enable it.

Training Bot on Your Data
Training your ChatGPT AI bot on your data is a breeze with our easy-to-follow steps. Whether it's your website webpages, FAQ, or other relevant information. Following instructions will help you train your bot with personalized knowledge.
Training with your Webpages
Easily train your AI bot by incorporating your website pages. The process is quick and simple, allowing you to utilize your existing web content. You also have the option to extract webpages directly from your sitemap.

Training with Documents
Effortlessly enhance your AI bot capabilities by training it with your documents. Whether they are in PDF, DOC, DOCX, TXT, CSV, or other formats, you can easily incorporate them into the training process. Expand your AI bot's knowledge and adaptability by leveraging a variety of document types.

Note: More the relevant data you provide, the better your chatbot will respond.
Features


Webhook Notification on Human Request
Webhook Notification on Human Request (Discord & Slack are directly supported).

Built-In Widget for Transferring Conversation
Built-In Widget for Transferring Conversation To Human or Human To AI.


Integration
This documentation outlines the process of integrating YourGPT AI Bot with Crisp Bot in two different use cases. The integration allows you to enhance your chatbot capabilities and capture leads efficiently.
Use Cases:
- Integrating Crisp Bot Before YourGPT AI Bot: This is typically used for capturing lead information, where Crisp Bot initiates the conversation and then hands it over to YourGPT AI Bot.
- Integrating Crisp Bot on Human Request: In this scenario, Crisp Bot operates only when a human request is made, and it collaborates with YourGPT AI Bot to assist users.
Integrating Crisp Bot Before YourGPT AI Bot
Open Crisp Integration Settings
Go to your Crisp dashboard.
Navigate to Chatbot → Integrations → Crisp Integration Setting Page.

Enable "Wait for Interaction" Option
In the Crisp Integration Setting Page, locate the Wait for Interaction option and enable it. This setting ensures that the chatbot waits for integrations to start a new conversation.

Configure Crisp Bot Scenarios
Customize your Crisp Bot scenarios based on your specific needs and requirements.
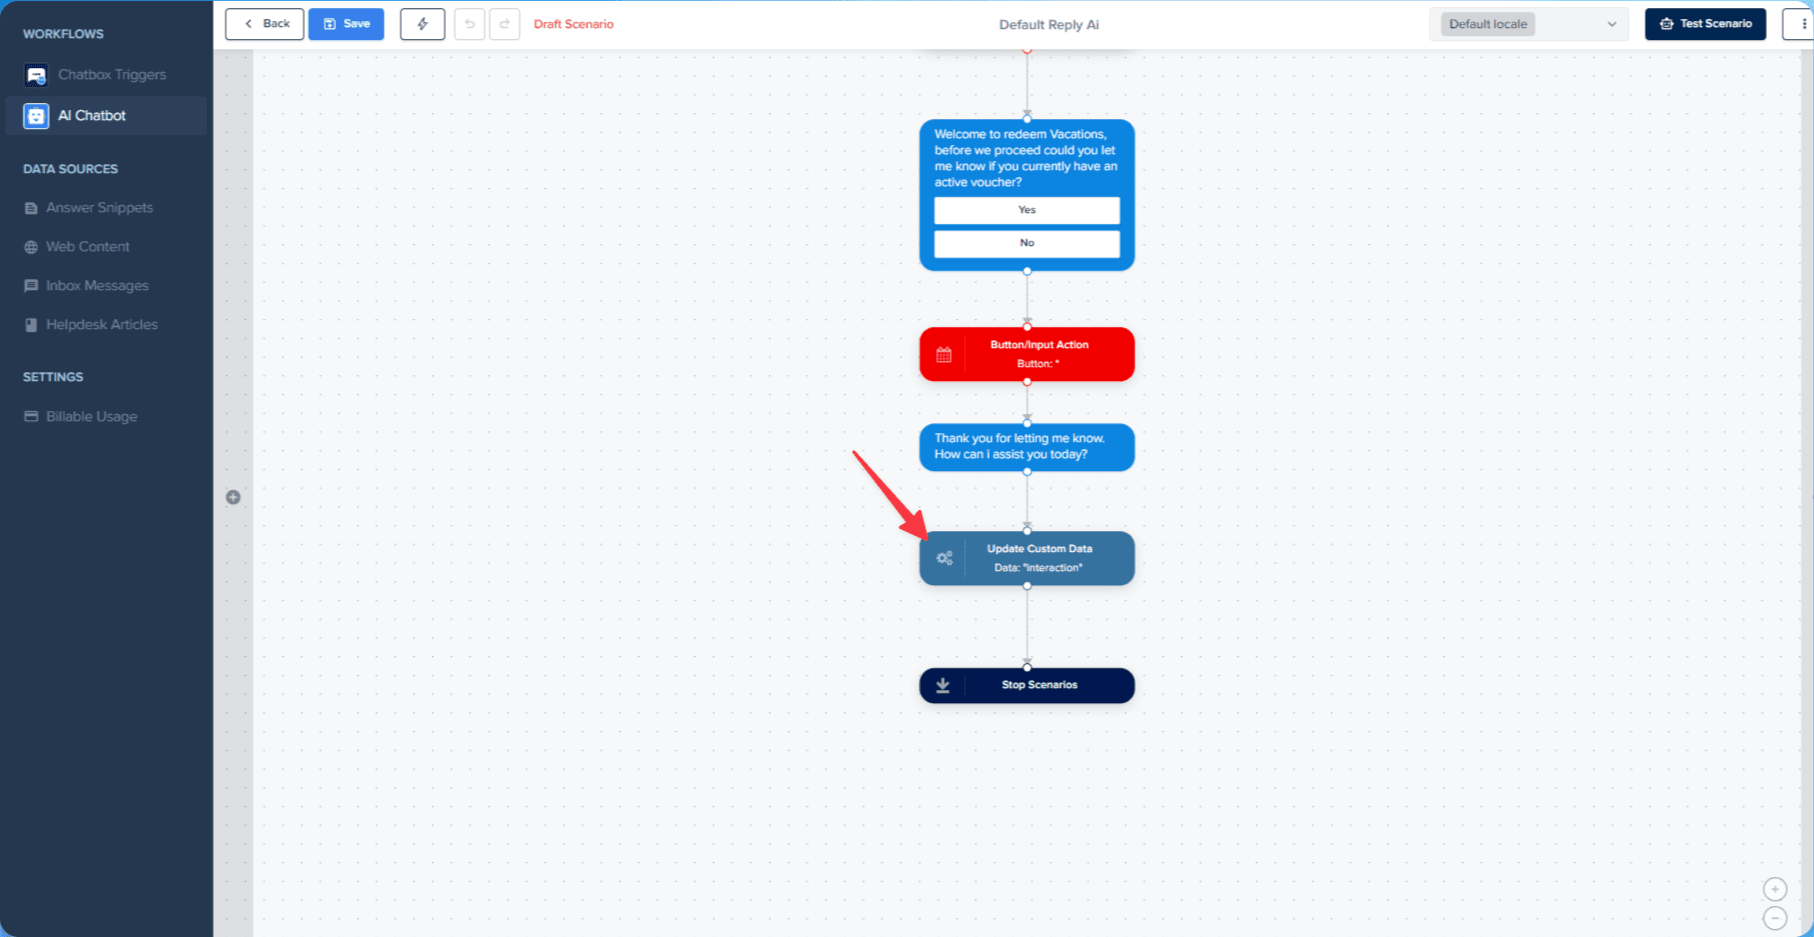
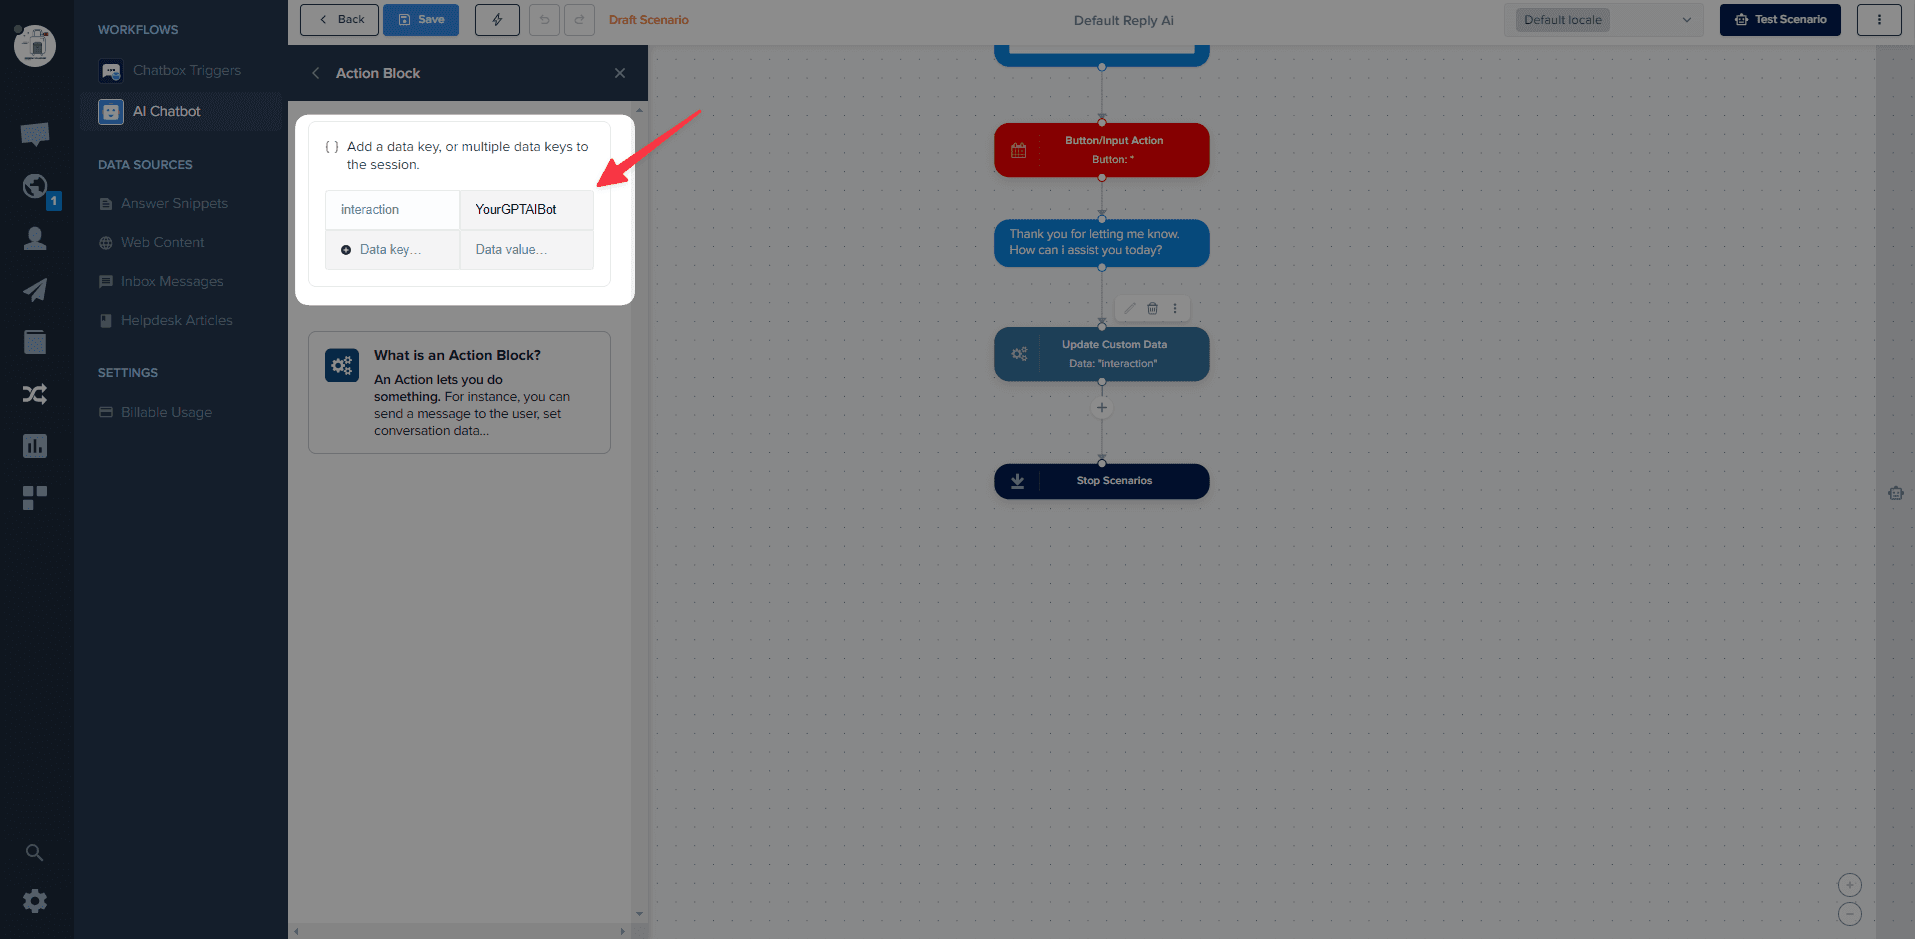
Enable YourGPT AI Bot
Within your Crisp Bot scenario, add an action that sets the value to interaction: YourGPTAIBOT.
Save the scenario.
Deploy the Scenario
Save and deploy the configured scenario. Your Crisp Bot will initiate conversations, and when the scenario is completed, it will hand over control to YourGPT AI Bot.

Integrating Crisp Bot on Human Request
Access Crisp Integration Settings
Go to your Crisp dashboard.
Navigate to Chatbot → Integrations → Crisp Integration Setting Page.

Enable "Human Request" Button
In the Crisp Integration Setting Page, enable the Human request button.
Make sure to disable the follow-up message to ensure that Crisp Bot operates only upon human request.
Configure Crisp Bot Scenarios
In your Crisp Bot scenarios, add an event that listens for the interaction value awaiting. This event indicates that the chatbot is waiting for a human request.
When the interaction value is set to awaiting, YourGPT AI Bot can take the lead in the conversation.
Customize YourGPT AI Bot's responses and actions based on user interactions.


Deploy the Scenario
Save and deploy the configured scenario. Crisp Bot will now operate when a human request is made and collaborate with YourGPT AI Bot as needed.

Note
Test the scenario in the Crisp chat widget; it may not work in the Crisp bot testing area.
Integration Supported Types
The Integration ID for Crisp is 9 and the supported types are:
Supported Types
- Text
- Image
- Video
- Audio
- File
- Button
- Carousel (Note: We can send a carousel URL button, which supports only URL-based formats.)
- Card (Note: We can send a card as a button, it supports only path-based formats.)
Not Supported
Forms are not supported on Crisp.
By following these steps, you can easily integrate YourGPT AI Bot with Crisp Bot to enhance user interactions and capture leads effectively.
Support
If you require any assistance or have any questions, please feel free to contact us at YourGPT Support. We are here to help and provide support in any way we can.